Introduction
When I first started this course, I was looking forward to learning about how to make VFX in Unreal Engine. During the first few introductory lectures I had, we where given this terms assignment which was to create either, a TV commercial, video game cutscene, intro or other action sequence, a particular sequence in a film or TV Show, a music video, etc.
Also I must document my journey through this process as a portfolio form this includes introduction, research process, concept design, visual effects making process, sequencing process, editing process and finally the conclusion/ reflection and references in a website known as WordPress. For my project, I wanted to create a starting cutscene for a game.
Research Process
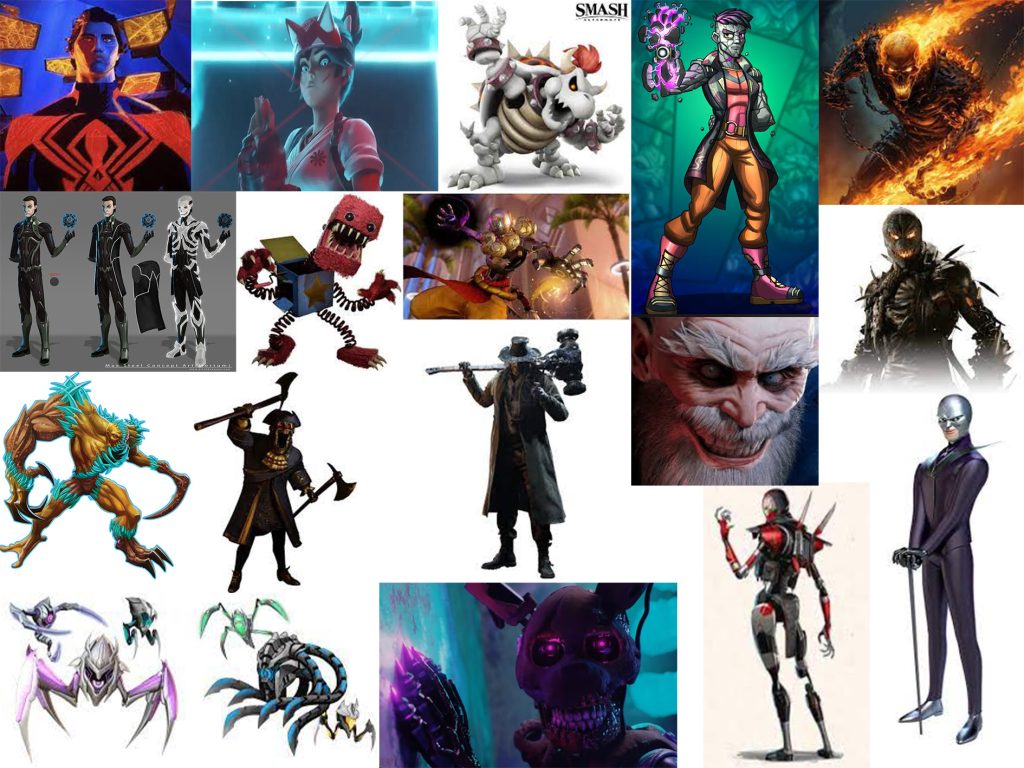
I went on google and gathered images of different VFX designs I aim to create. I chose a range of VFX styles and colours. Most of the VFX I have chosen, relate to magic and whimsical effects. This research have already solidified my decided idea for the VFX I’m going to create for a potential cut scene for a game.
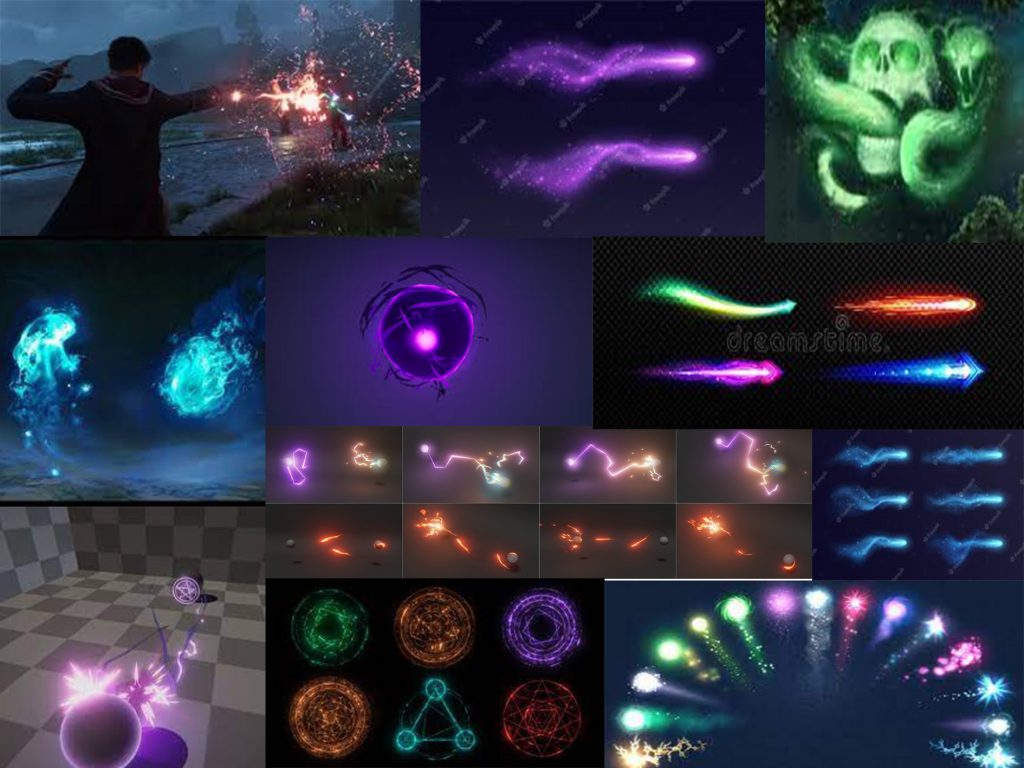
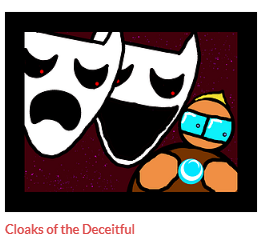
The VFX styles I have chosen where from different parts of media. Those include games, films and 3D level making software. This moodboard helped me realise what type of VFX I wanted to use in my video game cutscene. When I thought about this course, I remembered I made a game on unity a while back for a university course. This made me wonder, why can’t I make a fully fledged remastered cut scene of what happened before the events of the 2D top down shooter game Cloaks of the Deceitful?
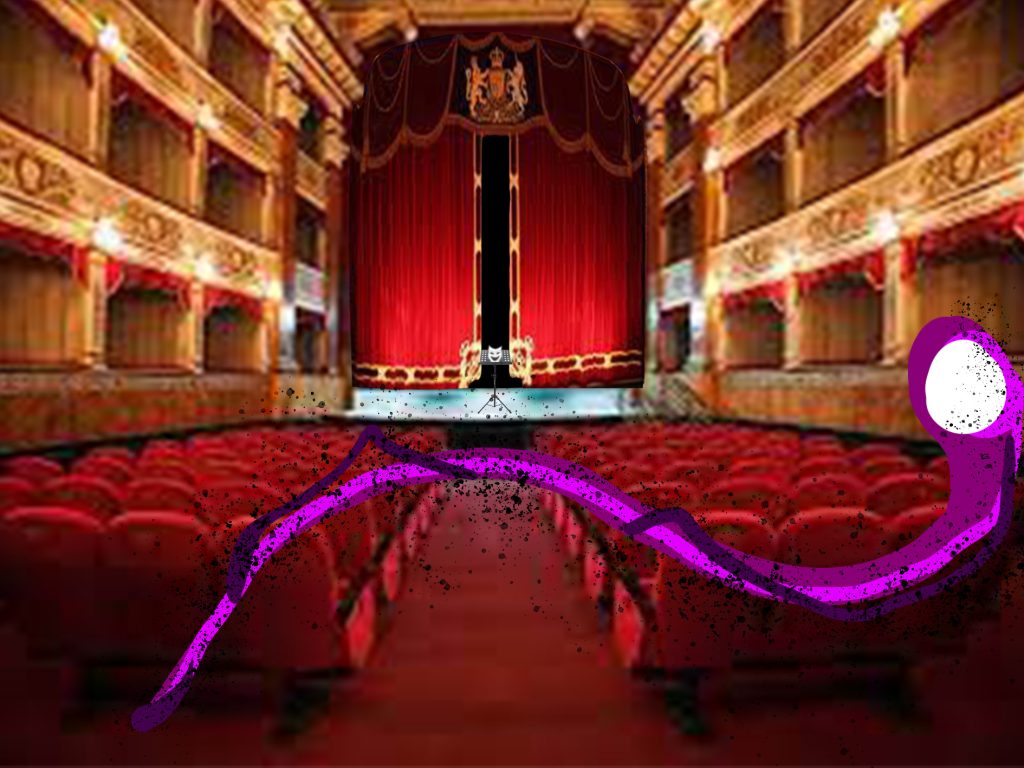
This course also ties in with the level design course within this university terms assignment. So the level must take place in an opera house and if I have not got props for the theme, I can’t go through with this idea. Luckily I did found the perfect free pack that includes an opera house kit. From the VIP hanging area of the opera house to a grand piano.
Concept art
For the concept art, we were given a task to create a storyboard of the sequence and the VFX that comes with it.
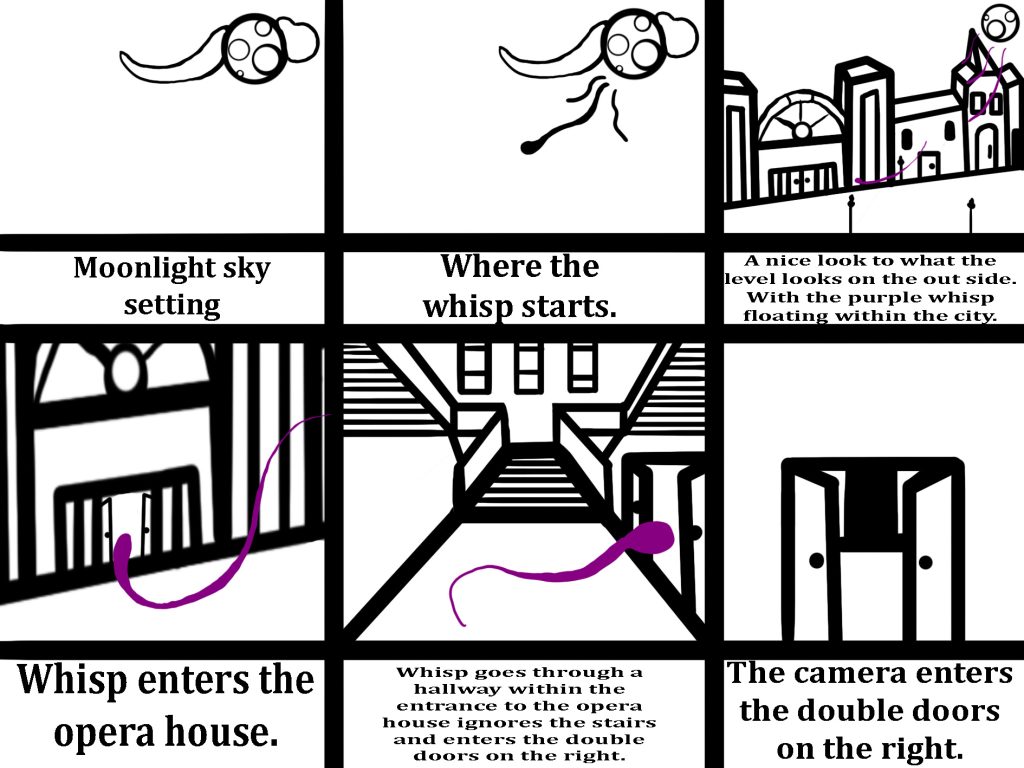
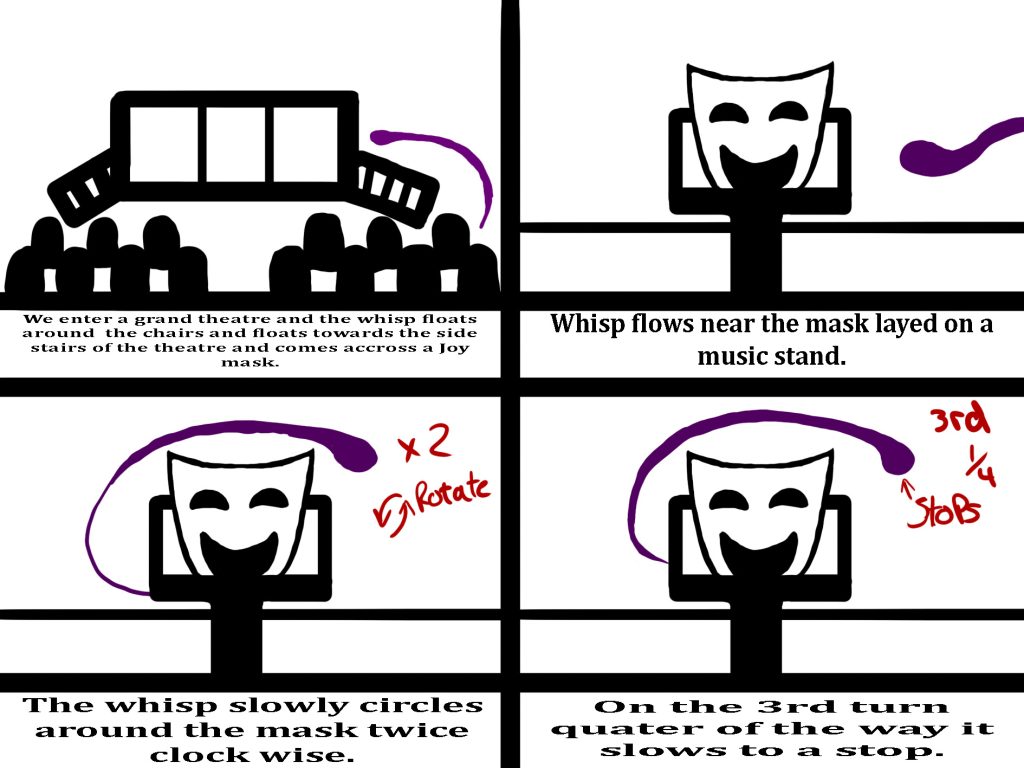

This storyboard will be the basis of what’s going to happen within my scene. The orb that comes from the moon goes into the opera house and enters the theatre and corrupts the mask giving it sentience. I talked about what specifically happens with this scene. I have added arrowed markings within the storyboard to show movement within the 2D scene. I will include more than one type of VFX styles. Those include:
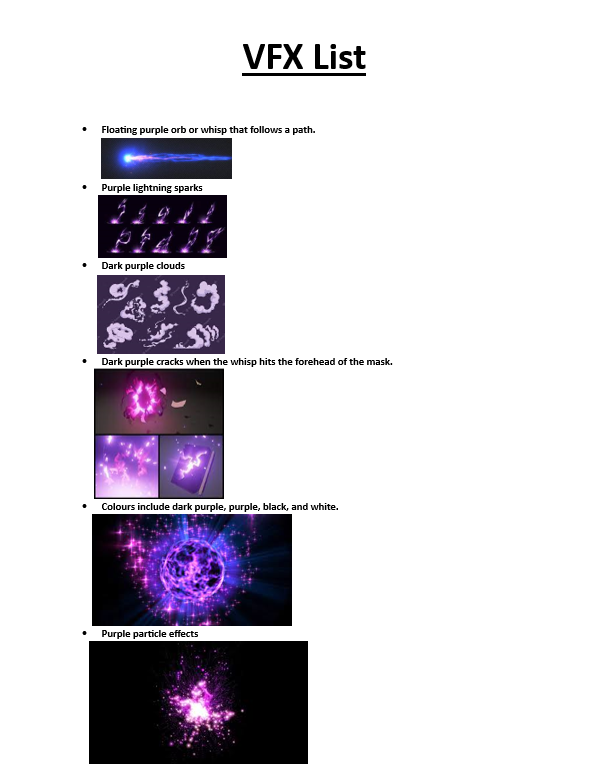
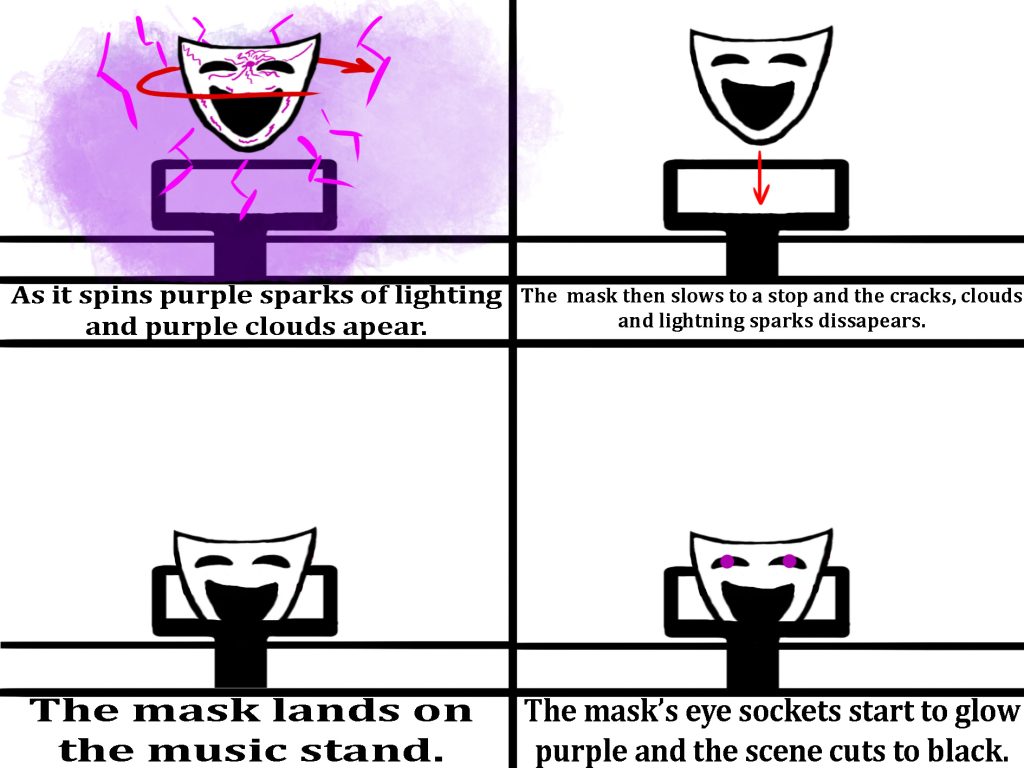
This VFX list is the premiss and the idea that I aim to do in terms of this course. The orb with a trail that comes from the moon that also follows a path, lightning sparks, purple smoke, purple particle effects and light purple cracks.
Also, I would like the VFX orb to make an object move after it collides into it. Then the object rises off the table or stand and starts spinning and producing lightning sparks, clouds of smoke and particle effects. Thirdly, I want the object to drop back on the table and the eye sockets of the mask glow purple and the screen cuts to black.
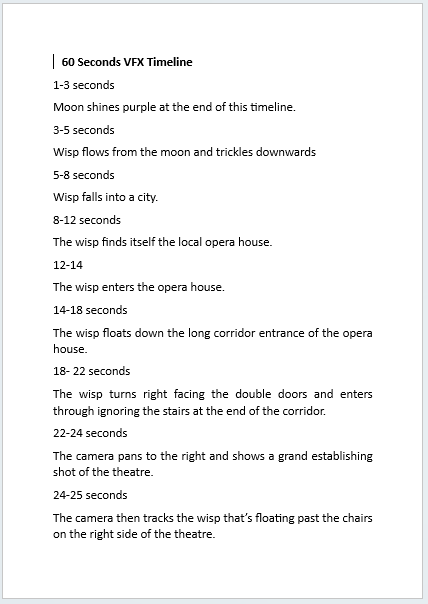
I believe that the VFX and cutscene I plan to make is very ambitious and I hope that the sequence works as planned. Also hoping that I can somewhat replicate my idea into unreal engine. I was recommended to create a rough VFX timeline of my sequence from start to finish. This took me some time because it required me to predict the durations of certain sequences within my cutscene starts. When they start and when they finish.
I did try to create animatics for my sequence. But I did spend more time than I thought on just making the animatics and I was told, if I created the storyboard, and a rough timeline, I wouldn’t need to finish the animatic fully because as long as I had the idea fully formed in my head, I am fine.
Test and Exploration
I did explore with creating camera shots and scenes within unreal engine. I also experimented with particle effects in unreal engine. I learned how how to make three different VFX within this new unreal test project.
First, I created a cherry blossom effect in unreal engine and I have explored with the blueprints and made it so that the particles scatter off the side and slide on the floor. I coloured the particles pink so they resemble cherry blossoms.
Next, I have created a fire effect in unreal engine and have tweaked the blueprints colour, particle spread, and gravity to simulate a realistic fire.
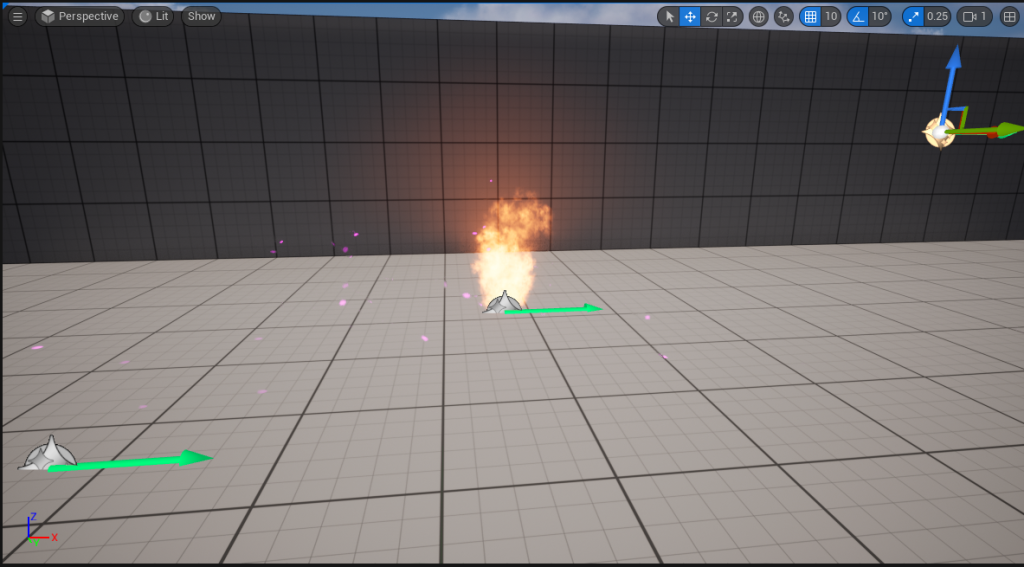
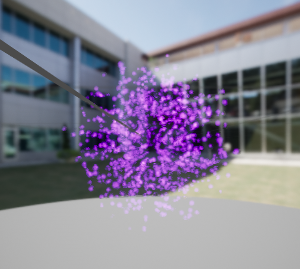
The third VFX test I made was a purple explosion. as this was one of many effect styles I plan to use for my sequence. I grabbed an explosion effect on the niagra particle system and changed the colour and created the particle shown below.
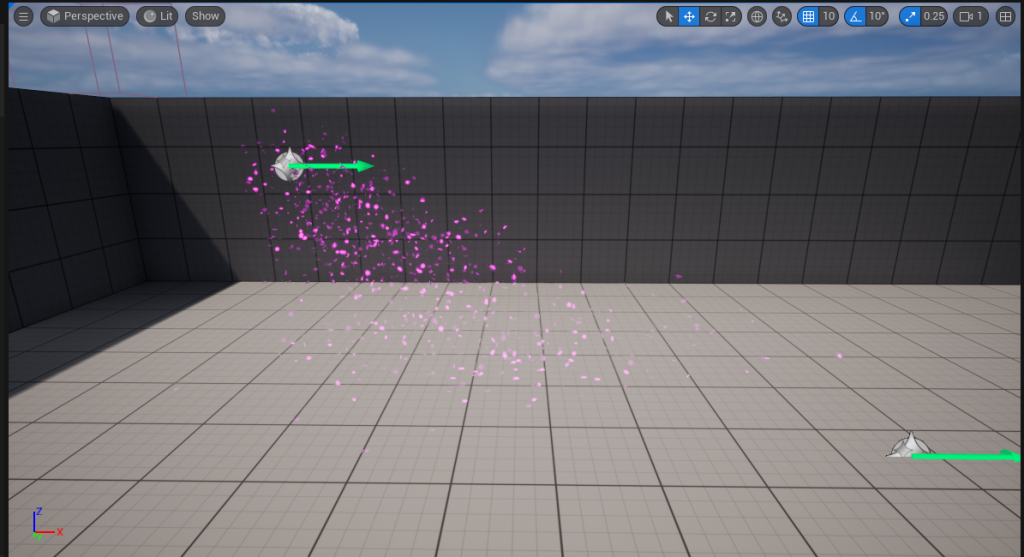
I decided to move on from creating the test particle effects and have started on creating one of my main effects. The first effect I focussed on, is the floating orb with the trail effect.
VFX Making and Other
I went on YouTube and have found an interesting particle effect ribbon trail tutorial that helped me explore the technical aspect of the Niagra particle system in quick succession.
As I went through the video following the details, exploring and messing with the functionalities of the Niagra system.
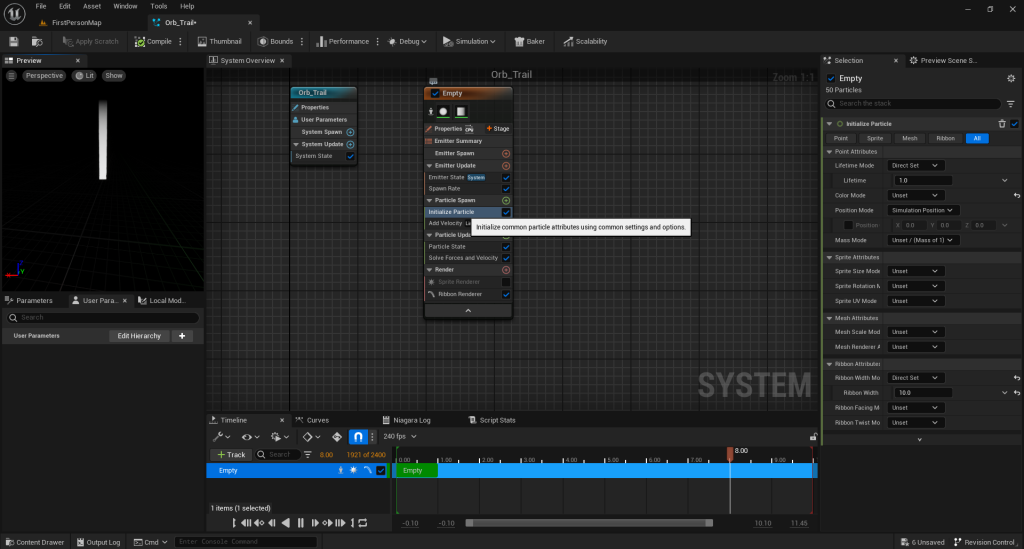
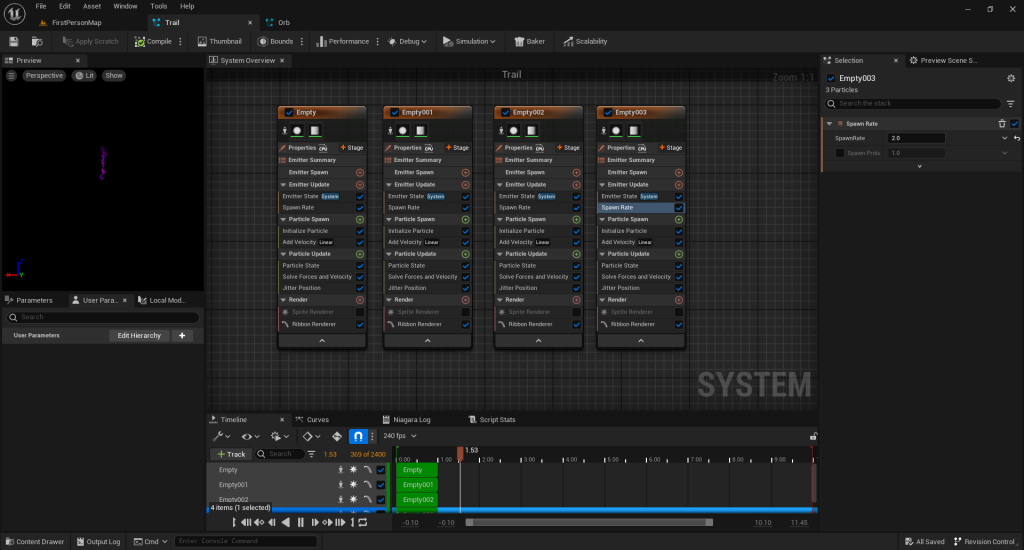
This is the outcome of the trail I created. It’s supposed to look unstable and crazy with the one random ribbon that is bigger than the rest can enhance that randomness.
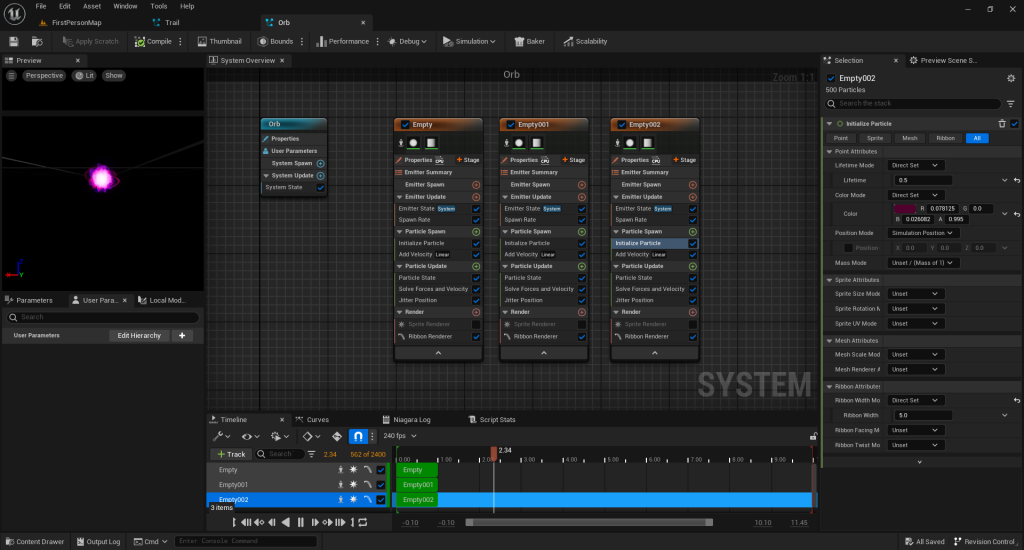
The pictures above shows my prosses when making the orb. I made it so that instead of the VFX spewing out of one end, altered it so that its spawns in a ball, simulating the orb.
This is a result of my first VFX sequence I made and believed to be very successful. This will be the VFX that will traverse though the level and interact with the mask and is what makes the mask levitate and spin. The next VFX I created was spiralling smoke which will circle around the mask when it spins adding more unstableness within my sequence. This will allow me to explore more on the types of VFX provided in the Niagra particle system.
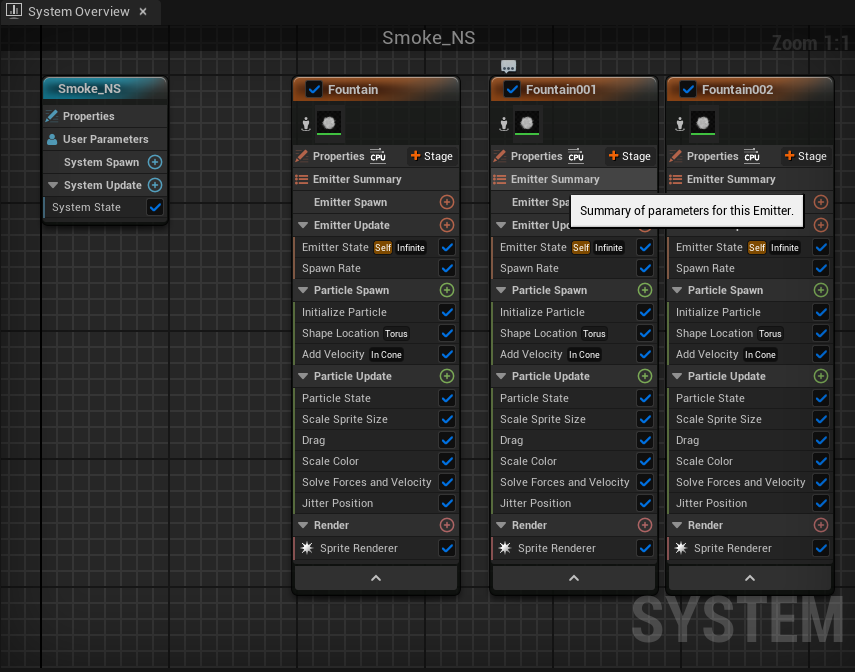
When exploring with the gadgets and gizmos within unreal engine’s Niagra system, (adding new features to the main system, changing and tweaking the particle spawn, velocity, update and etc). I wanted the smoke particle effect to spiral around the mask to add this sense of mystery within my sequence. The image below shows my progress of this VFX.
I managed to create the effect as if it’s spiralling around when it spawns. the image below reveals how I successfully made the effect spiral around an object.
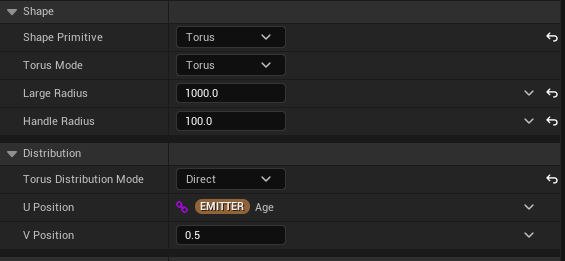
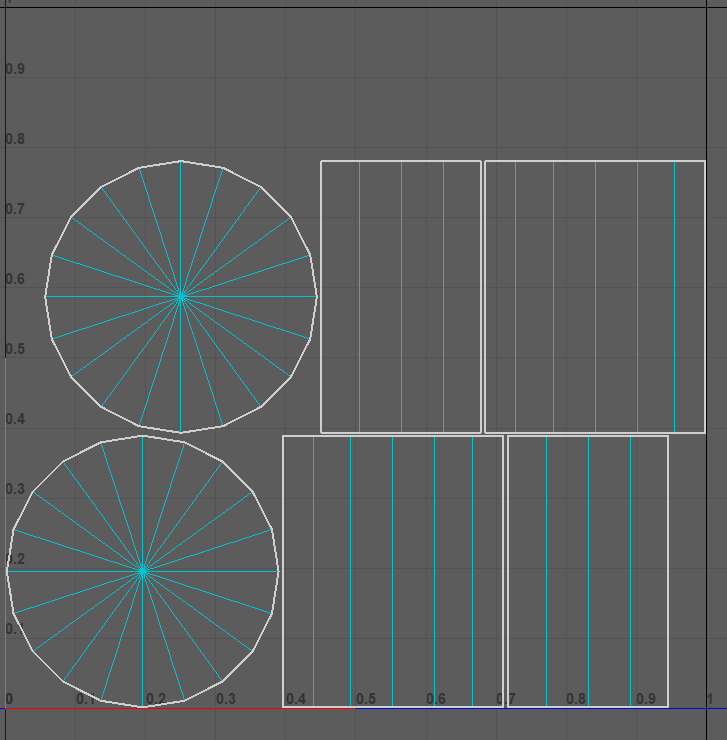
The shape primitive being torus is one feature I needed to get that spiral effect. Examples of shapes that won’t work is a Cone because it just goes up like the average smoke. Furthermore I changed the Torus Distribution Mode to direct instead of random. This makes the particles spawn in a spiral whilst random on the other hand, spawns the particles like a ring.
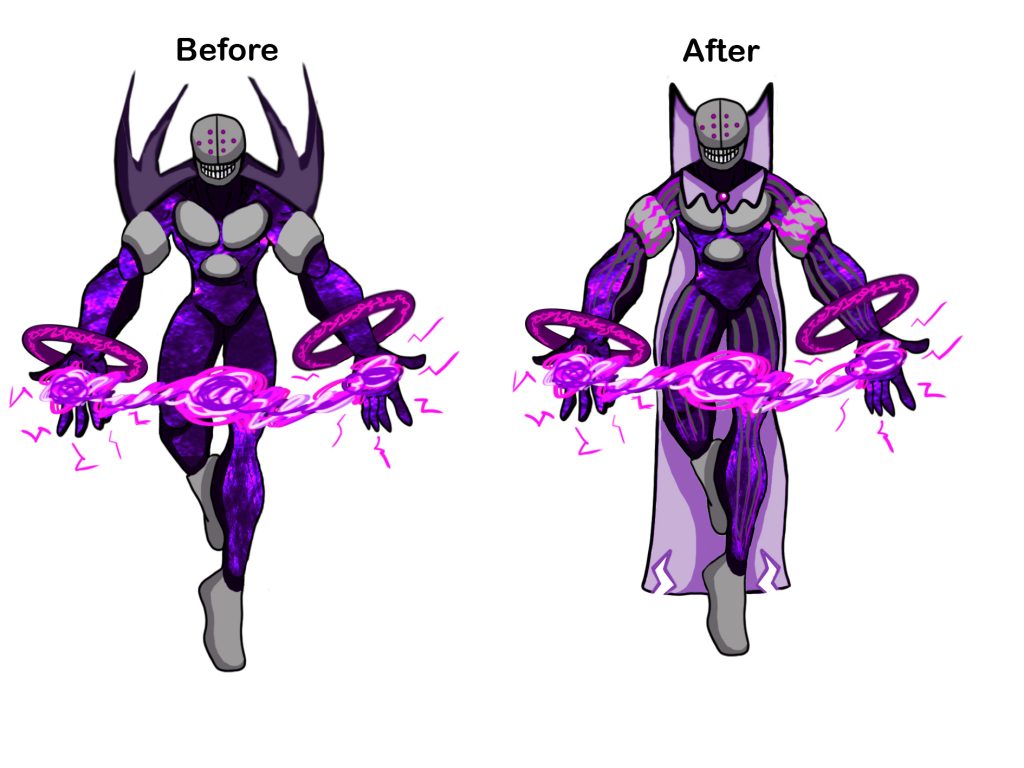
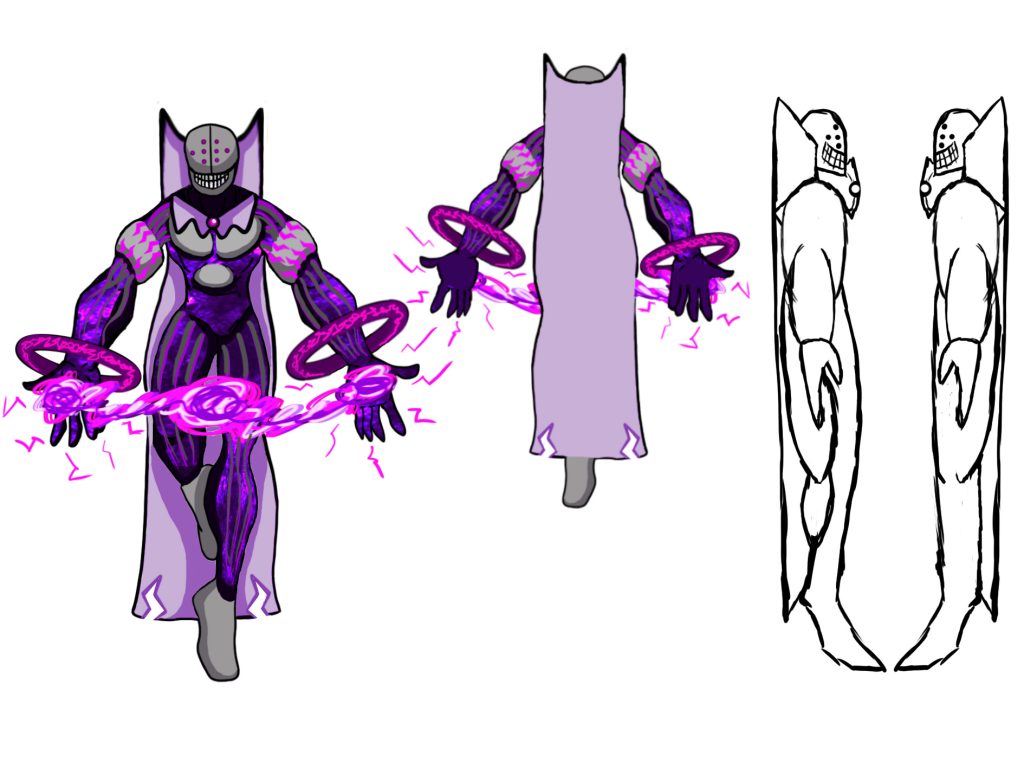
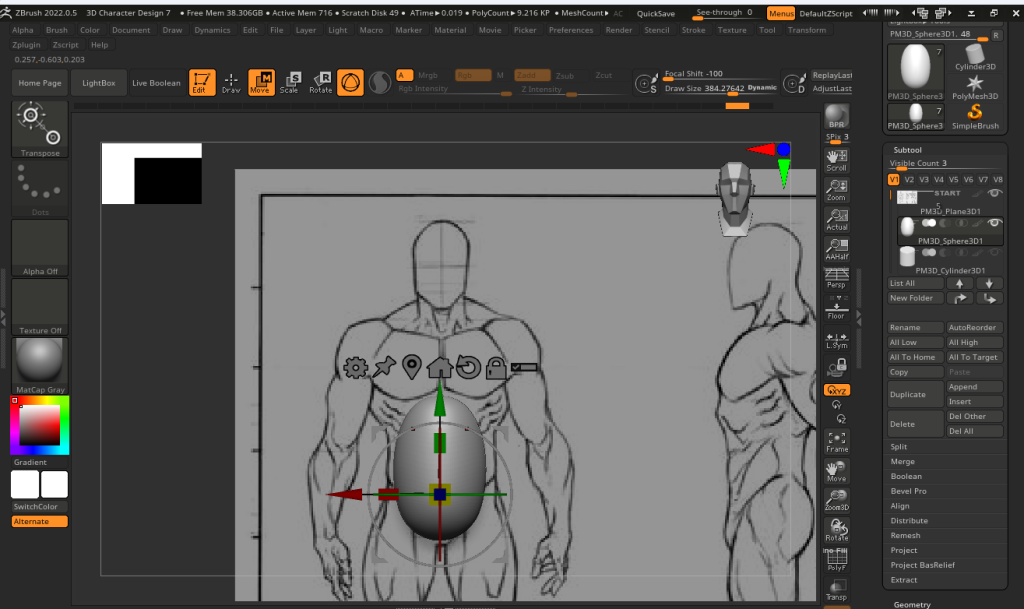
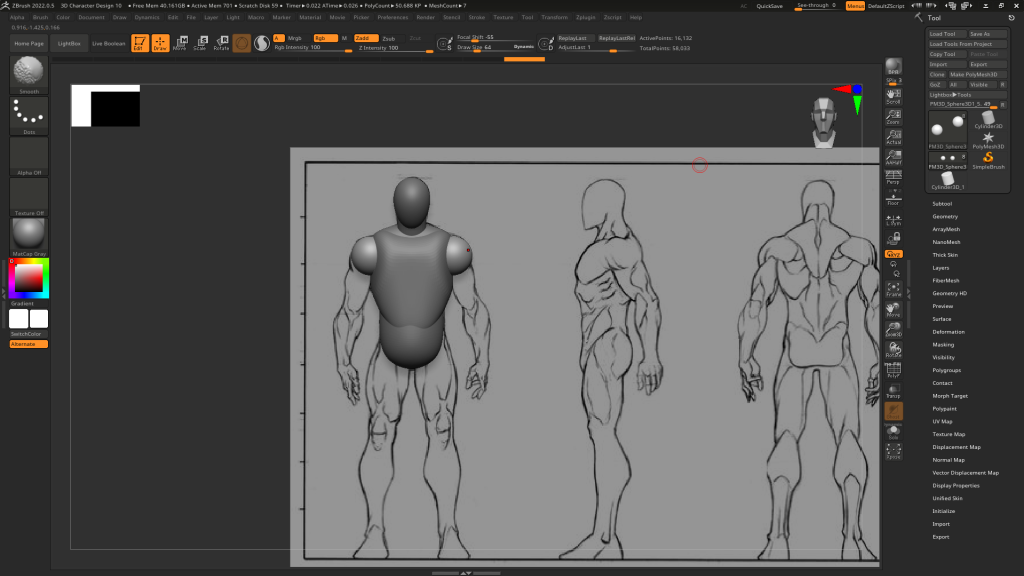
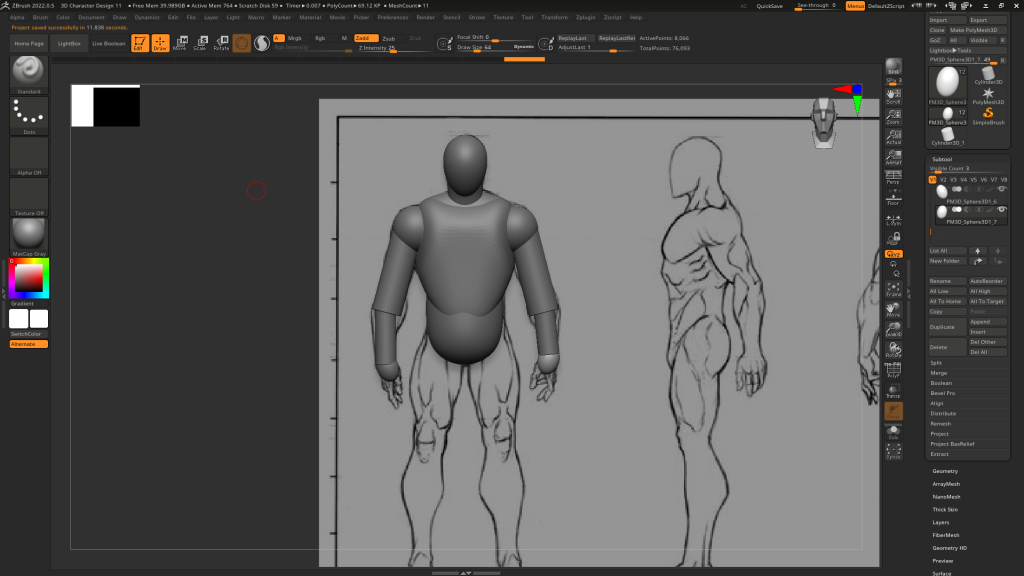
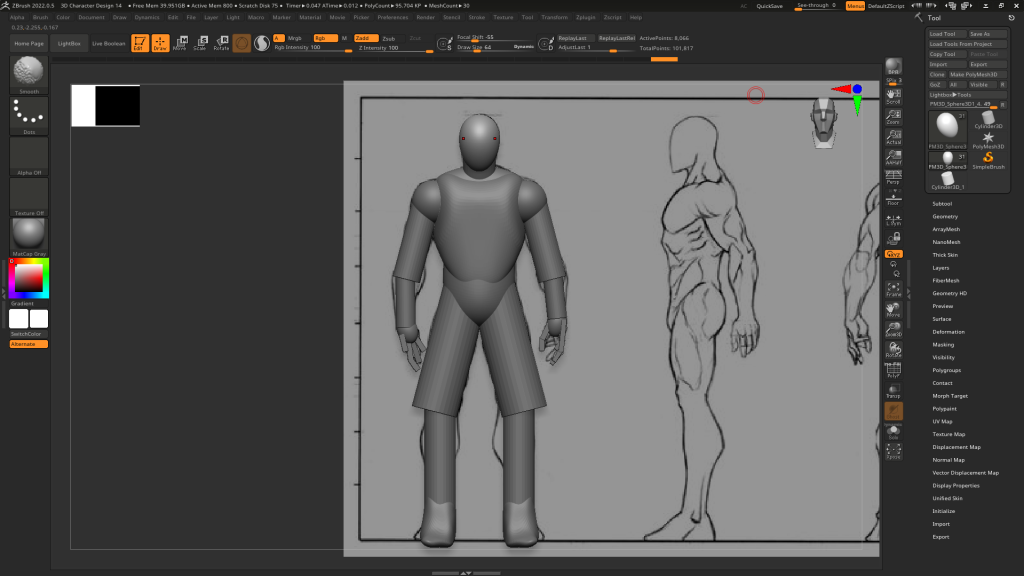
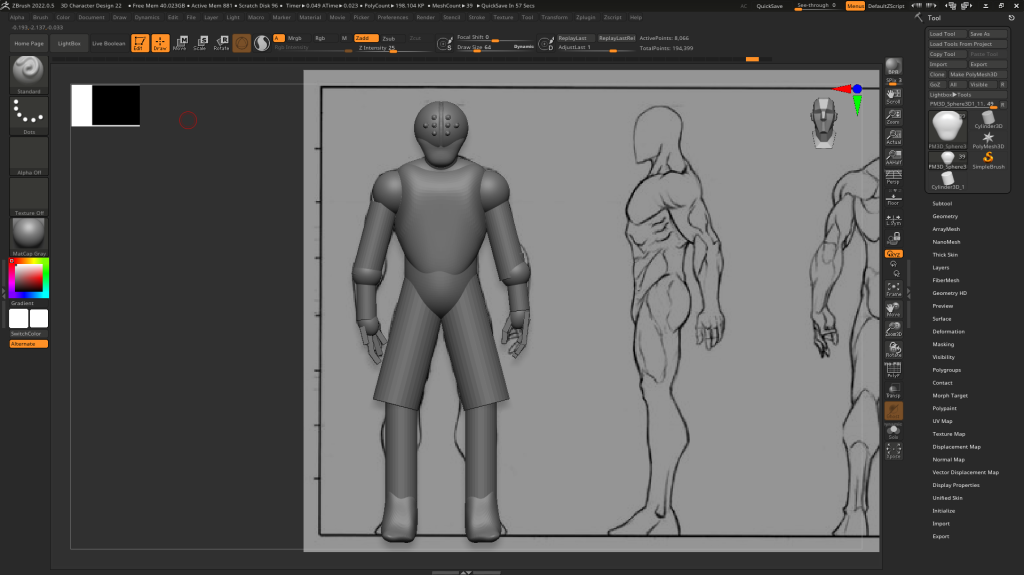
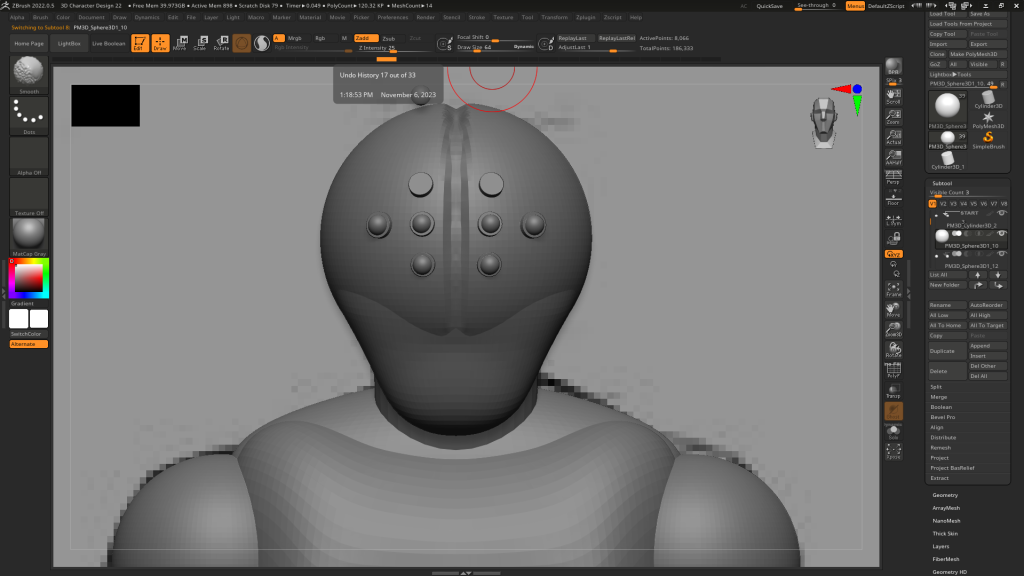
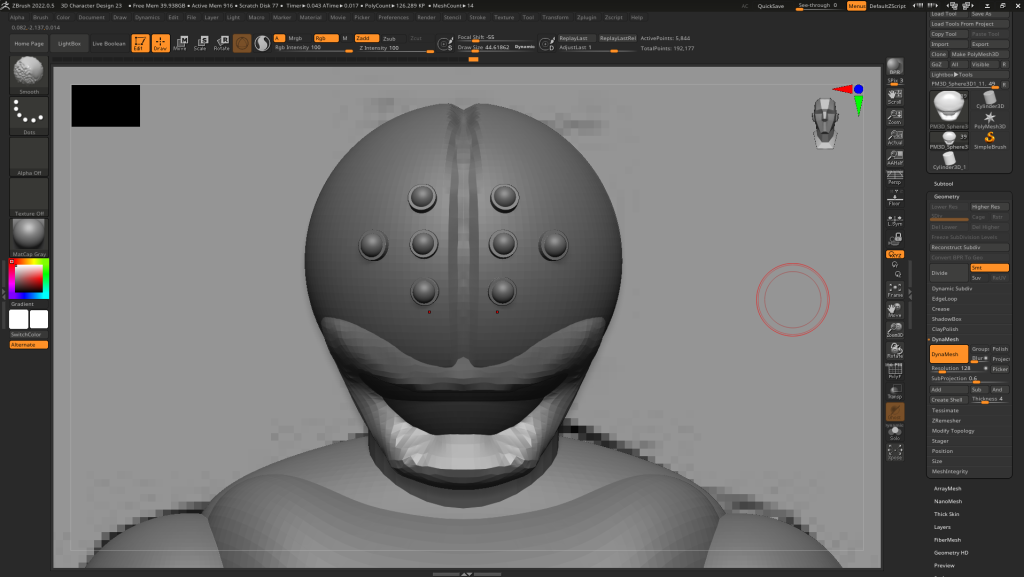
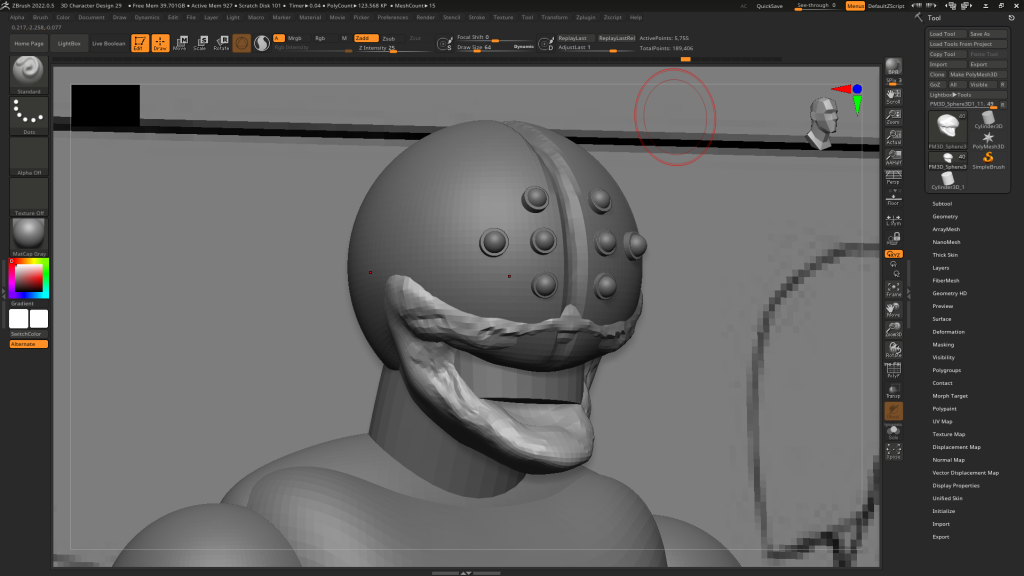
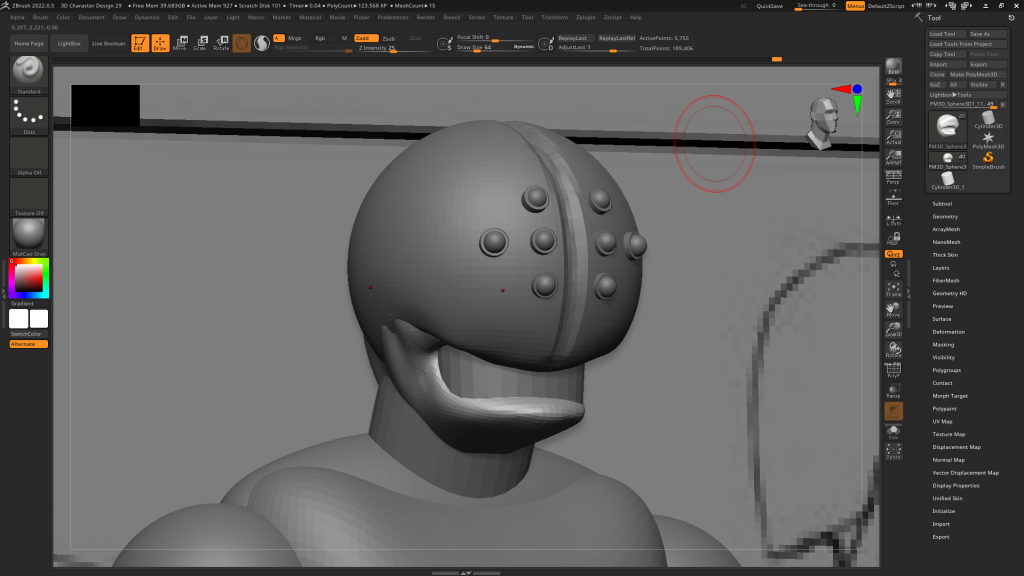
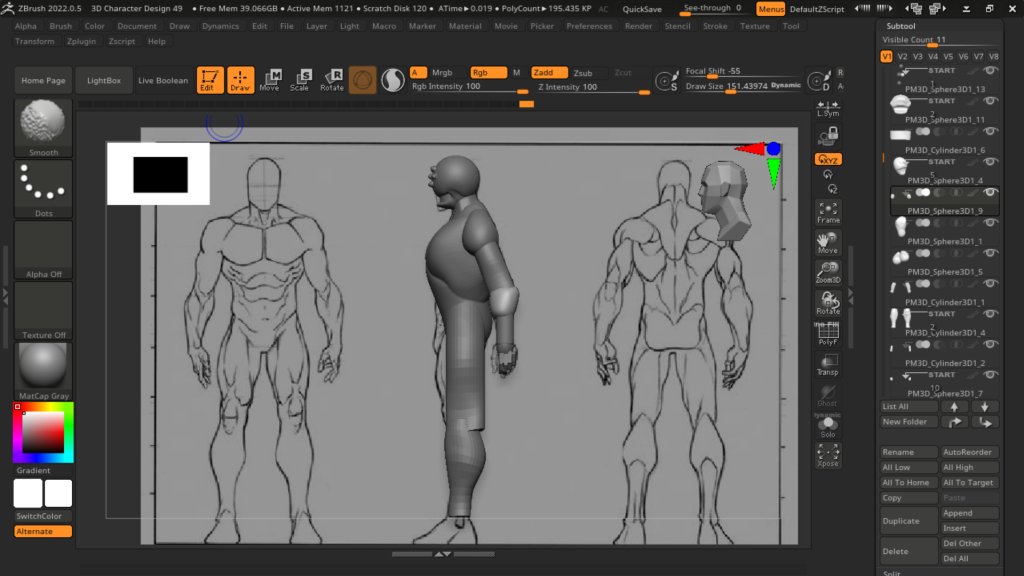
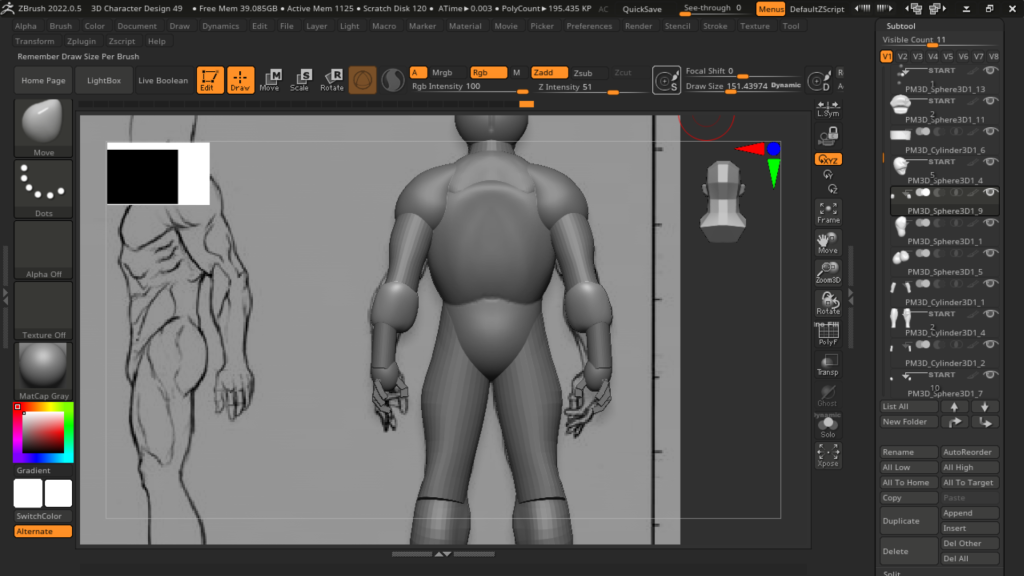
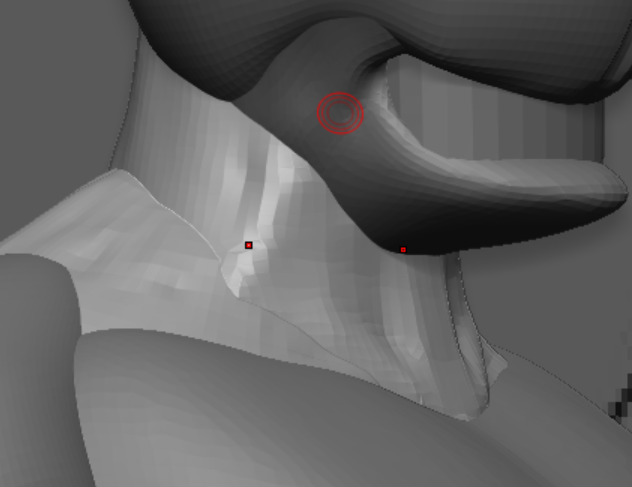
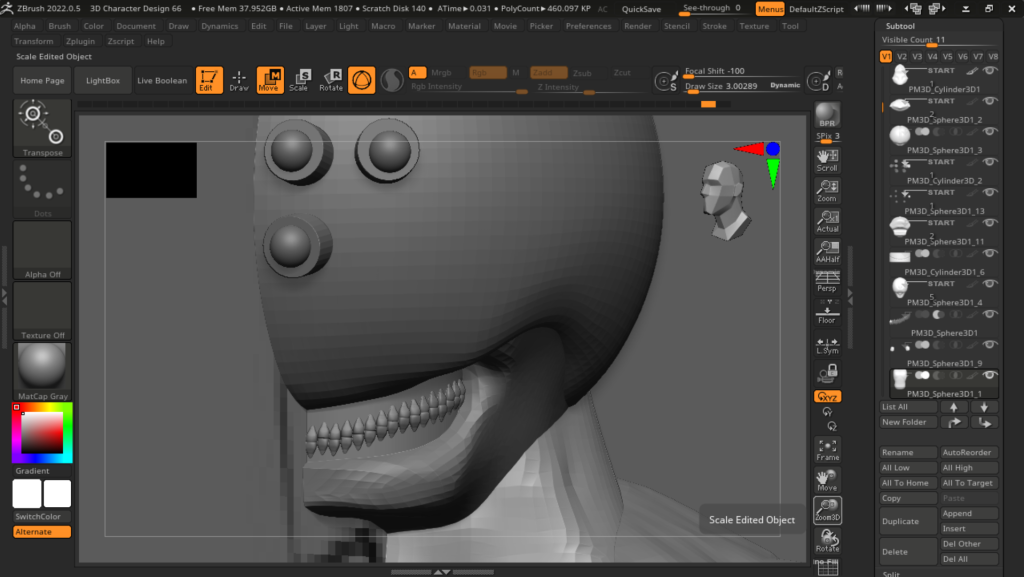
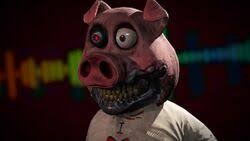
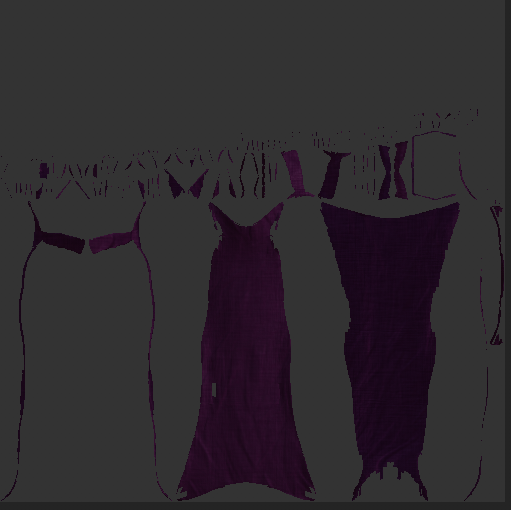
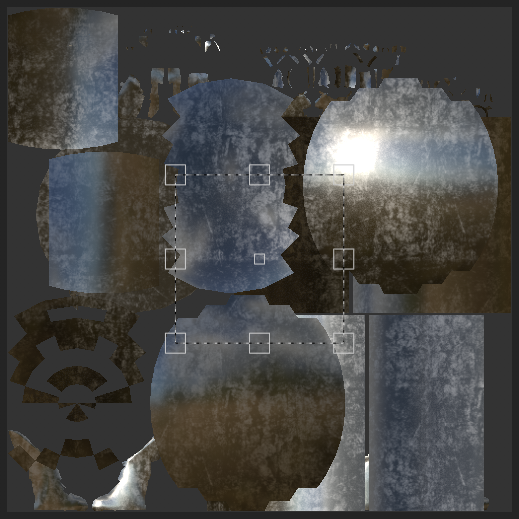
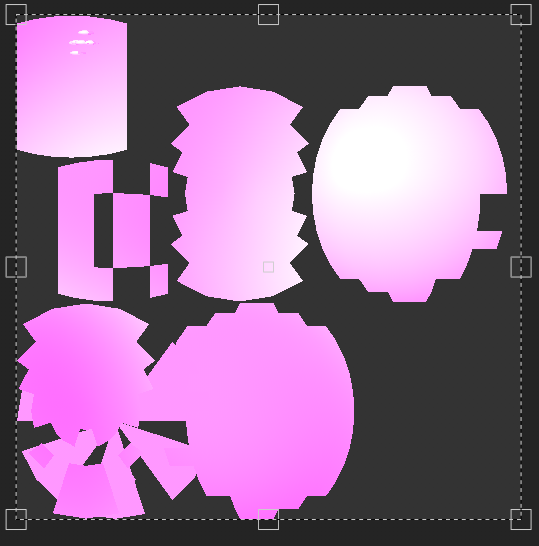
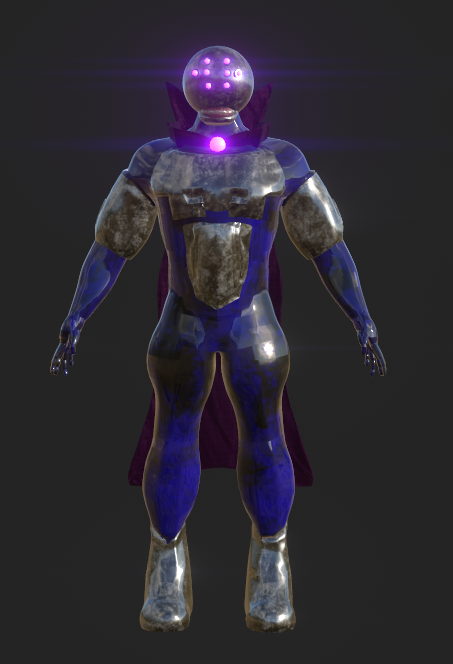
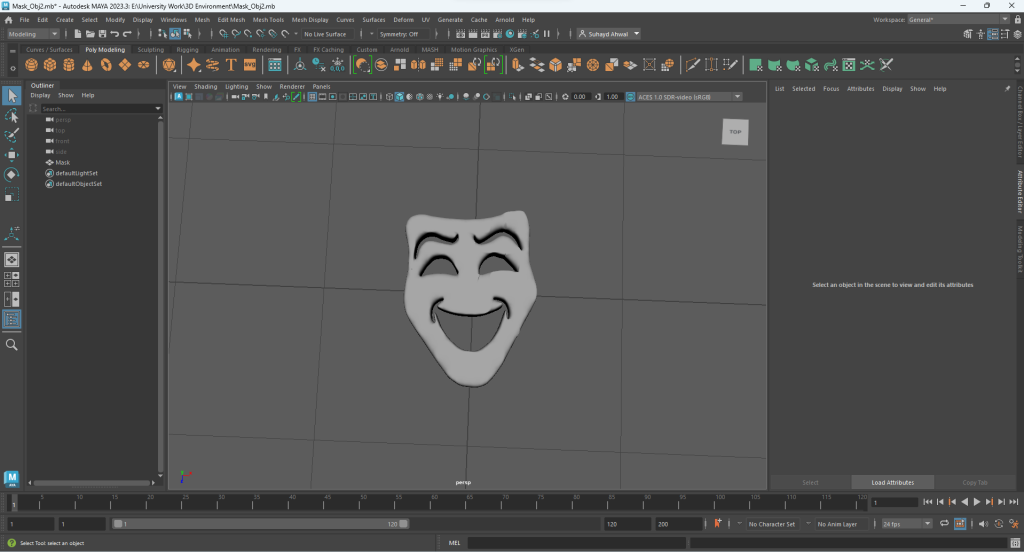
I then decided to create a mask prop for the VFX sequence and for the level. I went on google to find a basic theatre mask clipart and opened up Maya to create the prop using a plane with the clipart implemented flat on the plane and went through some options to allow me extrude the face of the mask upwards and removing faces to hollow out the the middle for the eyes, eye brows and mouth. Creating this model below.
I then exported the file as an FBX and saved it in my unreal engine file within the My_Meshes folder inside the Content folder of the engine and this is how it looked.
Then I realized that there was an issue…
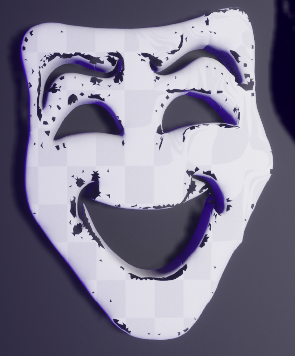
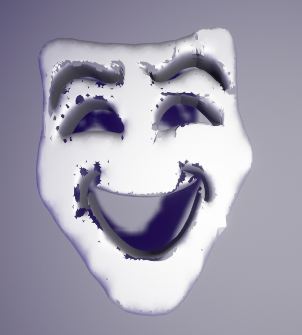
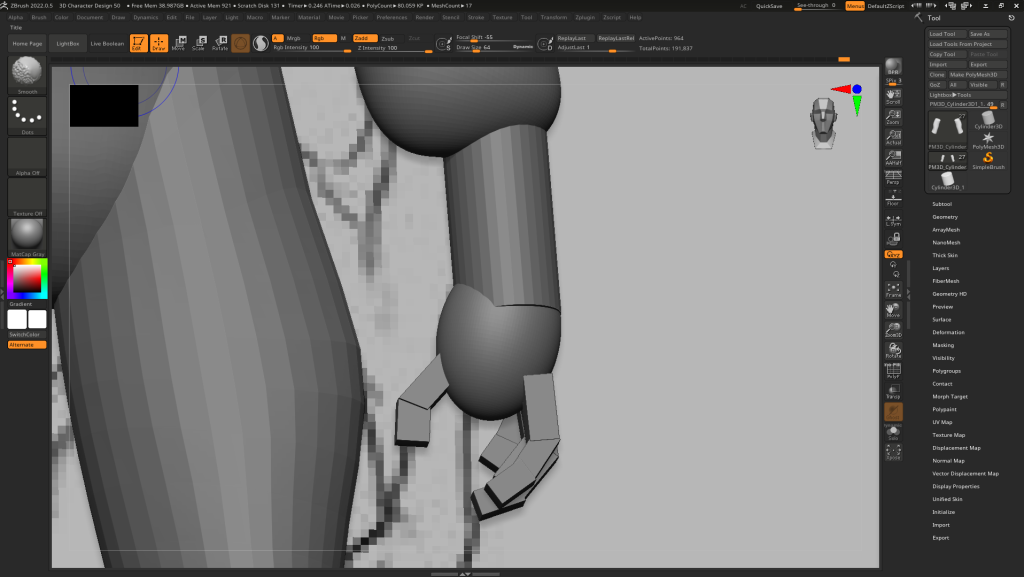
The mesh breaks when approaching the mask up close. I went back to maya and had to change the model entirely. I have used the image I found on google and have modified a plane on maya to reshape the plane to look like the shape of the mask and used the face tool and removed the parts that are meant to be hollowed out. I just needed to sacrifice a bit of the facial structure removing chin, cheek, and eye brow features making an almost flat mask resulting with the material and mesh fully fixed and not breaking which is a change I’m willing to make.
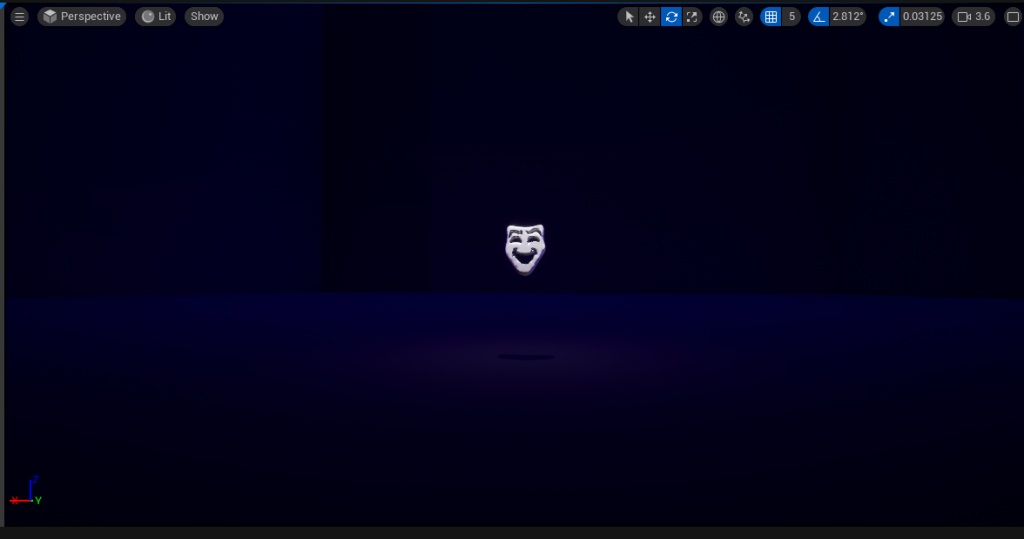
Now that I have fixed the mask, I can use it as part of my VFX sequence without much compromise on how far the camera or viewer can stand near the mask before the mesh and material breaks.
Moving back to creating more VFX, I decided on creating a lightning spark effect that’s meant surround the mask as it spins. I went on YouTube to find tutorials and found this.
I used this video and explored with making the VFX on my level following the the tutorial to the letter and have managed to create some lightning effect that can surround an object. But when I applied the Niagra effect onto my mask, the lightning sparks went through the mask not around it. I decided to work on a different VFX sequence that being the explosion effect putting the lightning effect on a side for now.
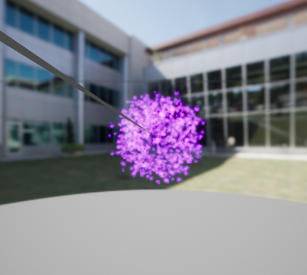
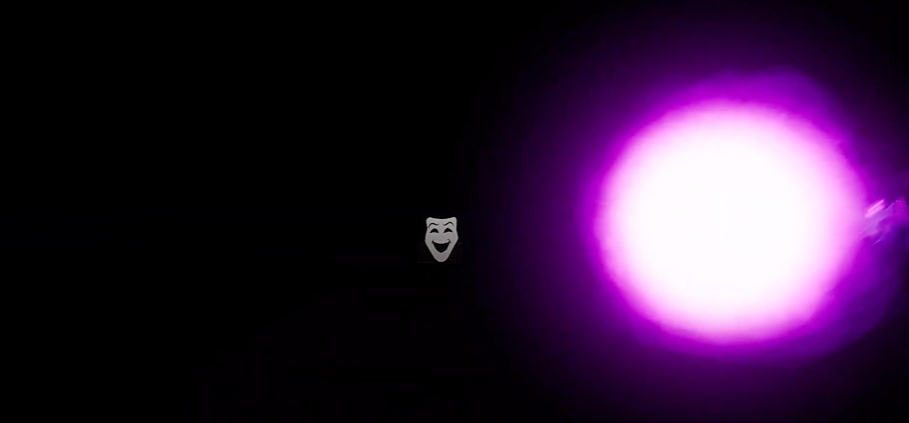
I explored with the colouring, sprite size, spawn count and speed when making my explosion effect. I did create a basic purple explosion with some grey rubble. Now that I have made the effect, it is time placed it near the moon of my level and played the effect loop and realised that the effect is invisible from a far because the moon is too bright and the effect is too small. I decided to just make one massive explosion effect that is so big that I can see from a far. Tweaked the particle spawn, colour, size and life time, the outcome of this VFX is shown below.
This video clip shows how successful this proses went after I’ve learned from my mistakes. It looks amazing from a distance and I’m glad that it worked.
Next, I got back to work on the lightning spark effect that actually goes around an object. I have followed a video that explained how to create the this particle effect.
With a few tweaks and changes to the original video, I successfully made the my own lightning spark effect for my sequence.
The final VFX I will create is two slowly glowing eyes effect that will appear at the end of the sequence when the climax of the scene ends to set an ominous after tone. I was told that I can make the glowing eyes a material and move it within sequence can provide the same result. With all the other effects I had and the later steps I needed to do, I later decided not to do it as I had plenty other VFX styles I made for the video.
Sequence Making
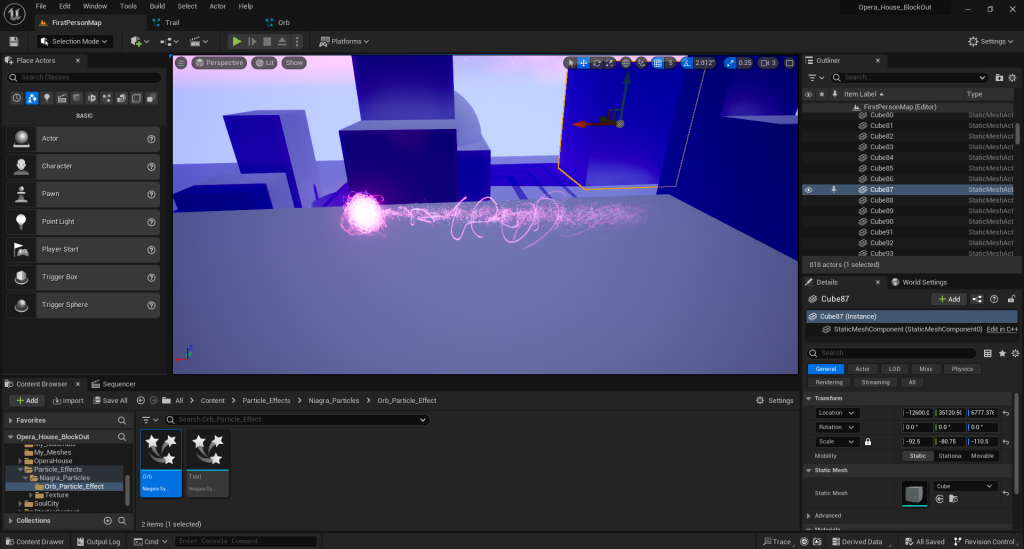
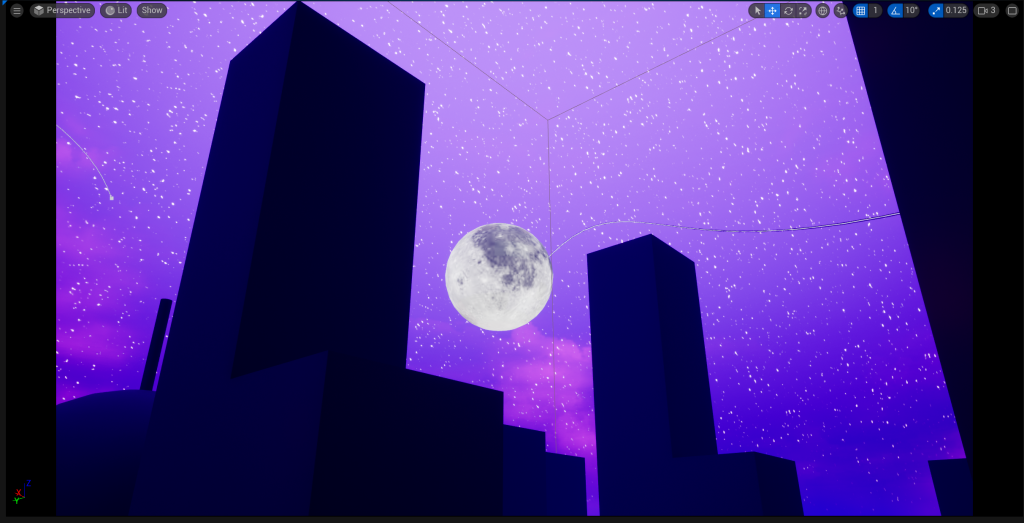
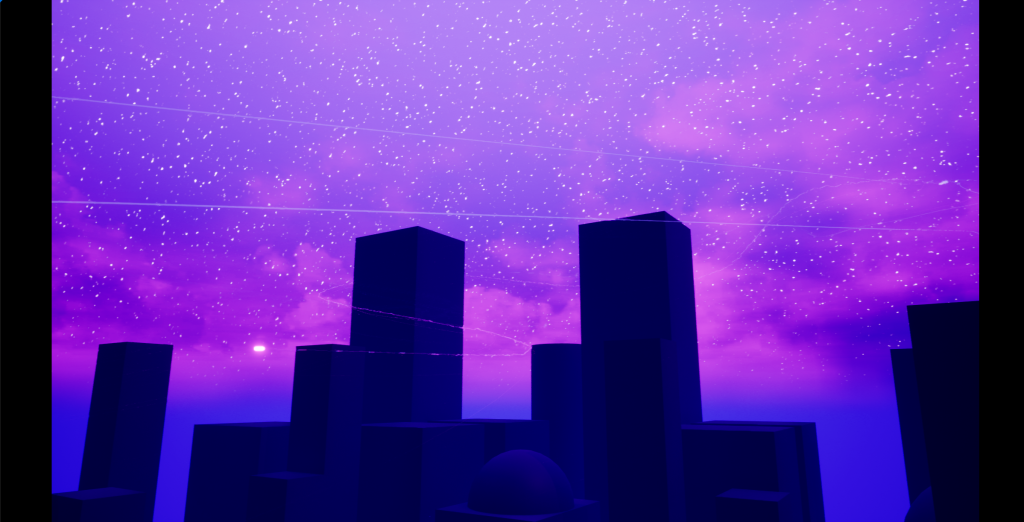
After making the whisp (Orb and Trail), lightning, explosion and smoke, I moved on to making the sequence. The first sequence is the establishing low angle shot of the video. For this sequence, I got a single camera tool and placed it between some city buildings facing up slightly to the moon framing it on the centre. With every cine camera actor made, a timeline sequence is applied. Within, I implemented the Niagar explosion VFX system on this sequence to play from start to finish at the beginning of my shot. I also implemented another VFX sequence that flies out from the moon, and out of the camera’s view using a camera rig rail tool in unreal engine.
“An explosion occurs on the moon and a purple whisp of dark magic flies out..”
I basically followed the video below and it taught me how to rig not only cameras but almost any object. I used this video to rig the full whisp on the rail whilst facing the whisp where the rail is going (this is important because of movement and rotation) and let it go from 0 to 1 in position of the rail using keyframes. Zero being the start of the rail one being the end of the rail.
I also made sure that the whisp wasn’t visible at the start, so I hid it behind the moon, for the sequence to start the rig rail system. I also made sure that the whisp is no longer visible with the help of buildings to obstruct the particle effect visibility (this will help tidy and connect the shots together). Then I used more keyframes for the extra camera movement.
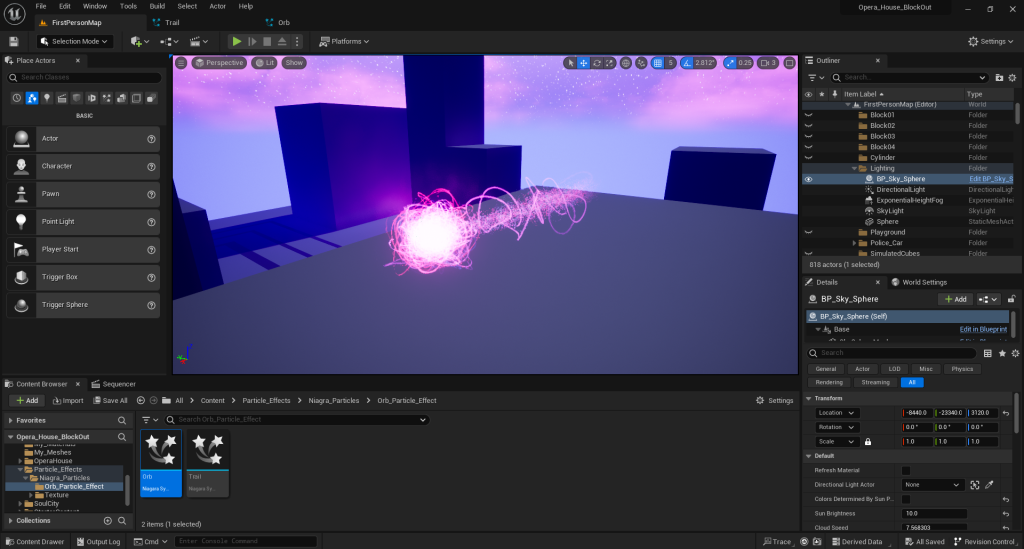
The next sequence, is a wide city shot showing more of the scenery with another rig railed VFX section embedded within. I also added more keyframes to move the camera. Similar to the first shot, I rigged a different whisp orb and trail to another rig rail system, placed the whole system on the sequence timetable and key framed it from start to finish. Also making sure that the whisp isn’t visible at the start and end of the every sequence (having the whisp enter into scene and exit the scene) making the shots flow well together. I made the camera pan to follow the whisp movements when it goes off screen. This makes the whisp hard to follow and adds more mystery within my video. I wanted the sequences to be as smooth as possible so few and long shots are preferred.
“The orb flies into the city…”
The third sequence, is an aerial shot of a corner of the city where the whisp goes down the street and off screen. I wanted a bit of variety within my 60 second video so I added this new shot type on the timeline to differentiate the previous shots. I did the same with the first few shots with the camera rig rail whisp technique. Again making the whisp enter scene and exit the scene in that sequence.
“The orb flies from street to street…”
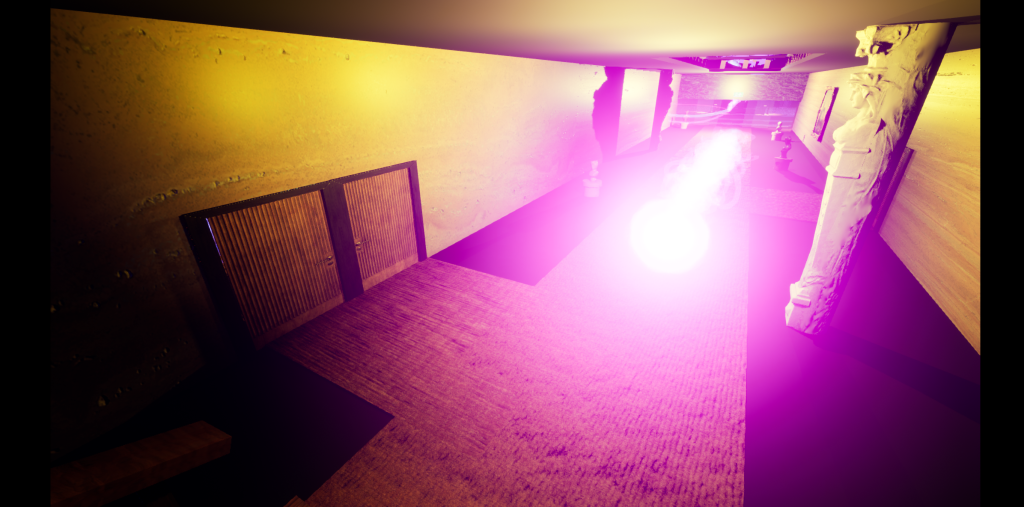
The fourth sequence is another wide shot of the city revealing the next location of where the video will occur. This is the entrance of the opera house where the main sequence will take place. In this shot, I have created another rig rail system and another VFX system is applied on it. Same with the other shots, I made it so that the VFX will enter the scene and will exit the scene.
With more and more shots being made, I needed to bare in mind that the many VFX systems, I have put in the level, are always visible and when I place cameras around the map, I need to think about the camera’s precise location and focal length so that the VFX sequences for other or previous shots won’t be included in this shot. Same goes for all the other shots, avoiding the break of continuity. I also need to move VFX sequences to my liking for the shots of the entire video.
“The whisp flies through the city and in the entrance of the opera house…”

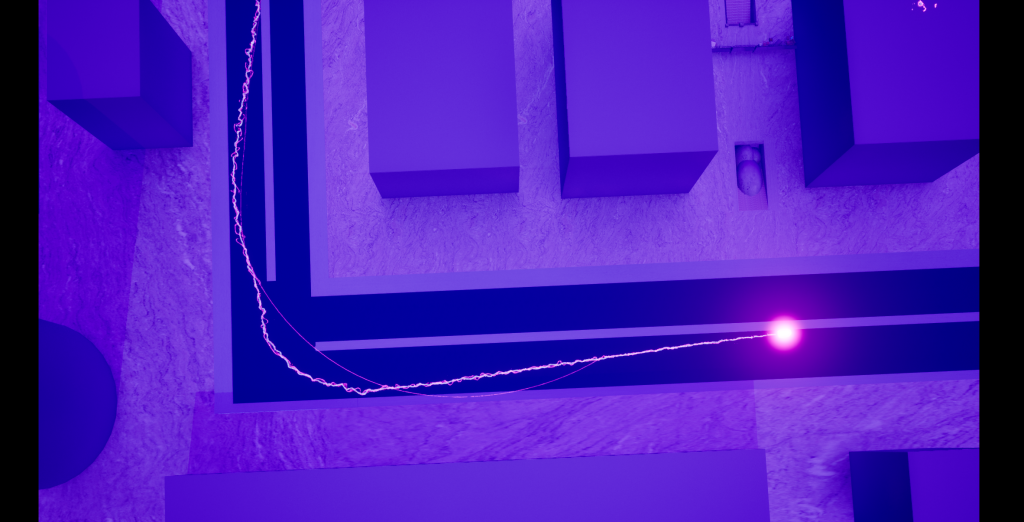
The fifth sequence is the first and last quick shot in the video. In this shot, I have included a fifth rig rail system with a fifth VFX system embedded (with the rail going from the hallway to the main opera house theatre) and a camera looking down at the hallway of the opera house. I made this quick shot because I want emphasise the the unstableness and the unpredictability of the VFX included by making it elusive for the camera to track.
With this scene, I had to put the VFX closer to the door because the trail of the orb is visible on the previous scene. This is not good when simulating the whole video as it breaks continuity.
“The wisp quickly turns the corner and enters the theatre…”
The sixth and final shot, was the sequence I put the most effort in. This whole sequence includes the sixth rig rail and the sixth VFX system, camera movement, object movement, a completely different VFX system that was created and some clever keyframing techniques/ other technical details.
The image below shows the complexity of this sequence.
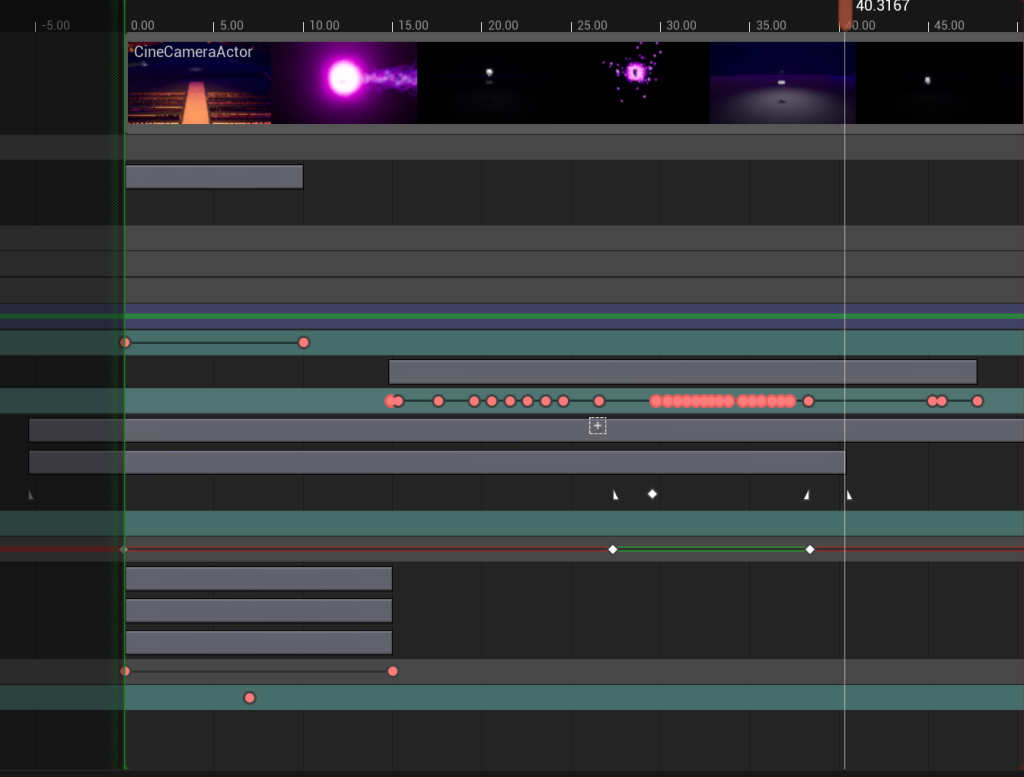
The image below shows what keyframes I used and how I have used them.
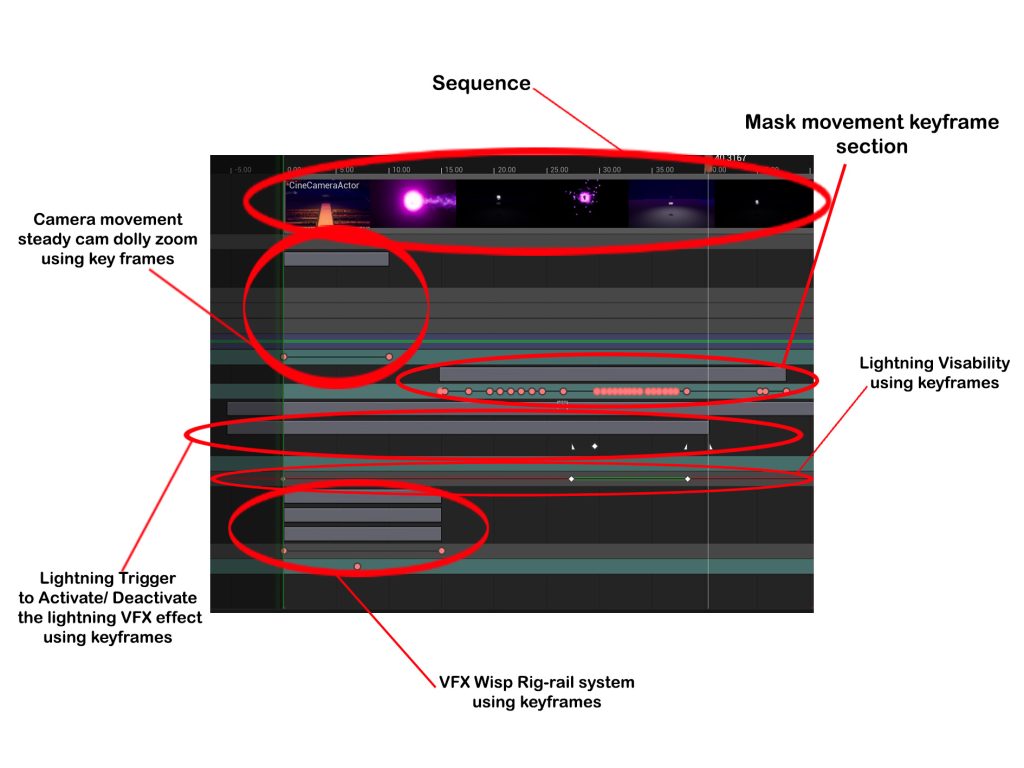
The image above includes all the technical details I used to make this entire sequence. As I was making this, I learned that the general key framing system embedded within this sequencing mode of this software is really helpful. It allowed me to create a nice and slow camera dolly zoom to add a dramatic effect with the mask object, create clever made sequences (when VFX sequences start or finish and whether they should be visible or not) and this section of the course made me learn about sequencing techniques I have never used before and allowed me to problem solve the issues I had with this shot.
The final rig rail system that has the VFX embedded within is apparent within this final scene as it is the catalyst for what’s about to happen next. With the help of keyframes, It allows me to play out the rig rail system from start to finish.
Plus, with the ability to change the visibility of the rig rail system, I can deactivate its visibility when it hits a certain point on the timeline. So visually when the whisp touches the mask, it disappears as if it entered the mask. With the help of more keyframes I then made the mask move on impact of the whisp.
Then I moved onto the mask movement section, I added transform keyframes to mark movement point on the timeline. I started slowly with few keyframes (making the mask rise slowly and tilt from left to right almost hypnotic like). I made the mask look straight at the camera and then went crazy with the movement by adding lots of transform key frames on the timeline marking one twist and turn to the next.
This is the climax of the video so I made the mask move sporadically as if it’s twisting and transforming into something ells. It spins and tilts randomly until it slows down to a halt in the air and quickly drops on the music stand. All of this object movement is achievable using keyframes and I learned a lot during the making of this shot.

Now that I have simulated the mask movement and the other keyframed sequences, I now need to implement the final VFX sequence I have made. The last VFX system is the lightning trails with a light orb and sparks jittering uncontrollably.

When implementing the lightning VFX system into the sequence, I have made it so that it only turns on at a specific time, and it will turn off at a specific time. In the sequencer, I have added key frames of the visibility of the effect. (Visibility is turned off until it reaches to another key frame that turns the visibility on and then off again) A trigger keyframe of when the VFX starts and finishes and another trigger for when the lightning starts and finishes.
The paragraph above is the outcome of my findings when doing this segment. I did however get caught up with some issues during this part and have independently fixed those issues using basic problem solving and a decent amount of knowledge of the software. Those issues include, a problem with the lightning VFX system where I watch the sequence play out (as a test) and in some cases the lightning part of the VFX doesn’t turn on and in other cases it works just as fine. Similar to a coin flip (I have no clue if the lightning part will turn on or will stay off).
This problem was solved by realising that I have unknowingly put a deactivated visual keyframe underneath an activated visual keyframe. This resulted in the two keyframes cancelling out each other. Making the sequencer decide whether or not to turn on the lightning or keep it off thus giving me the unpredictable coin flip effect when I watch the sequence play out.
The second problem I had, was that when I made the lightning VFX system deactivate at a certain point, the lightning trail particles still played out even when I deactivated the visual keyframe of the VFX system. Leaving me with rainbow trails that are still visible to the viewer at the end of the sequence when all the VFX are gone. This took me some time but I finally figured out the solution to this strange issue.
Basically the solution to this problem was that when I activated the lightning part of my VFX using a trigger keyframe, I did not add one to the end to deactivate the lightning part of the VFX system. (Making the problem easy to understand in the end but somehow took me time to grasp why it happened in the first place)
Those problem fixes are important to the visual aspects of the video and me fixing those issues improved the sequence even more in my opinion.
This whole process allowed me to problem solve and understand the software even more. Learning new things along the way and gain better knowledge of what I am doing for the course.
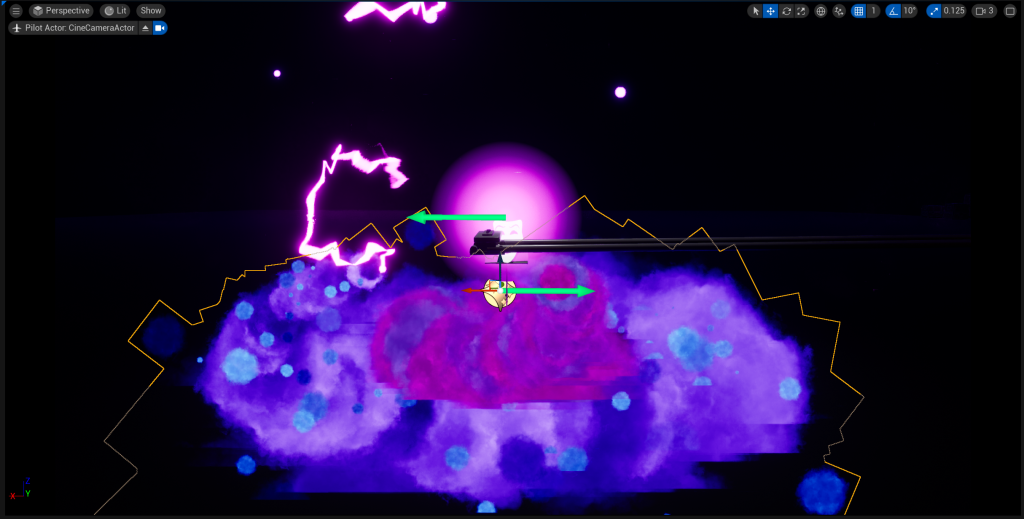
Another note I want to add, that is not an issue I faced but a design choice I made, was that I did make another VFX system for the video but decided not to implement it in the sequence because it clutters and makes the scene too much for the viewer. The VFX I made was a spiralling plume of smoke that is meant to circle around the mask as it floats in the air.
The image below shows what could have happened in my video. I felt that with the added smoke in the scene, can clutter the shot and drives the focus away from the mask. I did also show this image to four others and they all agreed that the scene did look cluttered and that encouraged me to stick with just using the lightning VFX.
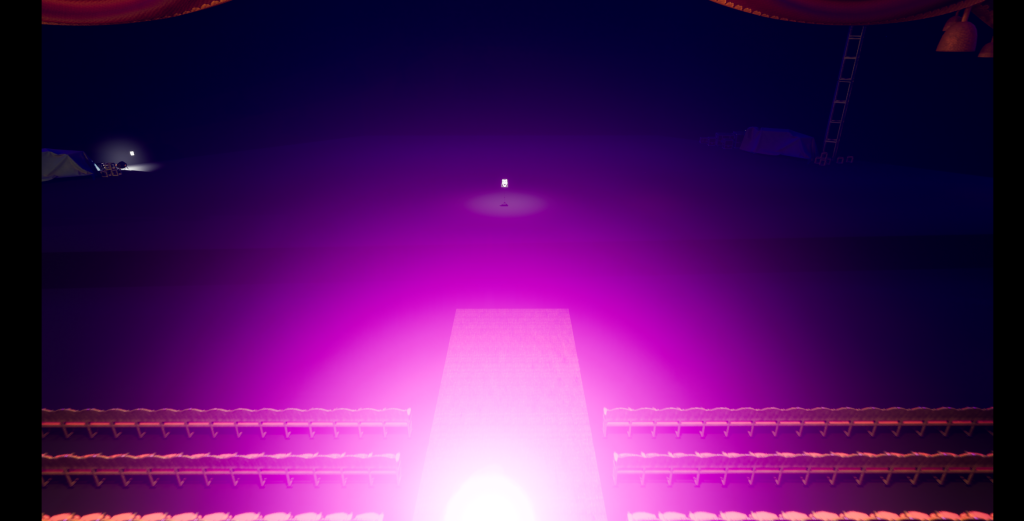
The image below is the improvement.

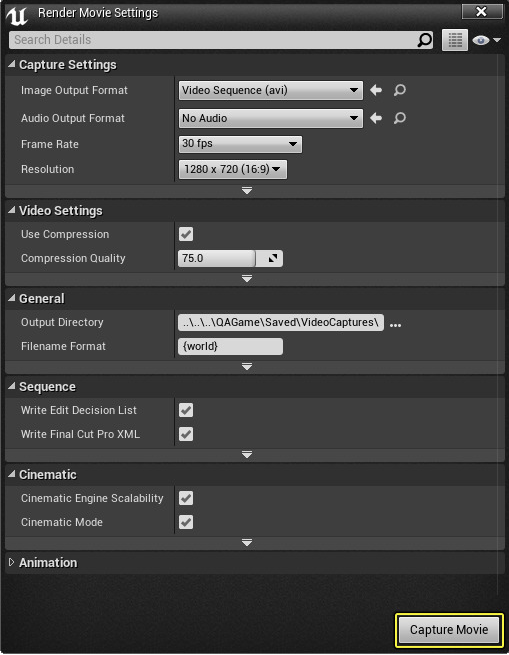
Now that I have fully completed the final sequence, I then added it to the master sequence where all my finalised and fully finished shots are kept and export the master sequence as a fully rendered film.
“The whisp is at it’s final destination and it slowly looms towards a theatre mask that is ominously placed on a music stand. It collides with the mask. The object slowly rises off the stand and tilts almost hypnotic-like then readjusts to face the camera and glowing orbs and jittering sparks of lightning consumes the mask as it rotates and flips in random locations (as if the dark magic is transforming the object into something terrifying). The lightning and sparks abruptly goes away and the mask slowly readjusts itself again and lands back onto the music stand. The light’s go out…”
I then followed the official Epic Games Dev website to understand how export the master sequence into video form.

Editing the video on Premier Pro
Now that I have exported the video from the master sequence in Unreal, I can then move on to editing the video in a video editing software. The software I chose was Premier Pro mainly because I have prior knowledge of the software before I started my university years.
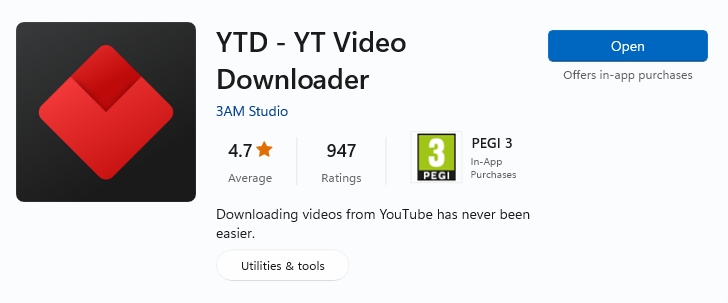
But before I edit the video, I need to source the sound and music files for the 60 second video. Luckily I have prepared what need, so this process didn’t take long. YouTube was the place I found my files. The video downloader used is called YTD-YT Video Downloader in the Microsoft store.
When finding the sounds and music for my video, I used a technique where I save the video in a private playlist. If I’m happy with the all the sound files I download them. And put them in a folder I have prepared for this part of the course.
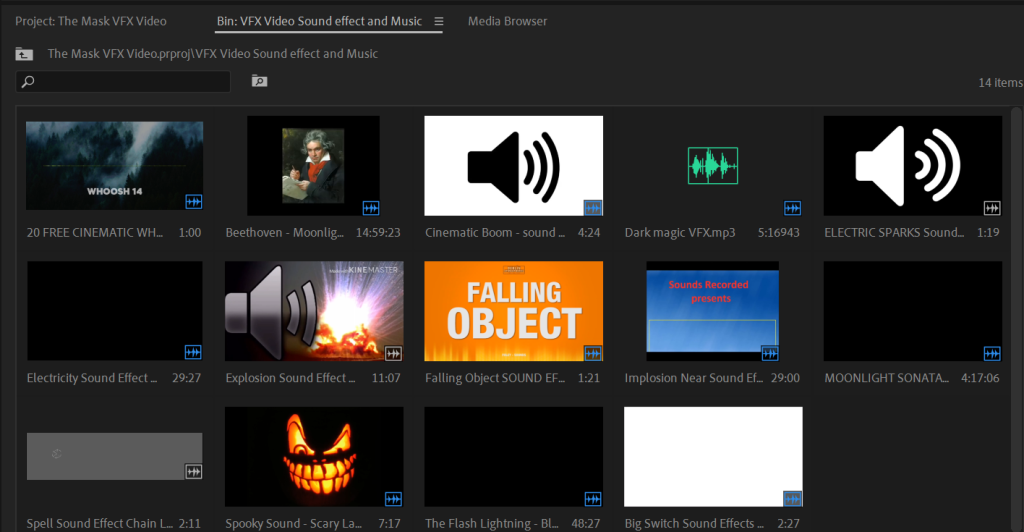
The sounds that I have downloaded include 2 music tracks that are the same song but will be cleverly spliced together for effect. The music I have chosen was Beethoven’s Moonlight sonata (A Orchestral version and a dark orchestral version of the song). Doing some research ahead of time, I can definitely use those music files. So copywrite problems won’t happen because the author of the music has died years ago.
The sound effects I have downloaded where, whooshing sound effects, explosion sound effects, implosion sound effects, falling object sounds, electric sparks sounds, a big switch sound effect, dark magic sounds and spooky laughter.
Now that I have all the sound files, I was ready to make the fully edited cleaned out 60 second video for my course. To me this part was like piecing together a fun puzzle. I had a great time in making this video and the sounds and music files I have gathered where perfect for this.
The first few sound effects I worked on was the explosion sound effect, the whooshing sounds the dark magic sounds and the whisp/ mask collision sound effect. I wanted to work on the sounds with the more convoluted editing styles.
For the explosion sound effects, I used two different explosion sounds (an implosion sound effect and an explosion sound) and lowered the overall volume of the two sounds to simulate something that is far away. I did the same for the dark magic sound effect. Where the further the object that is in the scene, that is producing sound, the lower the volume of that sound effect will need to be.
And when the mask and hallway scene play out, I need to make the volume of the dark magic sound louder because its near the camera and closer to the viewer. All this volume changing is achieved using keyframes.
With the whooshing sound effect, I used different provided sound bites that I have placed on the timeline. And when the whisp does a turn or changes directions, the sounds play out to realistically simulate something is flying by the camera. During this section of the editing, I needed to cleverly time sounds with the visuals.
The collision mask sound effect was placed at the right time for when the whisp interacts with the mask the sound plays as the mask moved to simulate real a life collision sound.
The sound effects I have edited at this stage, add realism into my video (whooshing sounds, explosion sounds, object collision sounds and energy sounds) and it is time to move on to the extra sound effects that enhance the mysterious theme of the video.
The next half of the editing process was adding the sounds that didn’t need that much changes to the volume like the spooky laughter, the lightning sparks and the big light switch shut off sound effect at the end.
For the laughter, I have timed it so that when the mask is about to spin the laughter starts. Made the volume not too high (so not to overwhelm the viewer) or too low (to avoid making it too quiet to hear) for the main video. This resulted in a dark spooky outcome that was meant to enhance the sinister theme of my video.
I then worked on the lightning sparks sound effect. I spliced two different sound effects together. One, a constant surge of sparks and the other is spontaneous spark sounds. Together results in an unpredictable surge of dark magic.
The final sound effect I added, to induce more sinister connotations in the video, was the big switch turn off sound effect. I cleverly, placed this sound effect in the timeline, matching it with the abrupt cut to black. This sound played with the cut to black at the end of the sequence would be perfect as it puts the viewer on edge even at the end of the video. Also, the sound echoes, adding even more tension to the scene.
Now that I placed all the sound effects into the scene, It is time to add the music in the video. This section is the most easiest part of the editing process because I have a concrete timeline video of events that happen as it plays out. Meaning I have the classical version of the music for the start of the video to the point where the main scene happens with the mask movement. The music will be cleverly spliced with the darker version of the same music revealing the sinister side of the whisp.
The way I achieve this is with the help of keyframes. At a certain point of the video the classical version of the the music will die down in volume and a darker version of the music rises in volume. More splicing is needed to abruptly end the music with a silence before the complete stop of the the video.
For this section, I cleverly put the climax of the music and the end of the music together (listening very closely to any noticeable jumps in the sound track). It got to a point where I was very impressed with the end and decided to watch and listen to the whole video.
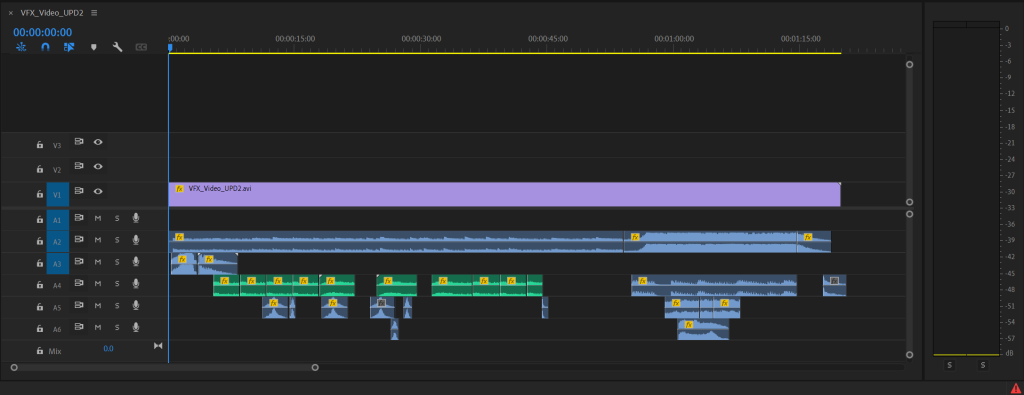
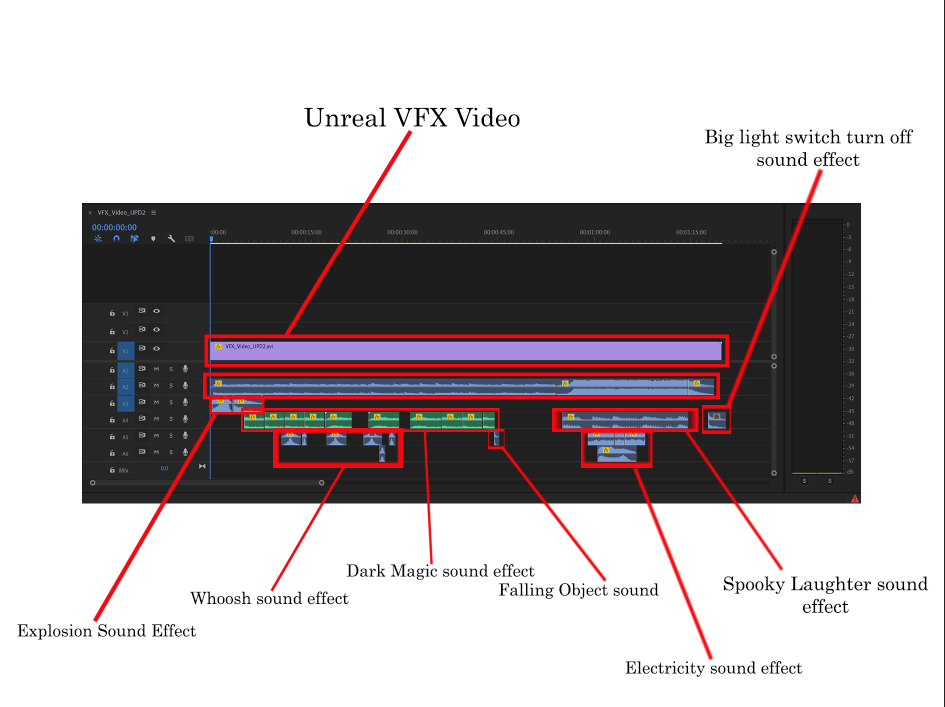
The image above shows which segment is which and where I placed them on the timeline.
Now that I have fully made the video, and I’m proud of the outcome. It is finally time to export the video into an MP4 format and post it on YouTube for all to see.
The video below is the outcome of my work.
Conclusion and Reflection
In conclusion, I am very proud of my work. I have learned a lot during this course. This includes creating VFX using the Niagar system, making the sequences on Unreal Engine, learning new techniques like the rig rail system (to get the outcome I wanted), revisiting old techniques like exporting the master sequence into a video form and having fun with creating the video on Premier Pro.
I have shown my video to many different people, family and friends. They said it was a great experience and have praised me for my efforts and determination. Very little feedback was given, which I was surprised to hear.
When I started this course, I told others what my intentions where for the theme and style of the video, and have explained what I want to happen in the video as a concept idea. They where excited to see what the final outcome will look like.
I have successfully made the concept I had, into reality and have surprisingly stuck with the main premiss. I also thought that the idea to make an opera house themed VFX video with explosions, whisps, lightning effects and moving masks was a bit too ambitious.
But I was determined and kept working, putting my full effort and attention on this course. In my opinion, I believe when I put my mind into creating projects like this, I can produce the best outcomes and love to show others what I’ve been working on.
Reference list
Video Tutorials and Sound effects/Music used
CIVAR (2023) Unreal Engine Camera Rig Rail: Crafting Immersive Cinematics like a Pro. www.youtube.com. Available online: https://youtu.be/-VpHY_aeVT8?si=UFlaM2zqwGF4iDWG [Accessed 13 Jan. 2024].
All Sounds (2018) Big Switch Sound Effects All Sounds. www.youtube.com. Available online: https://youtu.be/TjwFBwO-yiE?si=ajMV_VhkHwZuGsas [Accessed 10 Jan. 2024].
andrea romano (2010) Beethoven – Moonlight Sonata (FULL). www.youtube.com. Available online: https://youtu.be/4Tr0otuiQuU?si=mcvLM3SGPB6EO_TB [Accessed 10 Jan. 2024].
BerlinAtmospheres (2020) Falling Object SOUND EFFECT Falling Object Falls Down – Fallendes Objekt fällt herunter SOUNDS SFX. www.youtube.com. Available online: https://youtu.be/EAMEnrCsmJ8?si=tpITK9BOEo2UxTz1 [Accessed 10 Jan. 2024].
JJ Art (2021) Dark magic VFX. www.youtube.com. Available online: https://youtu.be/WM3js-UxVsI?si=Ii7LsXkNbQvh1F9X [Accessed 10 Jan. 2024].
Pandora Journey (2023) MOONLIGHT SONATA (Dark Orchestral Version) – David Eman & Pandora Journey [Epic Villain Music]. www.youtube.com. Available online: https://youtu.be/Qhlt4td3bZQ?si=pmRQmMvNuHkFng91 [Accessed 10 Jan. 2024].
Rosen Engel (2012) Spooky Sound – Scary Laugh. www.youtube.com. Available online: https://youtu.be/QpehDEmmv5U?si=3lbHa78t-cv8m6J5 [Accessed 10 Jan. 2024].
Sandra Michelle (2019) Electricity Sound Effect. www.youtube.com. Available online: https://youtu.be/TEFn1sB_XzI?si=AeNqUoALVxqvkd1_ [Accessed 10 Jan. 2024].
Septic Shark (2021) The Flash Lightning – Black Screen Effects. www.youtube.com. Available online: https://youtu.be/wTkEGYgjYVA?si=ZWiQai6urlzXfQZy [Accessed 10 Jan. 2024].
SFX sounds (2022) Cinematic Boom – sound effect – [High quality]. www.youtube.com. Available online: https://youtu.be/dz6Lp_PyX_Q?si=aKwl_VBmuAxs3kvg [Accessed 10 Jan. 2024].
Sounds Recorded (2017) Implosion Near Sound Effect. www.youtube.com. Available online: https://youtu.be/8FujlPV6J8M?si=QUULj0cBBq7Aav7o [Accessed 10 Jan. 2024].
Stock Sounds (2021) ELECTRIC SPARKS Sound Effect. www.youtube.com. Available online: https://youtu.be/fiPBgVngs40?si=IkslwgNP2UhMuYAN [Accessed 10 Jan. 2024].
The Bhavya shah (2021) 20 FREE CINEMATIC WHOOSH Sound Effects (No Copyright). www.youtube.com. Available online: https://youtu.be/Hj7-pltIVng?si=hJKCRxF7DCw-Wwa9 [Accessed 10 Jan. 2024].
Trickyz360 (2020) Explosion Sound Effect With Echo In Distant. www.youtube.com. Available online: https://youtu.be/O3ofvtnkPNI?si=HGx0k4u1ZIhnWLXQ [Accessed 10 Jan. 2024].
Breez-E Game Studios (2023) Create Dynamic Electrifying Visuals with GIMP & Unreal Engine | Step-by-Step Niagara VFX Tutorial. www.youtube.com. Available online: https://youtu.be/8obgGB5A8YA [Accessed 5 Oct. 2023].
CGHOW (2022) Magical Trails Aura in UE5 Niagara Tutorial | Download Files. www.youtube.com. Available online: https://youtu.be/ruEvaZUC7sA?si=rHiqMGixTG8ChG_g [Accessed 5 Oct. 2023].
Royal Skies (2023) Unreal5 Niagra VFX: Ribbon Trails (60 SECONDS-!!). www.youtube.com. Available online: https://youtu.be/lXPSNIak64Y?si=NkXTXetiLHleR4MS [Accessed 5 Oct. 2023].
Unreal Engine Packs
ArtcoreStudios – Environments (2022) Opera House Kit in Environments – UE Marketplace. Unreal Engine. Available online: https://www.unrealengine.com/marketplace/en-US/product/opera-house-kit [Accessed 22 Sep. 2023].
Dekogon Studios (2018) Construction Site VOL. 2 – Tools, Parts, and Machine Props in Props – UE Marketplace. Unreal Engine. Available online: https://www.unrealengine.com/marketplace/en-US/product/construction-site-vol-2-tools-parts-and-machine-props [Accessed 22 Sep. 2023].
Dekogon Studios – Props (2018) Construction Site VOL. 1 – Supply and Material Props in Props – UE Marketplace. Unreal Engine. Available online: https://www.unrealengine.com/marketplace/en-US/product/construction-site-vol-1-supply-and-material-props [Accessed 22 Sep. 2023].
Dekogon Studios – Props (2022) City Street Props in Props – UE Marketplace. Unreal Engine. Available online: https://www.unrealengine.com/marketplace/en-US/product/8162a702d7c747e9ac544dff38af78c8 [Accessed 22 Sep. 2023].
Epic Games (2018) Soul: City in Epic Content – UE Marketplace. Unreal Engine. Available online: https://www.unrealengine.com/marketplace/en-US/product/soul-city [Accessed 22 Sep. 2023].
Epic Games – Props (2022) City Sample Vehicles in Epic Content – UE Marketplace. Unreal Engine. Available online: https://www.unrealengine.com/marketplace/en-US/product/city-sample-vehicles [Accessed 22 Sep. 2023].
JessyStorm’s Assets – Props (2023) Grocery Store Props Collection in Props – UE Marketplace. Unreal Engine. Available online: https://www.unrealengine.com/marketplace/en-US/product/grocery-store-props-collection [Accessed 10 Jan. 2024].
SilverTm – Props (2019) Industry Props Pack 6 in Props – UE Marketplace. Unreal Engine. Available online: https://www.unrealengine.com/marketplace/en-US/product/3e2a3cb997cf47b1ab782a67957bfed0.
Switchboard Studios (2022) Vehicle Variety Pack Volume 2 in Props – UE Marketplace. Unreal Engine. Available online: https://www.unrealengine.com/marketplace/en-US/product/9a705589d1994c6e8757fdbedaf698af.
Moodboard Images
80LV (2020) Magic VFX & SFX. Ellie Harisova. Available online: https://80.lv/articles/unity-digest-magic-vfx-sfx/ [Accessed 26 Sep. 2023].
Agentics (2022) VFX Lightning and Sparks. Agentics. Available online: https://www.argentics.io/the-art-of-vfx-in-video-games [Accessed 26 Sep. 2023].
ArtStation (2020a) Dark Magic VFX. Gabriel Sanches. Available online: https://akashenen.artstation.com/projects/X1O8RD [Accessed 26 Sep. 2023].
ArtStation (2020b) Purple Orb. Alex Vinogradov. Available online: https://yarpoplar.artstation.com/projects/AdaWW [Accessed 26 Sep. 2023].
Dreamstime (2023) Magic VFX Illustrations & Vectors. Dreamstime. Available online: https://www.dreamstime.com/illustration/magic-vfx.html [Accessed 26 Sep. 2023].
Flickr (2015) Will o’ Whisp. Underworld Ascendant. Available online: https://www.flickr.com/photos/130354179@N07/16417722686/ [Accessed 26 Sep. 2023].
TuneDigital (2023) Magical Symbols VFX. TuneDigital. Available online: https://www.triunedigital.com/products/magical-symbols [Accessed 26 Sep. 2023].
Warner Bros (2007) Harry Potter Morsmordre. Harry Potter Wiki. Available online: https://harrypotter.fandom.com/wiki/Morsmordre [Accessed 26 Sep. 2023].
Warner Bros (2023) Hogwarts Legacy. Avalanche Software. Available online: https://store.steampowered.com/app/990080/Hogwarts_Legacy/ [Accessed 26 Sep. 2023].