Categories
Emerging Tech Emerging tech project Portfolio

Emerging Tech Project Blog Post.

Introduction

I was given a task to complete the proposed project for emerging technologies and write up a portfolio blogpost of my whole process from start to finish. I’ll include research I made for the project, any narration aspects, software proficiency related stuff (videos and screenshots and writing about what I learned about the multitude of functionality uses for the software). The portfolio will include ethical considerations. Examples include, lights and effects can attract the user, motion sickness (ways to overcome it). Also talk about what the project will achieve.

I’ll also write about forward thinking (who the project is aimed for, how it can help, future proofing the recording experience so my future self can feel more relaxed when recording my narration when it comes to post production, adding effects to the planets after making their basic shapes.

I will then later add a production piece video and will add references at the end if needed. Most of the references will be mostly the images I will use for the portfolio and some information on these planets.

Immersive Art

What is immersive Art?

Immersive art is a form of creative expression that actively involves and envelops the observer, which can be done either in person or through virtual means. The defining feature of immersive art installations lies in their ability to provide visitors with a meticulously designed, multisensory environment.

Compare 2D with 3D

The main difference is that works of 2D art exist on a flat plane, while works of 3D art are objects. Examples of 2D art are paintings, posters, sketches, comics, illustrations, prints, and photographs. Examples of 3D art are buildings, animations, wood carvings, sculptures, video games and virtual reality.

Advantages and Disadvantages of immersive art

One of the main advantages of immersive art is that it enhances emotional impact. Immersive art has the power to evoke intense emotions and provoke thoughtful introspection. As viewers become enveloped in the art’s environment, they may experience a heightened sense of emotions such as empathy and understanding.

However, that could mean one of the disadvantages of immersive art is that it may overwhelm the user (that technology is becoming more advanced as time grows and can also to lead those not liking this new way of creating art).

What I will be doing for the project

For this project, I will be creating a solar system experience with the many different planets. The experience will include a starting section that trails into the solar system. At first, the solar system would look small in size, but the user can resize themselves and zoom in to see the planets up close.

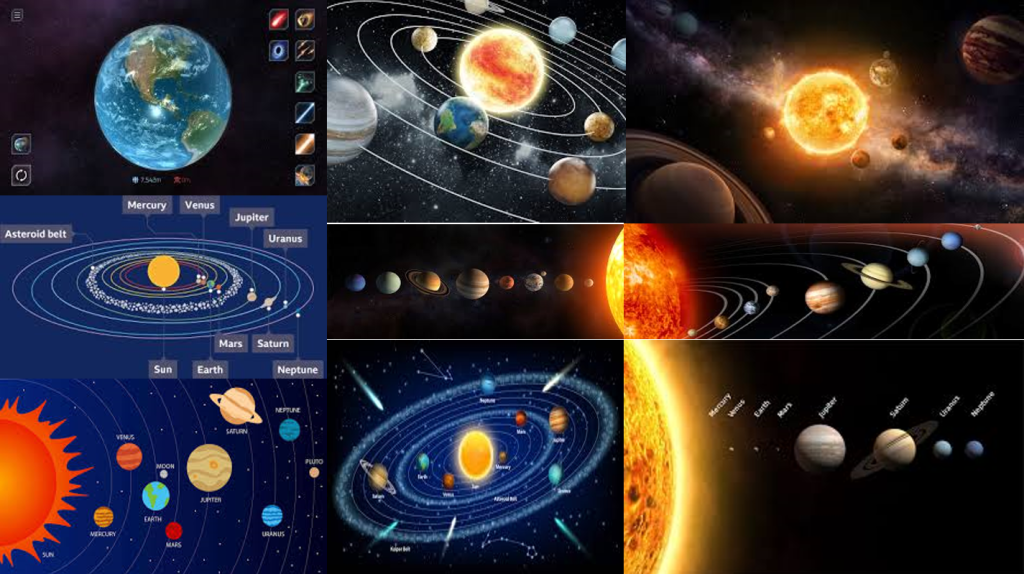
All eight planets will be created in their proportionately correct sizes on a visual scale and their accurate colour palate. So every now and again I check through multiple sources online to see each planets sizes and compare those sizes to each other and their colours. Technically eye-balling their rough sizes and colour. The solar system Ill create will start with the Sun and end with Neptune.

After I made all the planets, I did plan to record the experience and post the video on YouTube and have narration of what I did for the project and how I did it in the background. I was told however that this doesn’t make it an immersive experience. I had to change my plans a bit which lead me to the idea of incorporating AR technology within the experience.

This means I will need to turn my creations that I made in Open Brush into 3D models (lessening their quality but maintaining and making the experience immersive). Other than the solar system, I plan to make two other objects and implement them in Adobe Areo.

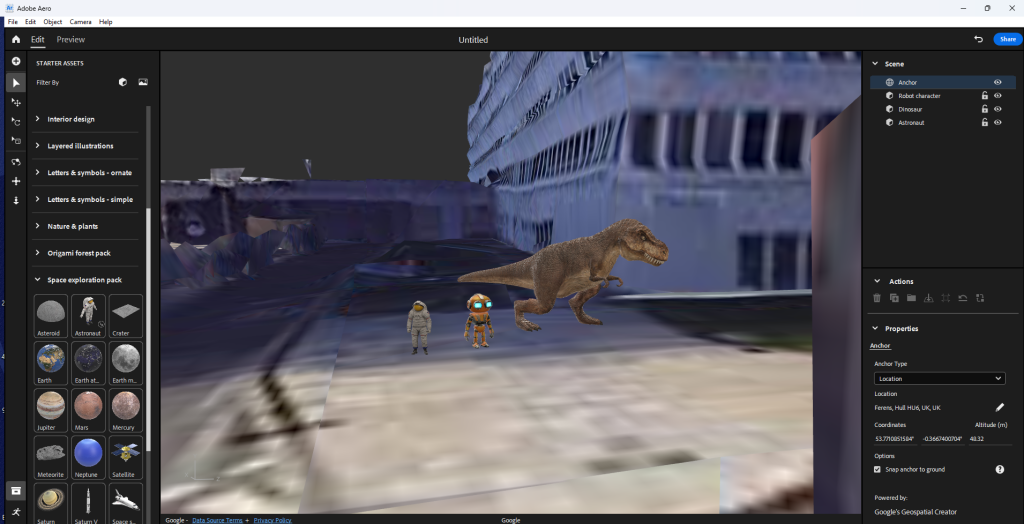
My whole trajectory of the project is me implementing my models in the real world through Adobe Aero’s location anchor setting when making a new project. I’ll then set a location for the project and place the models separately from each other. I will use a borrowed iPad to scan the Q r-code and then walk towards where I placed the models in the real world and record the models being there as part of the interactive experience.

Narration

For the narration, I will be talking about what I did for the project and explain parts of the AR experience. I will talk about where I made the models and how I created them. All the narration will be added during post production using the Premier Pro software. I also talk about what did not go right and explain how I fix those problems. Those problems included the sun being too close to the other planets and the trail would be too big if implemented to life size in the real world.

I have been inspired by our solar system and used it to create it as a project. My narration will include me talking about how I created it in Open Brush is fun and easy to do. Then turn the VR file into a 3D model and place it on the real world using Adobe Aero.

Software Proficiency

Open Brush VR

When exploring through Open Brush, I learned a lot of useful tools I can use to create the immersive experience. Those useful tools include the plethora of different brushes, each having their own textures, style and animations. For example, I can create twinkling stars or create gusty winds with one brush stroke.

I learned that Open Brush doesn’t have ready made models you can just put in and colour them. Instead the software provides basic shape grids that allow you to colour on top of with options to snap the paint tool on the graph when drawing for ease. For example, I have a sphere grid and I point my paint tool on the grid. It snaps on the face and when holding the right trigger to draw, it sticks on to the sphere face as you draw making it easy to draw a 3D shape in a 3D environment.

Also the many small but really helpful tools like the eraser tool, the undo and redo tool, colour wheel tool, select tool, the ability to move object around, to fly or teleport around the art piece, the ability to resize your self and to get closer to objects in the open brush file, the ability to save and lots more.

All the videos I have made, where recorded my entire process of making the VR art with the use of the functionalities of the headset. Also I have taken a lot of screenshots of the outcomes of each of the individual times I have worked. So I helped my future self by recording the evidence I accumulated, and use them in this blog post.

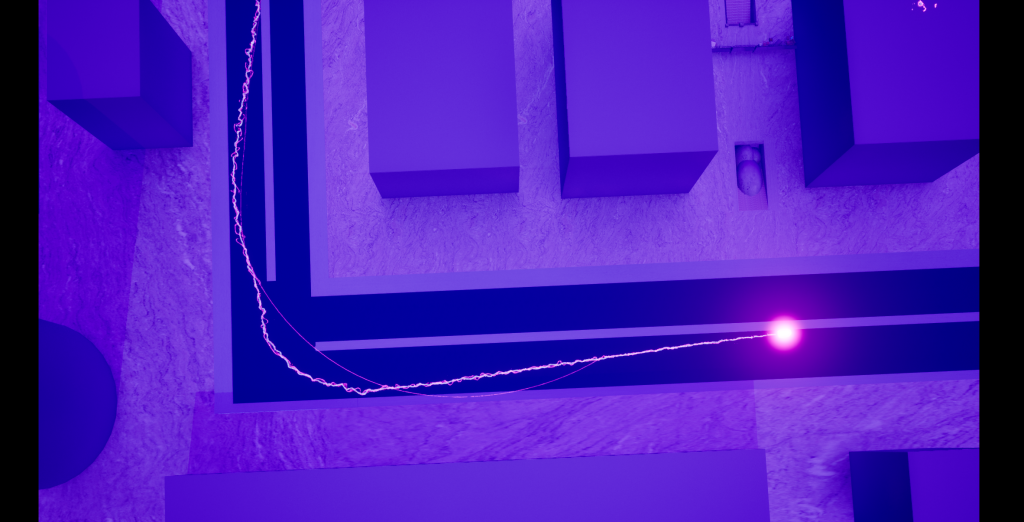
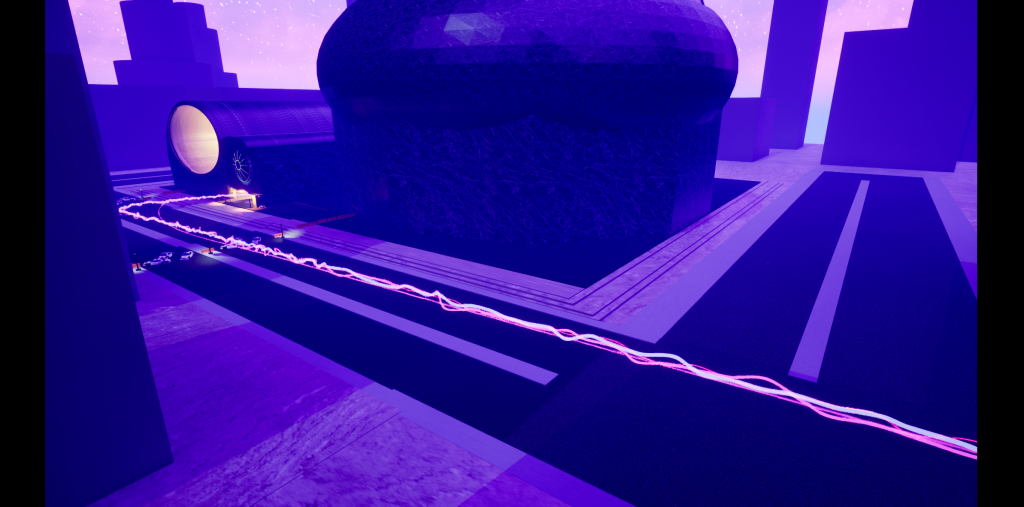
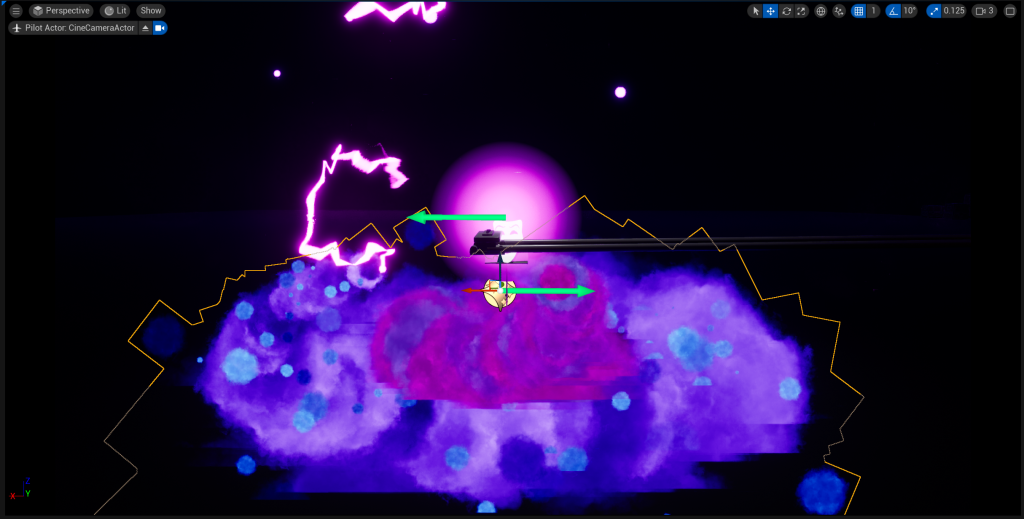
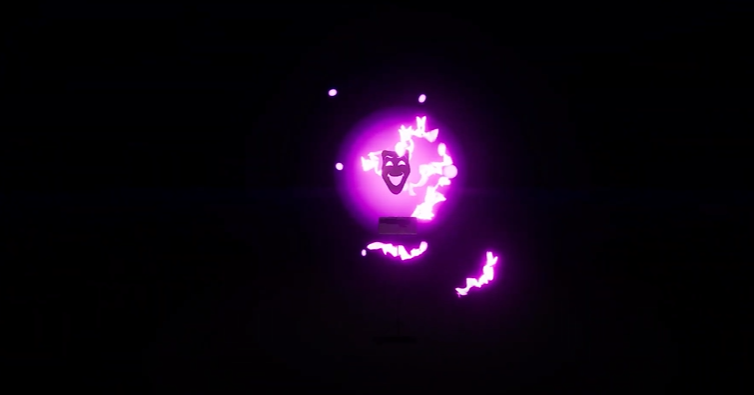
I have opened Open Brush and started working on the project. I was exploring and experimenting with the many brush strokes and tools of this software. I set up the scenery (it being dark and mysterious). Firstly I created a trail that leads to the solar system. I picked specific brush strokes. The strokes I used resembles that of Rainbow Road in Mario Kart Wii.
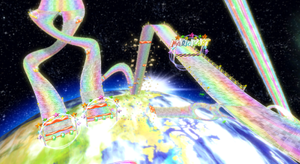
I wanted the experience to look mystical as well as factual. Since I planned to just record the art that I did as a video, It would look really cool as it has it’s effects. I used brushes that light up, zap, create stars, have prismatic colours and effects.
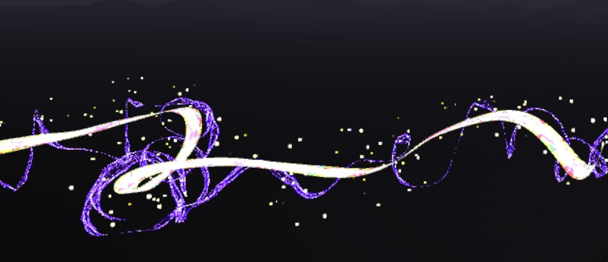
VR Project Ep1

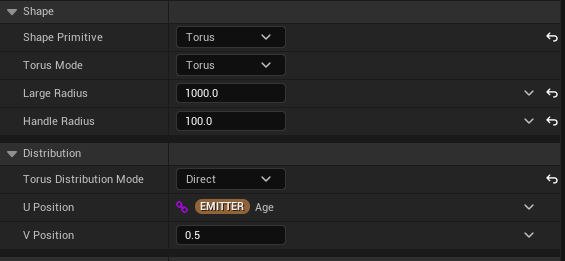
The video below shows the first few moments of me creating the experience in the VR software Open Brush. It shows me creating each of the planets, stars and other space related stuff. I found out within the software that it didn’t have a torus shape model or grid so I had to implement one that I made on a 3D model software. The torus shape allows me to map out and understand where planets go on the orbit, providing me with guidance to create hand drawn rings and an overall placeholder for the art and will be removed once the art is done.

When doing each of the planets Sun, Mercury, Venus and Earth, I focussed on making each of those planets look unique and special. For example, for the Sun, I used a fire brush tool with the colour picked being orange, a charcoal brush with a dark red to mix with the sun’s colours. For Mercury, I chose a marble like brush with the dark grey colour picked and the charcoal brush with the black colour picked.

For Venus, I chose a smooth brush with the colour being gold and a fuzzy brush to add texture to the planet with the colour being dark gold to match. And finally for Earth, I chose a wet brush and chose a light blue colour to create the water for the planet, a smooth brush with a vibrant green for the land, the same brush with a dark green for the greenery variety, and a dry brush with light yellow colour to represent the dry parts of Earth.

VR Project Ep2

When creating the planets Mars, Jupiter, Saturn, Uranus and Neptune, I focussed again on making each of the planets unique with each other. Again using different brushes and changing styles when creating each planet. For example, Jupiter as a gas giant would need to look windy but from a distance a solid. So what I did to create the planet is choose the brush stroke that fits, preferably with wind-like texture. Next, I chose colours that match with our real-life Jupiter and painted ring like patterns up the sphere grid creating the wind like texture Jupiter has.

When creating Saturn, I used a smooth brush with a yellow colour pallet to create the spherical object using the sphere grid. I then used a new technique that I haven’t used for any of the previous planets (and unfortunately forgot to record beyond that point). What I did was I used a wind texture with colours light yellow and dark brown and did the same Jupiter (creating ringed patterns around the planets) but since I used an animated wind texture, the planet will looked animated with swirling winds going around it. After that, I have added the torus model and used it to draw the ring around Saturn with the wind brush (this took some time as it wasn’t a grid I can snap with my brush tool as I am just painting on top of the model with my shaky hand.

Uranus was made using a cyan colour with the wet paint brush tool similar to when I made earth. I used the torus model again to help me visualise where to draw the ring. Uranus’ ring is vertical not horizontal it’s a lot thinner than Saturn’s and it’s white. For Neptune I used the wet brush stroke again. Unlike Uranus, It’s colour is more of a dark blue.

Since I made the mistake of forgetting to record the times when I finished Saturn and it’s ring, Uranus and it’s ring and Neptune, I have recorded a final bit at the end of the video bellow showing all the planets I made and the changes I have done.

Some of those changes include removing the trail mainly because I will not work well in a AR environment due to size changes and convenience. So I replaced the trail with two comets zooming on the outskirts of the solar system.

Other VR art I did for the AR experience

I have used the headset functions to record and take screenshots of my entire process of making the VR art. From creating previous artworks using the VR software, I have learned a lot and understand most of the tools included. Since my trajectory for the project had changed slightly, I decided to work on creating two other VR art that will turn into models. A satellite and a UFO alien space ship.

Satellite

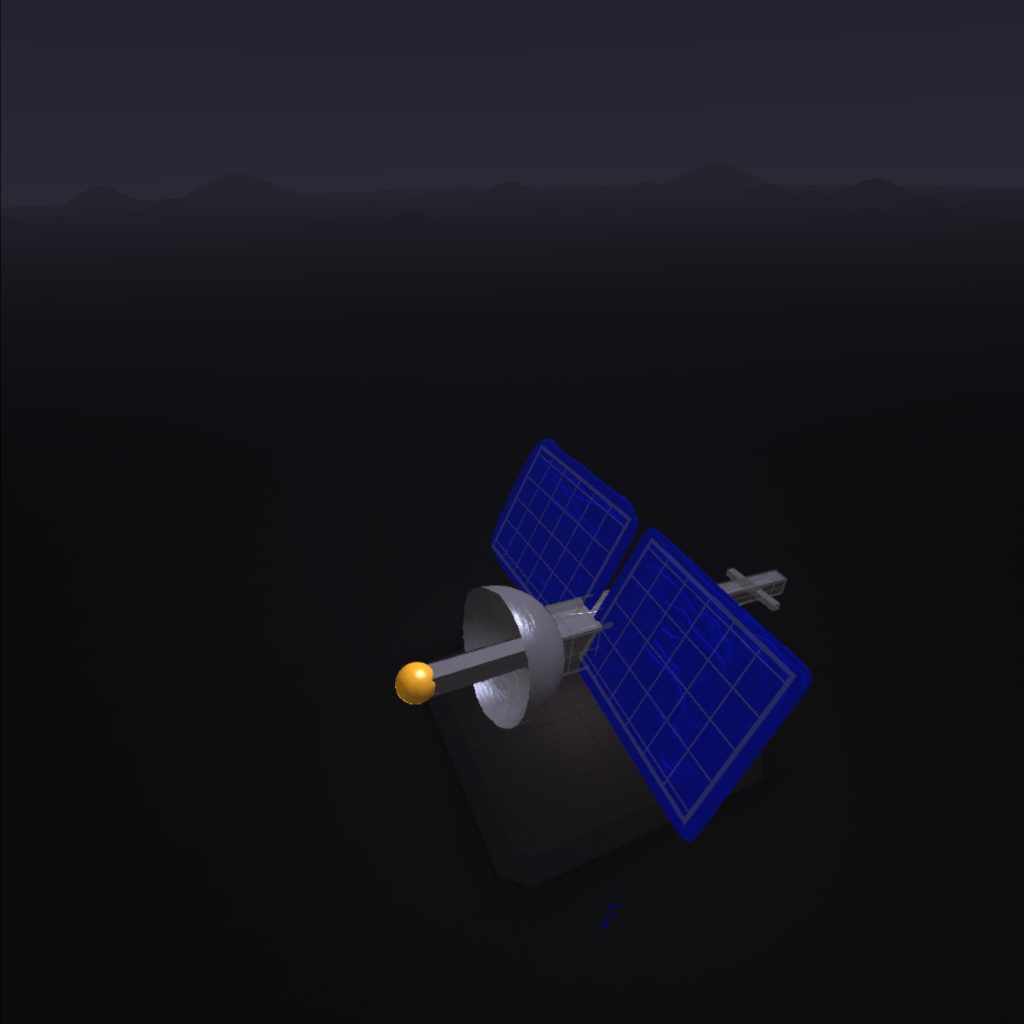
For the satellite, I used a wet paint brush and used the grey colour to create a metallic texture for most of the satellite model. The main way I created the shape of the satellite is the use of grids. Grids help me snap my brush tools to the surface of the shapes to easily create clean shapes with few struggles. I used two sphere grids. One for the dish that points towards the solar system. The other the gold antenna. I used six different cuboids to create the main body of the satellite and the tail and stuck with the metallic grey I chose for the dish. Finally, for solar panels, I used plane grids and with the royal blue colour with the brush being a wet paint texture.
UFO

For the UFO, I used a wet brush tool again for both the base of the metallic parts of the alien space ship (using the grey colour) and the green glass dome of the ship (using the lime green colour). I used the software’s grid tool to create the shapes using paint brushes. I did think of adding some brush effects that goes around the alien spaceship. Those effects include, plasma brushes. After I tried applying the brushes I didn’t think it looked well so I just went with the UFO object. I did try to add some shading on the dome part of the UFO and the side. It genuinely looked better.
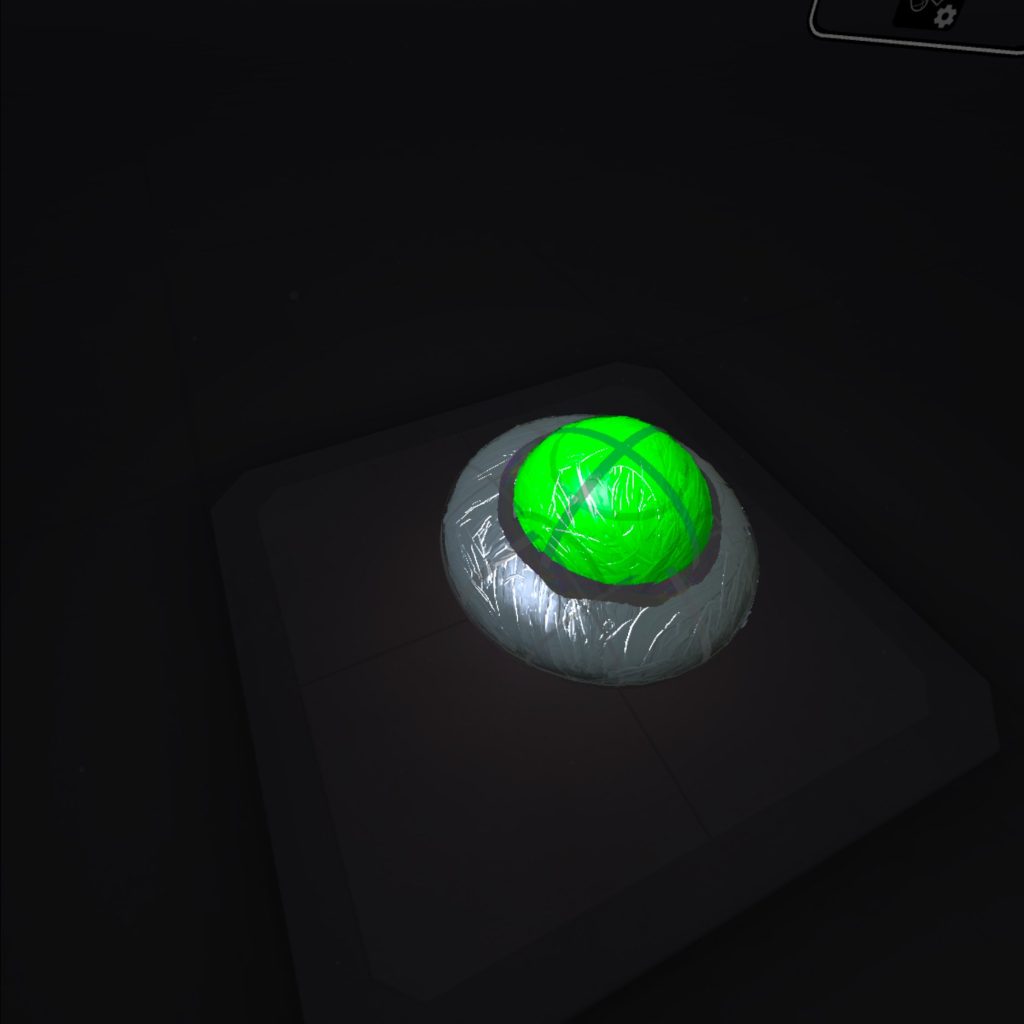
UFO and Satellite making

Adobe Aero

This segment of the practical project was mainly trial and error. It gave me around 8 different tries to get it right with different ways I tried to record the AR experience and successfully scan the scene. So I’ll explain how the process went and finally get to the solution.

Before I placed the models into Adobe Aero, I had to export the files into folders and zip those folders up for transport. I used Microsoft Teams to send the files to myself and import the glb files with the folder and put them in Adobe Aero.

Within the software, it gave me the option to either go for Image Anchor, Location Anchor or Surface Anchor. I did plan to choose image anchor but it didn’t work due lighting problems and since Adobe Aero was at it’s beta version, the software itself isn’t that advanced.

When creating the Adobe Aero file, I imported the three glb files of each of the VR art converted into models. I added the solar system model, the UFO model and the satellite model. AR art can be a bit inconsistent and can be difficult to get right. So going into this part of the project, I expected some trial and error when scanning the Q r-code given to me, going to the location and record the scene.

When implementing the models in Adobe Aero, I wanted the location of the models to be in a park area near where I work of course so I don’t need to run back to the computer I worked from as much when it fails. The park area is nice and not that busy. When I scanned the Q-code and went to that area, I had trouble scanning the area. I did this around five times and realised that the trees in the park area looked different to what’s in the AR software making it struggle to figure out where I am in the real world when I scan.
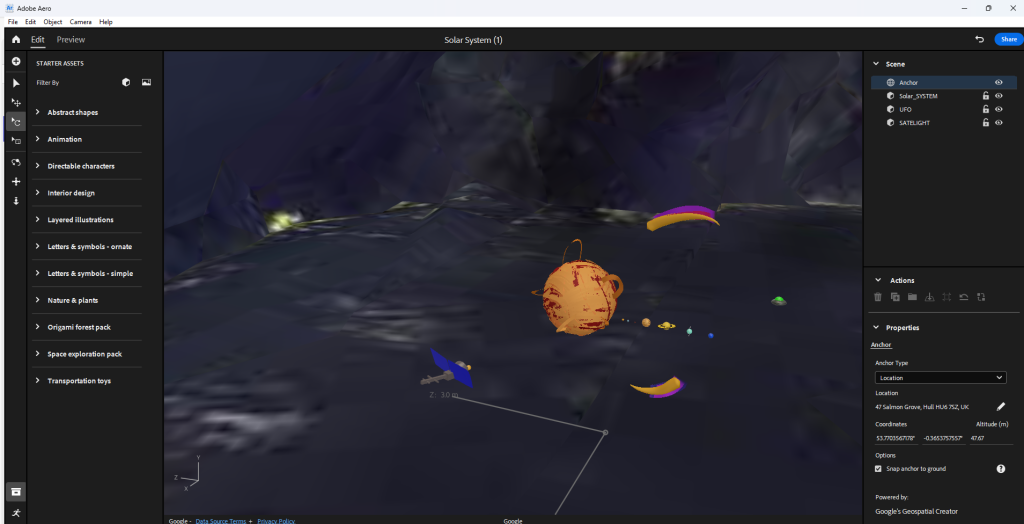
This lead to me changing the location of the models to an area that looks similar to the software. Also since the software is old, it would mean that I need to pick a location that’s been there at least more than 50 or 20 years.

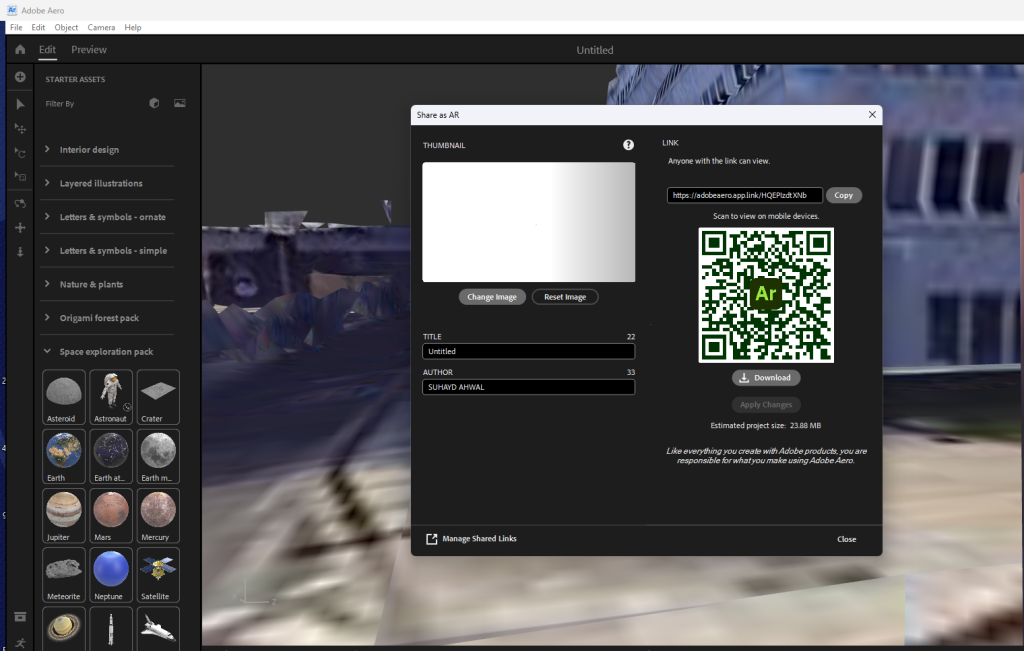
So I changed the location to a more recognisable area and placed the models near some buildings that has been built for more than 50 years. I then pressed the blue share feature button that allows the software to compile everything into a Q r-code. When I scanned the code and went to the location to pan around, the model refuses to load for some reason.

There could be a lot of factors to why this is the case. This includes; weather, satellite interference and some environmental factors that go from buildings being built or destroyed to tree leaves not being fully grown.
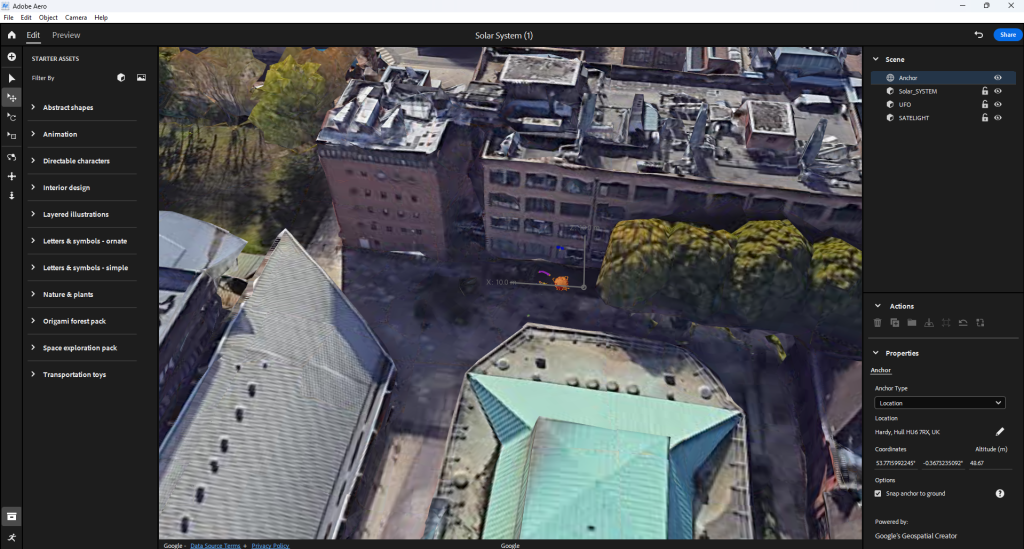
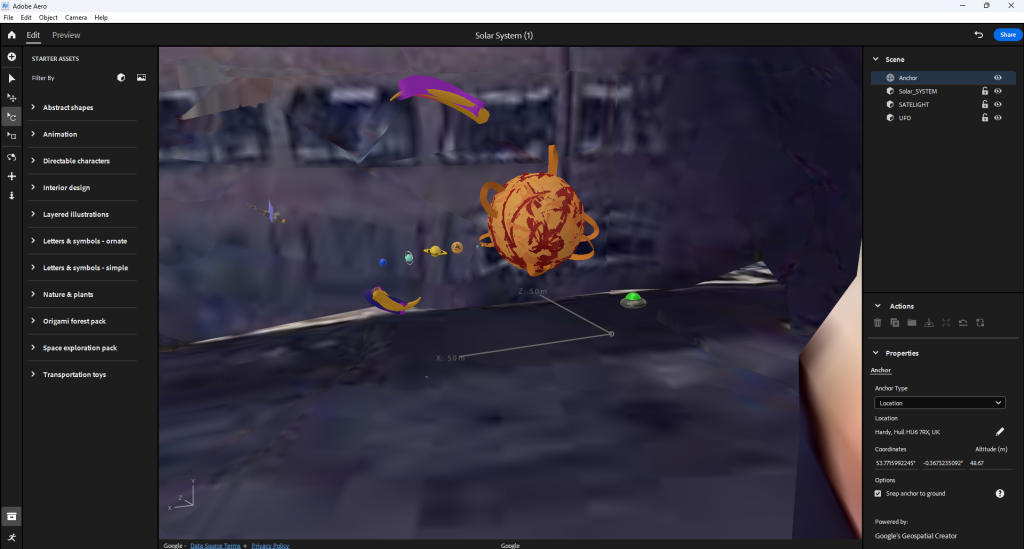
Thanks to previous experiences with AR, testing and experimenting, I do know of a place that works 100% of the time. I was also told maybe to separate the UFO the satellite and the solar system from each other and make the experience more immersive by creating a long line of artworks a far from each other.
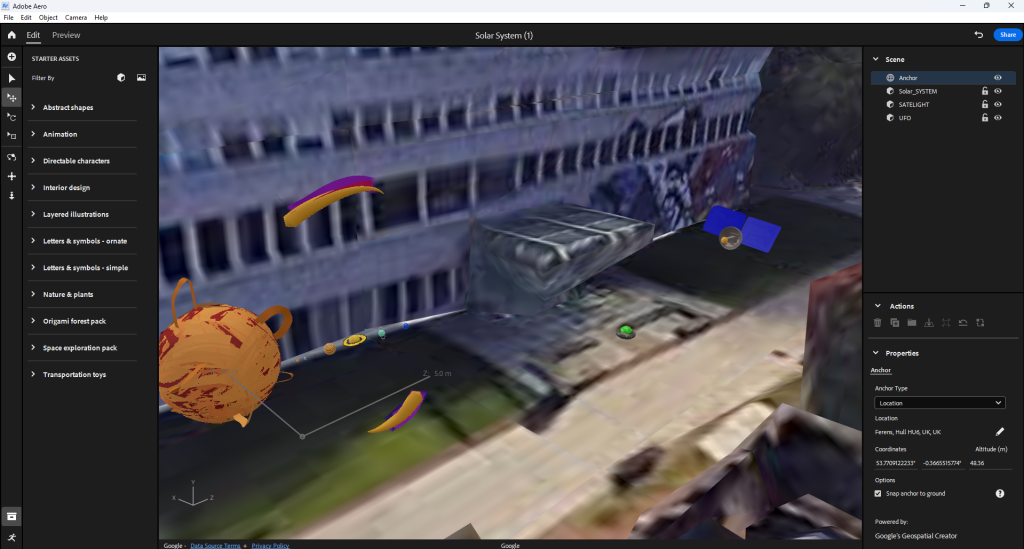
When compiling the scene together and scanning the Q r-code, I went out to check if it’s working. Sometimes when I do check if the AR scan works, I get issues where the models are in a completely place. This is due to the software being buggy and the AR functionality being less advanced.

Further more, I learned that separating the models actually make it worse in terms of calibration. When I walk up to the first model and then walk to the second and then the third the whole AR experience flips and puts all of the models in a completely different area. So, what I did to fix the issue is put all the models together and record the whole thing.
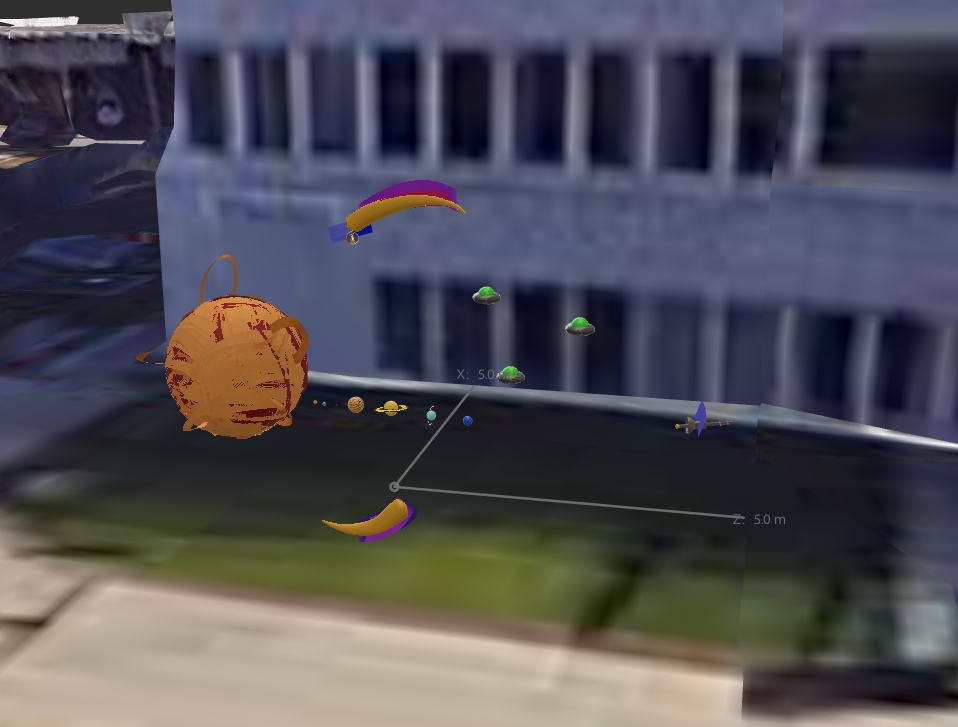
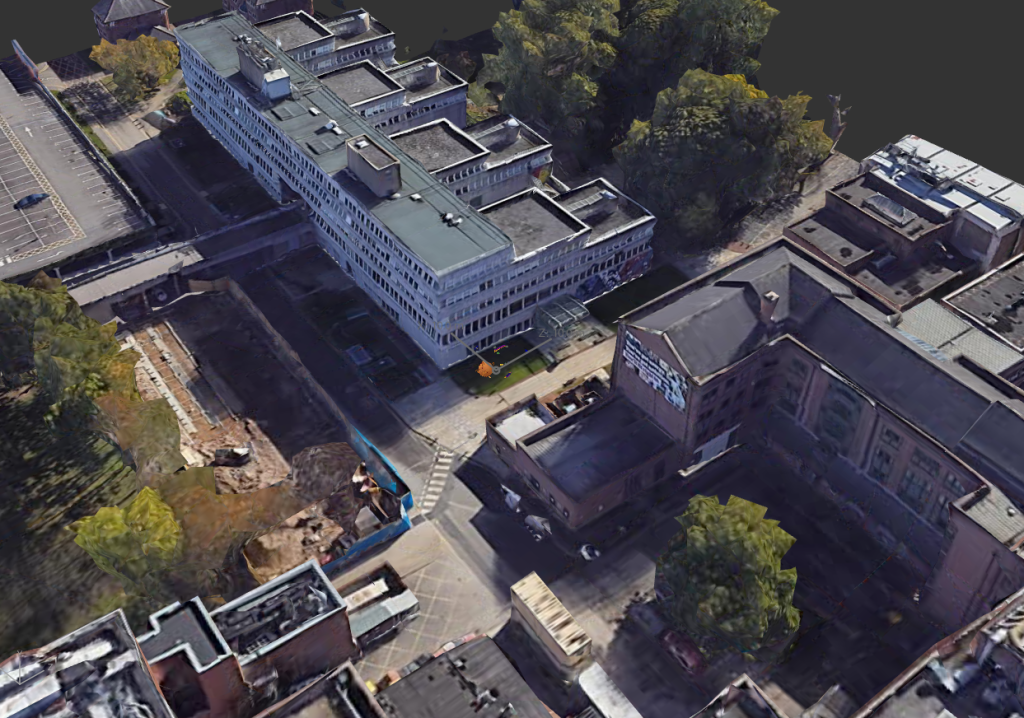
Q r-code

(Just in case you want to see it but it’s only in that location and it’s difficult and a huge pain to experience it. I recommend you just watch the production video below)

Ethical Considerations

The user will be able to use Adobe Aero to scan a Q r-code and go to the specified location for the model to load. The user will be able to walk towards the model and circle around it. The Q r-code will be sent to me on Adobe Aero so it’s completely safe to use.

  • It being an AR experience makes it easier for the user to traverse the scene. They don’t need to travel too far making it safe for the user if in a safe environment.
  • Also the controls to scan the Q r-code and scan the area marked on the map is pretty intuitive and easy to understand once the set up is done and all the models are present.
  • Since it is an AR experience, motion sickness won’t be a factor to be concerned about due to the user is familiar to his or her surroundings
  • The light trail won’t be added to model as it dwarfs the solar system (or it makes the trail too big.

Forward thinking

Since the project is aimed to educate others and also children about our solar system. There are three models I have created for this AR project. One, is our solar system (this may inform others on what each of the planets look like, how many there are, where there at in relation to the sun and there individual sizes).

Second, is a lone alien space ship (even though the thought of the existence alien life may seem silly and weird to think about, but in reality we don’t know if there are extra terrestrial life living beyond our planet). Emphasising a sense of mystery within the immersive experience.

Third, is a highly advanced satellite (this may inform others that our technology continues to expand with new discoveries and revelations) who knows maybe we’ll get to a point where we find another habitable planet with new species or minerals to utilise for the betterment of human kind.

In terms of forward thinking, when I place the VR made models I created into the location I plan to set, I’m going to record the out come of the AR experience. When recoding, I’ll need to make sure that I’ll take my time with it so when narrating in post production, I won’t feel rushed to say a few things about each of the models I did for the project.

Production Video (Narrated)

Production video (Un-narrated)

Reference list

BreakingCopyright (2021) Epic Sci-Fi & Cinematic (Music for Videos) – ‘Ultra’ by Savfk. YouTube. Available online: https://www.youtube.com/watch?v=8-c4hT35BRg&list=PLfP6i5T0-DkKqBmz_qzJtZOmlbO7CHlVD [Accessed 11 Dec. 2024].

Charlotte (2018) Visual Arts: Definition, Elements, 2D Art vs. 3D Art, Filmmaking, Game Design. Abstract Art Paintings by Carmen Guedez. Available online: https://cgmodernart.com/art-articles/visual-arts-definition-types-elements-2d-art-vs-3d-art-filmmaking-game-design [Accessed 22 Nov. 2024].

Kart, M. (2023) Rainbow Road (Wii). Mario Kart Racing Wiki. Available online: https://mariokart.fandom.com/wiki/Rainbow_Road_(Wii) [Accessed 4 Dec. 2024].

Kozlowski, M. (2021) What is Immersive Art? | A guide to art terminology. avantarte.com. Available online: https://avantarte.com/glossary/immersive-art [Accessed 22 Nov. 2024].

marianagaro (2023) The Marvelous Benefits of Immersive Exhibitions – TrackIn. TrackIn. Available online: https://trackin.tech/the-marvelous-benefits-of-immersive-exhibitions/ [Accessed 23 Nov. 2024].
Categories
Lab Exercises Research proposal

Crafting Your Emerging Tech Project with the Research Project

Introduction

I have gained a lot of experience throughout the lab sessions. I have received and experimented with different software. Those lab sessions include 360 video making, MASH video making, using FrameVR, making AR experiences and experimenting with multiple different VR art software.

I have made my choice in what software I’m going to use for the future project I’m creating. When experimenting with the art software, I came across a software that really stuck out to me as a creative designer. It’s fun, intuitive and easy to learn through time.

The software is known as Open Brush. Open Brush lets you paint in 3D space with virtual reality. To unleash your creativity with three-dimensional brush strokes, choosing from a wide palette, of brushes, including stars, light, and even fire. Your room is your canvas. Your palette is your imagination. The possibilities are endless.

Two Ideas I had whilst brainstorming on the project

  • A Solar System VR experience (that teaches players about the different planets in our solar system)
  • A WebVR portfolio (that focusses on trash waste in polluted oceans)

Research Overview

I decided to go for a Solar System experience which means my research will consist of our solar system and almost everything about it. it will include the planets Sun, Mercury, Venus, Earth, Mars, Jupiter, Saturn, Uranus and Neptune, what they look like and where they’re at on the solar system. The experience itself would have small fact boxes, a visual or audio that will tell some planet facts to the user.

Also the planets will have proportionally correct sizes to each other and the looks of the planets needs to be true to what they are. This is another thing I needed to research on that aspect.

In terms of visuals, the user sees a light path that leads to the solar system that is floating on top of a pillar or table. I would need to test out if I can mask the table out when the user flies deeper into the solar system. This will also count as research in my project.

Ethical considerations (what does it aim for?)

  • The experience needs to be factual as our solar system is a real thing and it could teach the user some fun and light facts. Also since this is meant to be a fun experience, adding lots of factual writing and information can be boring for the user
  • Also having wrong information about the solar system is not a good thing to have when your teaching others about the solar system because it may break the immersion
  • The user at one point does need to use the fly function in Open Brush to fly into the solar system in order to see the planets close up. This can provide a more in depth view on what the planets look like and the user can look around it not being only tied to looking at it one way
  • The experience it self can be viewed in both flying and teleport so motion sickness can be reduced if the player uses the teleport feature. Since the teleport feature is an instant travel, you won’t feel much motion sickness because the brain isn’t receiving conflicting signals about movement in the environment around you
  • The user will be guided visually throughout the experience with the use of brush strokes or in my case stars or space dust to fit with the theme of the solar system level. In most game design, the light helps direct the player’s eye, highlight contrasts, and show key focal points. The place that a player should go as well as what awaits them there. The lighting also creates an atmosphere that evokes certain emotions and a “wow” effect.

Possible fear of hights

My experience of flying through the solar system could make the user have some induced fear of heights. When they look down they see the endless void below. This could be a problem for some users because it may make them not want to experience the idea of falling.

As flying in VR can give others motion sickness and or induce potential fear of hights within the experience, I have thought of a way to fix this issue. Having the user sit down on the floor or on a chair, can provide enough comfort and stability for the user.

Movement

In terms of movement the player will either use the fly function or teleport function in Open Brush and will be visually guided using colour or light. I found out that creating a visual or trail to guide the user can be just as successful in guiding a player or user to something than using text.

The user gets introduced to the many planets starting from the sun and ending on Neptune in a chronological order. The trail will also go from the start of the experience to the end of the experience.

Project scope and objectives

This project’s goal is to teach and show the user a greater understanding of our solar system and it’s many planets. It will be a light experience where the player can learn about the different planets and view them either from a distance or close up with a decent visual accuracy.

It may also create an awareness of other planets we are yet to explore and that our reality is currently orbiting into the endless void of space. It can also provide a nice way to teach children the solar system (possibly hinting to the user that their might be new undiscovered planets) experiencing the planets up close is a great way to teach others even at the comfort of their own home.

Also since VR headsets are available to everyone around the world, It can provide an immersive teaching experience.

Key Objectives

  • The user can fly/ teleport through, a solar system experience to teach the user of the planets I create
  • I want the user to gain an understanding of our solar system and immerse them into a fun experience
  • I want the user to be immersed whilst avoiding motion sickness. A way to counter motion sickness is for the player to choose from flight mode or teleport mode. And the project mainly being still and simple it won’t overwhelm the user
  • To create a fun immersive experience about the solar system whilst understanding the different tools used in Open Brush to help me create an experience

Research of Concept

In here, I will talk about the research I have made when thinking about this project. I will also include some research images and inspiration of my ideas. Mood boards will also be added into this research section.

With the Images I found, I want the experience to be whimsical in terms of visuals (as the user goes through the system and looks at the majestic planets close up) and I want it to remain factual by creating the orbit rings, maintaining correct size proportions of planets within the system and maintaining the correct colour palate for all of the planets.

Looking into user movement and limiting potential motion sickness, I decided to make it so that the planets are all ready aliened so the player/ user can move from one planet to the next (following a trail) without much need for extreme movement (going from one end of the system to the other if the planets are orbiting at there own pace).

For a factual standpoint, the user can learn about the planets with the visuals provided (where the planets are at within our solar system, how big they are in relative to each other (of course proportionally accurate sizes) and what do they look like. Some light text could be involved to teach the user more about each planet.

Or another idea would be that I would narrate the facts to the user during post production instead of just using text boxes.

I want the user to have a nice overall experience with the solar system by toning down the facts (so it won’t be too much for the user) and the visual style can be pretty basic but nice to look at (not to overstimulate the user with complex designs and structure).

I did however, consider adding Pluto as the 9th and final planet in the solar system experience but after researching on multiple sources online, I found many that say that Pluto is no longer a planet anymore due to it technically being a dwarf planet.

So with that research made, I decided not to add Pluto in the solar system and plan to make Neptune the final planet in the solar system. It did feel strange though because as a kid I’ve always learned that Pluto was the final planet and ending on Neptune feels weird.

Project Plan

My overall plan for this project is to create an experience where the player can explore our solar system with the use of a VR art software called Open Brush. The user get to see the Sun, Mercury, Venus, Earth, Mars, Jupiter, Saturn, Uranus and Neptune. This will include planets that will be proportionally correct in size to each other, the look of the planets needs to be similar to what most facts and sources state otherwise It may brake the immersion of the experience.

I will also add the orbit rings around the sun so I can place the planets on those rings. Even though the rings aren’t present in our solar system, I wanted to add them for a few reasons; to allow me to figure out and measure where and how far the planets needs to be from each other (also in relation to the sun) and to link back to almost every illustration about the solar system in existence having the orbits in my experience can remind the user that this experience is to teach them the basics of our solar system.

Another way immersion could break in my VR experience is that the user my stray from the path I lead it in my experience. This a lot harder to fix from a functional aspect, but If I created a path this may avoid the user from straying from the path. I have a few ideas to avoid this from happening.

  • Make the trail look visually attractive by adding some noticeable light effects and nice smooth colours
  • Beyond the solar system will be an endless black void (having that, may make the user hesitate to wonder aimlessly into the void)
  • Make each planet feel good to look at by adding effects, light sources or have attractive colours (whilst maintaining accuracy)

The experience will help the user passively learn more about our solar system. So by creating this experience, it will guarantee not only a fun experience for the user (letting the user see the accurate planets I create and the VR functions allowing the person fly around the planets) but also learn more about the planets first hand by seeing what they look like and their size difference.

The user starts off in a dark void and theirs only a singular light path that leads you to a small solar system that the player can fly into and experience it in full size (if they want). This basically makes the user feel like a god as they fly or teleport through the solar system. As the player/ user explores and feels lost they can always follow the light dust stream floating in space.

They start off with the sun, seeing a boiling hot ball of magma and work there way through Mercury a planet that looks grey, Venus a very hot planet despite being further from the sun, Earth being habitable of life, Mars being red due to being covered in iron oxide dust, Jupiter being a gas giant and having a large diameter being eleven times the amount that earth has, Saturn being intangible and it’s rings aren’t solid, Uranus being made of mostly water, ice, methane, ammonia and a small rocky core in the middle, and Neptune’s tone of colour is slightly different (Neptune being a darker blue colour compared to Uranus being a cyan colour, it is also made up with water, ice, methane, ammonia).

Post Production

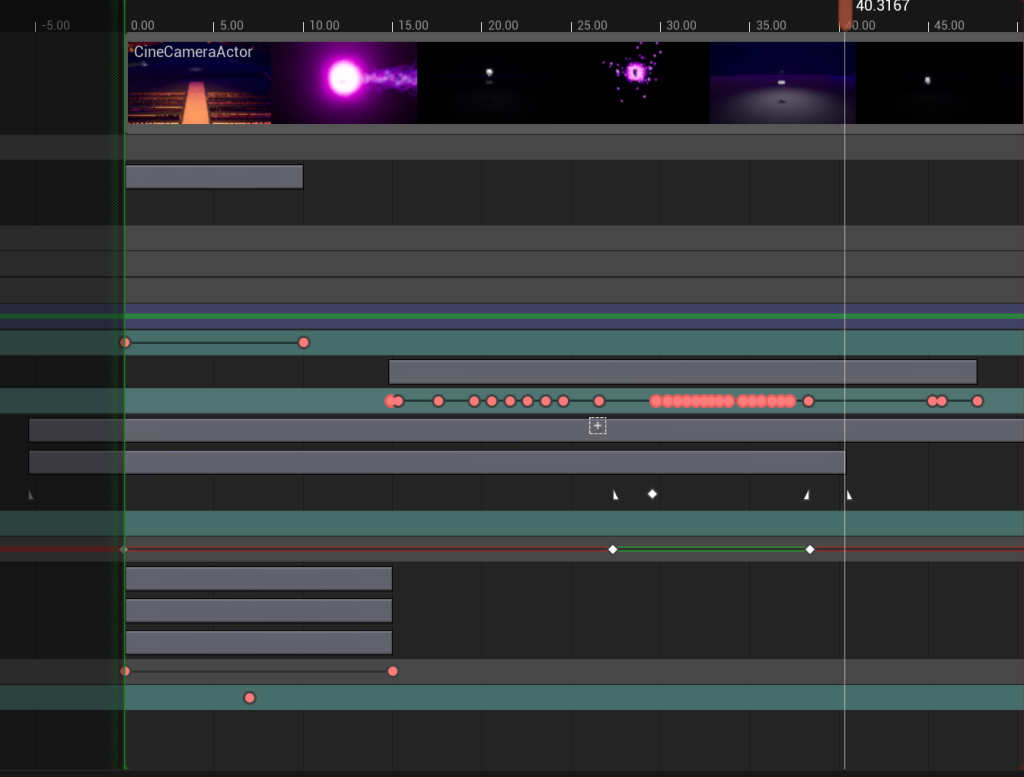
For the assignment, I need to record and post a video link of the experience in a production blog post. The software (that I will be using to make the video) is Premier Pro. Here I will edit the video and with the help of OBS (a general recording software) I can also record and implement my sound into the video. I might be adding a constant relaxing music and a voiceover talking about the facts of each of the planets. After that I’ll post my video on YouTube.

Concept Storyboard

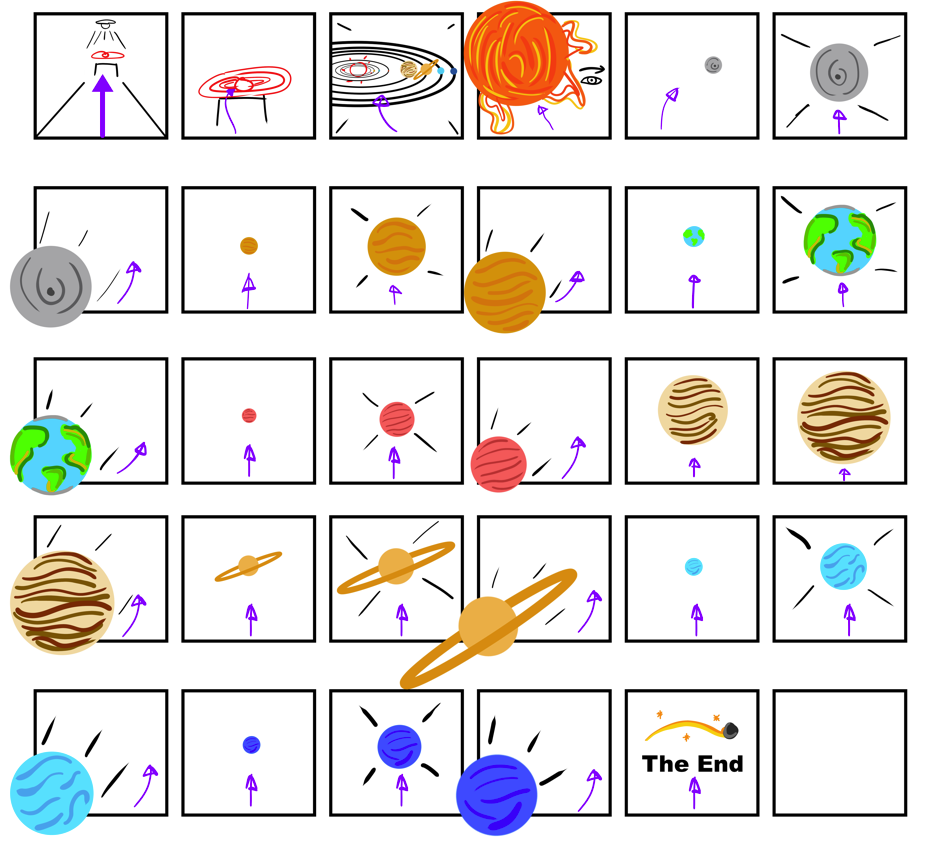
I created a rough storyboard for the VR experience that shows everything from start to finish. The software I used to create this story board was Photoshop. It is the preferred software I can use to create basic mock ups of my idea.

I also colour coordinated some key parts of the storyboard for example, movement (the purple arrows shows where the user goes and what they will experience when they follow the arrow or in their case a trail of some sorts to each segment of the experience chronologically) key objects are coloured red, (to signify importance) black to show certain camera controls (how I perceive the experience should go) and all of the planets drawn are coloured to their respective looks to create a difference within each of the storyboard segments (if the planets where monochromatic in colour, they can look pretty boring as the scenes look similar to each other throughout the storyboard.

When creating the storyboards, I used a new technique to create a sense of depth within a storyboard (even though storyboards are meant to be used for video and picture style forms of media and entertainment). That technique was to have the box surround the scene, not apply in some certain scenes of the storyboard. Those scenes include how the user passes a planet to go to the next planet. Having an object or scene exit the box adds some depth into the storyboard and naturally feels strange because that’s not how usual story boards work.

But for a VR experience, It can work that way and can give others a better understanding of how the experience should go. The storyboard Starts from top left and ends at the bottom right where it says “The End”.

Creating this story board gave me a better understanding of what my experience should look like and also helped me to realise what I needed to do VR art wise. Those Include what planets to create, (Mercury, Venus, Earth, Mars, Jupiter, Saturn, Uranus and Neptune) how big the experience is (walking up to the mini solar system and flying into the experience and seeing the planets up close in their proportionally accurate size) and an overall fluent rundown of the entire project. It also made me realise how simple and straight forward my experience may seem.

Production Timeline (Excel)

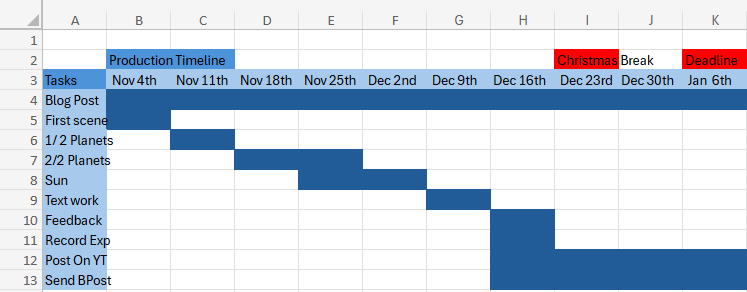
This is my very rough production timeline of tasks I needed to finish before the deadline. At first I struggled in creating this because I always think too literal when doing something like this where I wonder If I can do these tasks in the time or not and ending up being concerned for the future.

But I realised when I finished this timeline in Excel, I felt I gained a better understanding of how I will complete the VR experience and knowing that I have technically 3 months to complete it and thought about each of my tasks, I felt a little more confident in my self to finish those tasks.

Those tasks include the blog post itself, the first scene (where the user starts), planet progress, text work progress, feedback, recording of experience, post recording on YouTube and send the portfolio blog production post.

References

Websites

Brush, O. (2020) Open Brush. openbrush.app. Available online: https://openbrush.app/ [Accessed 29 Oct. 2024].
NASA (2023a) Neptune – NASA Science. science.nasa.gov. Available online: https://science.nasa.gov/neptune/ [Accessed 29 Oct. 2024].
NASA (2023b) Venus – NASA Science. science.nasa.gov. Available online: https://science.nasa.gov/venus/ [Accessed 29 Oct. 2024].
NASA (2024a) Facts About Earth – NASA Science. science.nasa.gov. Available online: https://science.nasa.gov/earth/facts/ [Accessed 29 Oct. 2024].
NASA (2024b) Mars – NASA Science. science.nasa.gov. Available online: https://science.nasa.gov/mars/ [Accessed 29 Oct. 2024].
NASA (2024c) Mercury – NASA Science. science.nasa.gov. Available online: https://science.nasa.gov/mercury/ [Accessed 29 Oct. 2024].

NASA (2024d) Saturn – NASA Science. science.nasa.gov. Available online: https://science.nasa.gov/saturn/ [Accessed 29 Oct. 2024].

NASA (2024e) Uranus – NASA Science. science.nasa.gov. Available online: https://science.nasa.gov/uranus/ [Accessed 29 Oct. 2024].
Nasa, N. (2024) Jupiter – NASA Science. science.nasa.gov. Available online: https://science.nasa.gov/jupiter/ [Accessed 29 Oct. 2024].
Thompson, S. (2020) Motion Sickness in VR: Why it happens and how to minimise it. virtualspeech.com. Available online: https://virtualspeech.com/blog/motion-sickness-vr [Accessed 29 Oct. 2024].
Universe, W.R. (2024) Using light and color in game development: a beginner’s guide. MY.GAMES. Available online: https://medium.com/my-games-company/using-light-and-color-in-game-development-a-beginners-guide-400edf4a7ae0 [Accessed 29 Oct. 2024].
Images

Ashwin (2015) Why Is Pluto Not A Planet Anymore? Science ABC. Available online: https://www.scienceabc.com/nature/universe/journey-of-pluto-why-it-lost-its-status-as-a-planet.html [Accessed 29 Oct. 2024].
Bartlett, R. (2022) 8 Things You Need to Know About the 8 Planets in Our Solar System | High Point Scientific. www.highpointscientific.com. Available online: https://www.highpointscientific.com/astronomy-hub/post/astronomy-101/8-things-you-need-to-know-about-the-8-planets-in-our-solar-system [Accessed 29 Oct. 2024].
BBC Bitesize (2022) Features of our solar system guide for KS3 physics students – BBC Bitesize. BBC Bitesize. Available online: https://www.bbc.co.uk/bitesize/articles/zxyw7yc#zd6g8p3 [Accessed 29 Oct. 2024].
FunKids (2016) Top 10 Facts about The Solar System. Fun Kids – the UK’s children’s radio station. Available online: https://www.funkidslive.com/learn/top-10-facts/top-10-facts-about-the-solar-system/ [Accessed 29 Oct. 2024].
Games, P. (2021) Solar Smash. Google.com. Available online: https://play.google.com/store/apps/details?id=com.paradyme.solarsmash&hl=en_GB&pli=1 [Accessed 29 Oct. 2024].

NASA (2024) Planets – NASA Science. science.nasa.gov. Available online: https://science.nasa.gov/solar-system/planets/ [Accessed 29 Oct. 2024].

Plait, P. (2017) Scaling the solar system. SYFY Official Site. Available online: https://www.syfy.com/syfy-wire/scaling-the-solar-system [Accessed 29 Oct. 2024].

Robert Roy Britt (2017) Solar System Planets: Order of the 8 (or 9) Planets. Space.com. Available online: https://www.space.com/16080-solar-system-planets.html [Accessed 29 Oct. 2024].

Vanstone, E. (2022) How big is the Solar System? Science Experiments for Kids. Available online: https://www.science-sparks.com/how-big-is-the-solar-system/ [Accessed 29 Oct. 2024].

Categories
Lab Exercises Research proposal

Creating VR Immersive Art Using multiple experiences.

Introduction

I was given a task complete. This task was to experience 4 different types VR Art software. After I have done with the experience, my next goal is to document it and add a segment that will include my thoughts; How I relate with these activities, if I want to carry those experiences on for my future.

What I did this week (VR, AR, MR, XR)

I have gained experience and a better understanding of multiple different VR art software. I had a really fun time testing and playing around with the different functions and capabilities. Although I did have some trouble with understanding the ways to create art (some of the functionality was a bit confusing) and in some cases feeling slightly dizzy and disorientated when wearing the headset and also taking off the headset.

What is VR?

Virtual reality, or VR, is a simulated three-dimensional (3D) environment that lets users explore and interact with a virtual surrounding in a way that approximates reality, as it’s perceived through the users’ senses.

The environment is created with computer hardware and software, although users might also need to wear devices such as goggles, headsets or bodysuits to interact with the environment.

Advantages

  • Immersive Learning: VR provides an immersive and realistic learning experience, allowing users to interact with virtual environments and objects as if they were real.
  • Safe Training Environment: VR enables trainees to practice dangerous or high-risk scenarios in a safe environment, reducing the risk of injury and equipment damage.
  • Repeatable Scenarios: Trainees can repeat VR scenarios as often as needed to refine skills and build muscle memory, ensuring consistent and thorough training outcomes.
  • Customizable Simulations: VR allows training scenarios to be tailored to specific learning objectives and challenges, enabling personalized and targeted skill development.
  • Data Collection and Assessment: VR systems can collect detailed performance data, enabling trainers to assess trainee progress, identify strengths and weaknesses, and adapt training accordingly.

Disadvantages

  • Motion Sickness: Some users may experience motion sickness or discomfort due to the sensory disconnect between virtual and physical movements, leading to nausea and dizziness.
  • Cost and Accessibility: VR systems can be expensive to develop and maintain, making them less accessible to organizations with limited budgets. High-quality hardware and software requirements can also pose barriers to adoption.
  • Ethical Concerns: The immersive nature of VR can desensitize users to violence and blur the line between reality and simulation, raising ethical concerns about its impact on perception and behaviour.
  • Learning Curve: Some users may struggle with the learning curve associated with using VR equipment and navigating virtual environments, potentially affecting the efficiency of training programs.
  • Isolation and Social Disconnect: Prolonged use of VR can lead to isolation from the real world and reduced face-to-face interaction, potentially impacting social skills and relationships.

What is MR?

MR brings together real world and digital elements. In mixed reality, you interact with and manipulate both physical and virtual items and environments, using next-generation sensing and imaging technologies. Mixed Reality allows you to see and immerse yourself in the world around you even as you interact with a virtual environment using your own hands all without ever removing your headset.

It provides the ability to have one foot (or hand) in the real world, and the other in an imaginary place, breaking down basic concepts between the real and the imaginary, offering an experience that can change the way you game and work today.

Advantages

  • Gaming: Mixed reality is being used to create highly immersive gaming experiences that allow players to interact with digital objects in a realistic and intuitive way. For example, Microsoft’s HoloLens headset allows players to build and manipulate virtual structures using hand gestures and voice commands.
  • Education: Mixed reality is being used to create interactive educational experiences that allow students to explore complex concepts in a more intuitive way. For example, medical students can use mixed reality to simulate surgical procedures and gain hands-on experience before performing them in real life.
  • Healthcare: Mixed reality is being used to create more efficient and effective healthcare experiences. For example, doctors can use mixed reality to visualize medical data in real-time, allowing them to make more accurate diagnoses and treatment decisions.
  • Manufacturing: Mixed reality is being used to improve the manufacturing process by allowing engineers to visualize and manipulate 3D models in real-time. This can help to reduce errors and improve efficiency, leading to faster and more cost-effective production.
  • Immersive experience: Mixed reality creates a highly immersive experience that allows users to interact with digital objects in a more natural and intuitive way.
  • Real-time interaction: Mixed reality allows for real-time interaction between digital and physical objects, creating a seamless blend of the virtual and physical worlds.
  • Hands-free operation: Mixed reality headsets allow for hands-free operation, which can be especially useful in situations where users need to keep their hands free for other tasks.
  • Increased efficiency: Mixed reality can improve efficiency by providing users with real-time access to information and data, allowing them to make faster and more accurate decisions.
  • Cost-effective: Mixed reality technology is becoming more affordable and accessible, making it a cost-effective solution for a wide range of applications.

Disadvantages

  • Technical limitations: Mixed reality technology is still relatively new, and there are still technical limitations that need to be addressed, such as limited field of view and processing power.
  • User acceptance: Mixed reality technology may not be widely accepted by all users, as some may find the experience disorienting or uncomfortable.
  • Privacy and security: Mixed reality technology raises new privacy and security concerns, as it can potentially capture and transmit personal data and information.
  • Cost: While mixed reality technology is becoming more affordable, it can still be expensive, especially for high-end applications.

What is XR?

XR is an emerging umbrella term for all the immersive technologies. Those include, augmented reality (AR), virtual reality (VR), and mixed reality (MR) plus those that are still to be created. All immersive technologies extend the reality we experience by either blending the virtual and “real” worlds or by creating a fully immersive experience

Advantages

  • Retail: XR gives customers the ability to try before they buy. Watch manufacturer Rolex has an AR app that allows you to try on watches on your actual wrist, and furniture company IKEA gives customers the ability to place furniture items into their home via their smartphone.
  • Training: Especially in life-and-death circumstances, XR can provide training tools that are hyper-realistic that will help soldiers, healthcare professionals, pilots/astronauts, chemists, and more figure out solutions to problems or learn how to respond to dangerous circumstances without putting their lives or anyone else’s at risk.
  • Remote work: Workers can connect to the home office or with professionals located around the world in a way that makes both sides feel like they are in the same room.
  • Marketing: The possibilities to engage with prospective customers and consumers through XR will have marketing professionals pondering all the potential of using XR to their company’s advantage.
  • Real estate: Finding buyers or tenants might be easier if individuals can “walk through” spaces to decide if they want it even when they are in some other location.
  • Entertainment: As an early adopter, the entertainment industry will continue to find new ways of utilizing immersive technologies.

Disadvantages

  • Those developing XR technologies are battling with some of the challenges to mainstream adoption.
  • First, XR technologies collect and process huge amounts of very detailed and personal data about what you do, what you look at, and even your emotions at any given time, which has to be protected.
  • In addition, the cost of implementing the technology needs to come down; otherwise, many companies will be unable to invest in it. It is essential that the wearable devices that allow a full XR experience are fashionable and comfortable as well as always connected, intelligent, and immersive.
  • There are significant technical and hardware issues to solve that include but are not limited to the display, power and thermal, motion tracking, connectivity and common illumination where virtual objects in a real world are indistinguishable from real objects especially as lighting shifts.

Adobe Aero

When experimenting with Adobe Aero, I found it incredibly easy and intuitive to learn. Basically, open the software, put the location you want in the software and place already made models within the specific scene you want, turn it into an AR experience from technically anywhere after I scan a Q r-code.

Process

Q r-code

Outcome

Do I plan to use this software again in the future?

No. Out of all the software I’ve experienced, this software was the most basic and probably has the least artistic/ immersive need for experience. It’s practically find location, place object in said location turn it into a Qr-code to scan and go to that location and pan around to make it work.

Advantages

  • Extremely easy to do
  • Can be used to present an art piece in any location

Disadvantages

  • Too basic (not much one can do with AR)
  • Can be pretty lacklustre in my opinion.

Gravity Sketch

When experimenting with Gravity Sketch, I was creating basic shapes, drawing lines, and using different colours. I was learning multiple different functions like moving the entire scene, rotating it, expanding or shrinking it and etc. As it is my first time using it, I did struggle with achieving certain goals like if I only wanted to move a singular object I placed, ending up in moving the entire scene at once for example. But I did have a lot of fun with the software. Me and another student recorded our experiences.

Experimental Videos

Video Made By Ben Corcoran
Video Made By Myself

Do I plan to use this software again in the future?

No. When exploring Gravity Sketch, I realised it mainly centred around creating basic shapes and drawing. All of this was a fun experience but I did find it a bit basic in terms of what I can do. Also I had some struggles when it comes to moving separate objects and doing other certain features. This is probably due to me not being experienced with the VR software.

Advantages

  • It was fun and some of the controls where easy to understand
  • Allowed me to create basic shapes, lines and more with any colour I wished
  • Once I knew about and learned the controls of the software it became more easier to use

Disadvantages

  • Other controls where a bit finicky and hard to use and can be a bit frustrating when using it
  • Felt that the things I can do are a bit basic and boring
  • Didn’t think I understood most of the things I can do on the software and felt that I missed out on learning it

Shape XR

When experimenting with Shape XR, I was implementing basic assets like furniture, vehicles, food and mannequin body poses. I was learning multiple different functions like moving objects, rotating it, expanding or shrinking it and etc. Me an another person had the chance to explore with the features of the software.

As it is my first time using it, I struggled a lot with with the software. I added a simple burger model into the scene but I did not like the where I placed it. So I tried moving the burger but instead managed to duplicate the burger and the entire scene I was in and moved it creating a very warped and destroyed area. I felt that the controls where finicky and weird as I struggled achieving the simplest of functions.

Experimental Videos

Video Made By Ben Corcoran
Video Made By Myself

Do I plan to use this software again in the future?

No. I felt that the controls where hard and annoying to use. Also the type of work needed to do doesn’t fit with what I wanted to do art wise. From the experience, the goal goal was to grab basic assets and place them into the scene. Whilst trying to understand the basics of the software, I ended up completely ruining it in the worst possible way.

Advantages

  • Allows for more scenery building
  • Can become more intuitive as time passes with learning the basic controls
  • Visually the controls seem easy to understand and the experience looks high quality.

Disadvantages

  • Only limited to scenery building
  • Controls can be hard and annoying to use for first time users
  • The overall view of the scenery and what you can do is very basic as it is just dragging assets from a folder and dropping it into the scene
  • It was so easy to mess up the scenery your working on

Open Brush

When experimenting with Open Brush, It was honestly the better VR application out of all the software I’ve used. It was the most intuitive and easy to understand software. Me an another person had the chance to explore with the features of the software.

I learned how to create brush strokes and create 3D objects with those strokes. My partner created a little forest like scene with campfire and a night sky. I created a log next to the fire and a brown bear sitting on that log and singing. It was very fun.

Experimental Videos

Video Made By Ben Corcoran
Video Made By Myself

Do I plan to use this software again in the future?

Yes. I really enjoyed experiencing with this VR software. I felt that I intuitively learned most of the core design mechanics of Open Brush and felt that it brought out the creative drawing artist in me. I loved how simple the functionality and straight forward the controls are. It made me explore with new ways to create 3D art with that sense of familiarity (drawing).

Advantages

  • Felt that the controls where intuitive and easy to understand after practise
  • Relates to what I like doing as a hobby (drawing)
  • It has a wide range of things I can explore when creating art on the website
  • Allows me to have total control on where I place my art with the use of the fly feature it has.

Disadvantages

  • The fact that is in VR and I suffer from dizziness when I use the headset after long use
  • Also some of the controls are a bit confusing to get used to

Which software will I be using more?

I will definitely be using Open Brush more if I had the chance.

References

Websites

Intel (2019) Virtual Reality Vs. Augmented Reality Vs. Mixed Reality – Intel. Intel. Available online: https://www.intel.com/content/www/us/en/tech-tips-and-tricks/virtual-reality-vs-augmented-reality.html [Accessed 25 Oct. 2024].

Isfahani, S. (2023) Exploring the Future of Interaction: The Advantages and Applications of Mixed Reality. www.linkedin.com. Available online: https://www.linkedin.com/pulse/exploring-future-interaction-advantages-applications-mixed-isfahani [Accessed 25 Oct. 2024].

Marr, B. (2019) What Is Extended Reality Technology? A Simple Explanation For Anyone. Forbes. Available online: https://www.forbes.com/sites/bernardmarr/2019/08/12/what-is-extended-reality-technology-a-simple-explanation-for-anyone/ [Accessed 25 Oct. 2024].

Sheldon, R. (2022) What is Virtual Reality? Tech Target. Available online: https://www.techtarget.com/whatis/definition/virtual-reality [Accessed 25 Oct. 2024].

Simbott (2023) 11 Virtual Reality Advantages And Disadvantages (2023). Simbott. Available online: https://simbott.com/virtual-reality-advantages-and-disadvantages/ [Accessed 25 Oct. 2024].

yigitbaba (2023) Disadvantages of Mixed Reality. capsulesight.com. Available online: https://capsulesight.com/mixedreality/disadvantages-of-mixed-reality/ [Accessed 25 Oct. 2024].

Categories
Lab Exercises Research proposal

Creating an Immersive User Experience Using AR and use of the Zapworks website.

Introduction

During week 3, I was given another task to complete. This task is to create an AR experience that I can scan with my phone and use a trigger image to show in front of you. After I have done with that task my next goal is to document it and add a segment that will include my thoughts on how I relate with this activity, if I want to carry this experience on for my future.

What Is AR?

Augmented reality (AR) is an enhanced version of the real world, achieved through the use of computer-generated digital information. These include visual, sound, and other sensory elements. AR uses computer hardware and software, such as apps, consoles, screens, or projections, to combine digital information with the real-world environment.

Pros and Cons of AR

Advantages

  • It helps with the learning process: provides an easy view rather than reading guidelines and can engage the user more.
  • Creates unique user experiences: AR helps to create unique digital experiences that help in blending digital and physical worlds. Ar helps the user to experience immersive experiences through browsers. AR blend audio-visual experiences with realities. It helps to place digital elements on top of physical elements to create a mirage effect.
  • Removes cognitive overload: Cognitive overload happens when a machine’s working memory is made to process huge information sources. Cognitive overload hampers the work process and decision-making. Ar helps to present the information in a summarized orderly manner. AR also helps to process the information and develop results accordingly.
  • Creates user engagement: AR helps businesses to improve user engagement. AR helps to make better visibility of product labels and aids to create interactive ads and catalogues. AR when combined with other technology enhances the ability to deliver information faster.

Disadvantages

  • The cost of AR implementation is high: To create an AR experience can be costly due to the process and making it fully functional for everyone is required for that experience
  • Most devices having a low level of performance house low AR compatibility: Not everyone can experience AR due to the performance of their devices.
  • AR can lead to a security breach and lack of user privacy: AR hackers can embed malicious content into applications via advertising. Unsuspecting users may click on ads that lead to hostage websites or malware infected AR servers that house unreliable visuals undermining AR security.

AR testing and exploration

I followed some tutorials given to me to create an AR experience and I used Unity as the main software. After going through installing the Zappar package, (that allows me to create the AR experience and put it on the Zapworks website) I did some camera related work.

I then downloaded the tutorial file and inside was an image and a model. I used the inspector to do some tweaks with the Activate the game object function and went to update to publish. After that I then went through the prosses of building the scene and post the file I have on the Zapworks website. At first, I found the guidance a little confusing but I understood it when I did it twice (animated and non animated).

AR test tutorial

First AR Project

Trigger Image

Animated Version

My First AR Animated Scan

Trigger Image

Custom AR mini project

My next goal within this part of the course is to create my own version of the AR experience with the knowledge I gained from the tutorial tasks. I decided to use a character model I created a while ago as the object that pops out when you scan the Q r-code and put the phone camera in front of a trigger image.

When using my model, it did not apply the textures I had on the character so what I did was applied colours to certain parts of my character to look better. I followed the exact same steps as above and posted the outcome on Zapworks.

My own AR mini project

Character AR Scan

Trigger Image

Do I plan to use this principle again for my Final Project?

No. In this project, I used Unity to create a working AR experience that with my phone, I can scan a Q r-code to access the website and use the trigger image on the thumbnail of the project (this means that the anyone who can scan the code doesn’t need to find the trigger image since it’s already in front of them).

I did enjoy doing this project even though the whole process was confusing and slightly complicated, the outcome I got was fairly decent for my first time. I liked how I managed to create an AR experience where one of my art pieces gets shown in a special way.

Advantages

  • I managed to be successful in the lab session and have created a working AR experience
  • I understand more about Unity in the AR side of things
  • I learned something new in creating an AR experience
  • I did like the tutorials I was given to be able to do stuff like AR.
  • The object that pops out is clear and easy to see.

Disadvantages

  • Some parts of the project was difficult to understand for example the guidance we where given was complex.
  • The outcome of the AR could look weird due to the camera being used
  • The object being projected must be the right size to have it fit a general computer screen
  • Also the distance of the object to the trigger picture matters a lot if you want a clear outcome to avoid rendering issues.

Reference list

Websites

Apurvawagh (2022) What Are The Advantages And Disadvantages Of AR? Medium. Available online: https://medium.com/@apurvawagh/what-are-the-advantages-and-disadvantages-of-ar-c09c97f9d6 [Accessed 22 Oct. 2024].

Hayes, A. (2023) Augmented Reality (AR) Defined, with Examples and Uses. Investopedia. Available online: https://www.investopedia.com/terms/a/augmented-reality.asp [Accessed 22 Oct. 2024].

Kaspersky (2021) What are the Security and Privacy Risks of VR and AR. www.kaspersky.com. Available online: https://www.kaspersky.com/resource-center/threats/security-and-privacy-risks-of-ar-and-vr [Accessed 23 Oct. 2024].

Categories
Lab Exercises Research proposal

Prototyping An Immersive Experience using 360, 3D content and WebVR.

Introduction

I was given three lab related work segments to complete. Those include a 360 interactive video, a MASH prototype and an interactive portfolio. After I have done with those tasks my next goal is to document it and add a segment that will include my thoughts; How I relate with these activities, if I want to carry those experiences on for my future.

What is VR?

Virtual reality, or VR, is a simulated three-dimensional (3D) environment that lets users explore and interact with a virtual surrounding in a way that approximates reality, as it’s perceived through the users’ senses. The environment is created with computer hardware and software, although users might also need to wear devices such as goggles, headsets or bodysuits to interact with the environment.

The more deeply users can immerse themselves in a VR environment, and block out their physical surroundings, the more they can suspend their belief and accept it as real, even if it’s fantastical in nature.

Pros and Cons of VR

Pros of VR

  • Technology – Improves slowly by time.
  • Availability – VR headsets can be purchased all around the world and can be viewed from anywhere.
  • Multiple uses – Although primarily used for gaming, it can be used for training, marketing and advertising.
  • Engagement – The fact that the user can explore for themselves makes for a more memorable and enjoyable experience.
  • Experience – Allows people to “travel” to places that they may not get the chance to in real life. A dream holiday, for example.

Cons of VR

  • Technology – Still in the early stages of VR, there are some bugs that are to be worked on such as glitches.
  • Expensive – A VR experience needs a VR headset which are generally expensive.
  • Advertising – They need to be very well made to work properly, or els the audience will have a negative experience.
  • Real-life engagement – The users are cut off from the real world as their eyes are diverted to the world they see before them. This could become a problem if users use the headset too much as it would mean that there would be no more real-life engagement between people and families.
  • Experience – In testing, some people had experienced motion sickness when wearing the VR headset. This is something that developers are reportedly working on.

What is a 360 Video?

360 Video is content that has been recorded/rendered at all angles. This allows the User to watch from any angle of their choosing. Since the 360 Video’s shot with using a stereoscopic technique, this helps give a sense of depth to the scene.

Advantages

  • Immersive experience – a 360 view of the scene allows the user to feel that they have become apart of the virtual world. The user can look in any direction they wished.

Disadvantages

  • Lack of focus – Since the video was made from rendering on a 360 view, the camera can sometimes lack focus and make the scene blurry or distorted for the user.

360 Prototyping

For the 360 video, I used Photoshop to create a basic shot scene.

Using Maya and some tutorials, I simulated an alien ship flying in a city scape. I made the ship move and rendered the scene for a 360 video.

360 Video

MASH Prototyping

I was then given a task to produce a MASH sequence where it allows me to create procedural animations. Following tutorials, I manged to simulate an explosion where the debris splits into multiple pieces, turn different colours, rotate at random locations and falls to the ground. I was having some fun with the animation.

MAYA Version

After making the MASH simulation work, I then rendered it with the Arnold renderer, and immediately a few things did not go well.

  • Arnold did not apply the colours I wanted for the explosion making it annoyingly monochromatic hence the Maya version of the MASH video above.
  • After rendering, Premier Pro cuts out the entirety of the bottom half of the video. What I did to fix this issue is to sacrifice the top and move the video up in the viewport and when exporting the video should look like as if it’s in the middle of the screen.

I exported the video render of the MASH mini project and overall it looked ok. There was somethings that need improving but since it’s my first time and I was merely exploring with Maya’s cool features, I felt that I did have some fun with it.

Finalised MASH Video

Do I plan to use this principle again for my Final Project?

Since I had used Maya over the course of my university years, It is a good chance I will use it again. I know quite a lot of tools Maya has to offer and I’ve had decent experience.

Advantages:

  • I’ve had lots of practice
  • I know the basic tools used in the software
  • I know the basics of animation and camera movement

Disadvantages:

  • Never created an environment in Maya before
  • Rendering can be weird and fuzzy leading to severe quality drops.
  • Maya as a general 3D modelling software can be a difficult software to understand as it does have many bugs and software related issues

What is WebVR?

WebVR is a website that enables developers to create and control virtual reality (VR) experiences in the web browser.

Advantages:

  • Compatibility – All operating systems can use WebVR from windows to Mac. All devices can use WebVR from PC to mobile.
  • Pre-sets – There is a lot of saved sceneries and settings your art can be placed in. Grants variety to anyone using the website.

Disadvantages:

  • Can be Limiting – If you have a lot of work to show off, WebVR has a set limit of assets that can be placed into a world. This can force a person to have multiple portfolio worlds to show off their art.
  • Limited person count – Only up to 8 people can visit your world at a time. If you want to show off your project to a wider group, WebVR is going to be difficult.

VR Interactive Portfolio (WebVR)

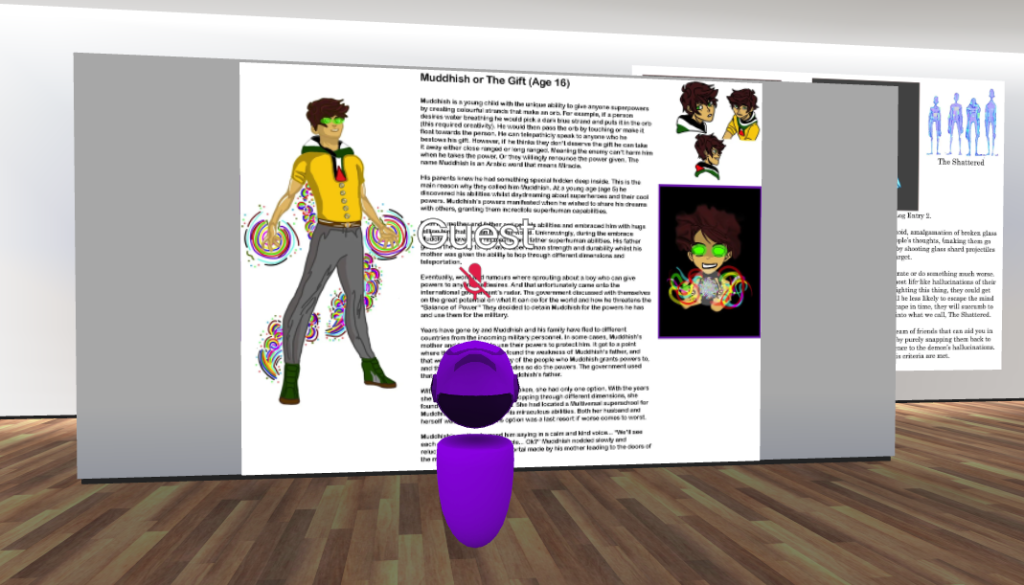
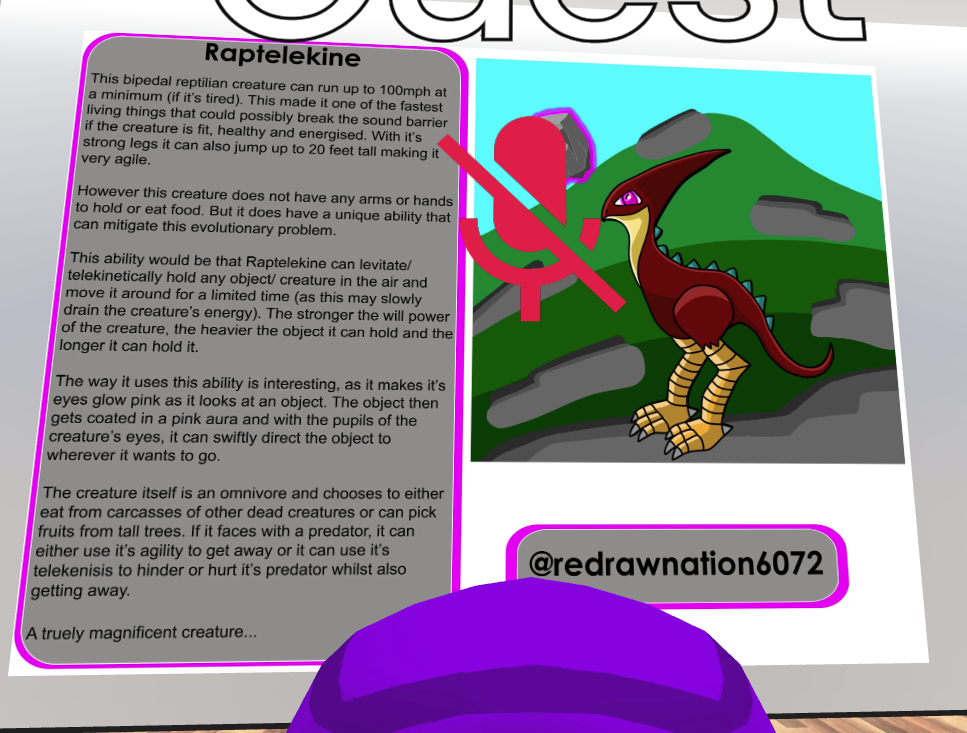
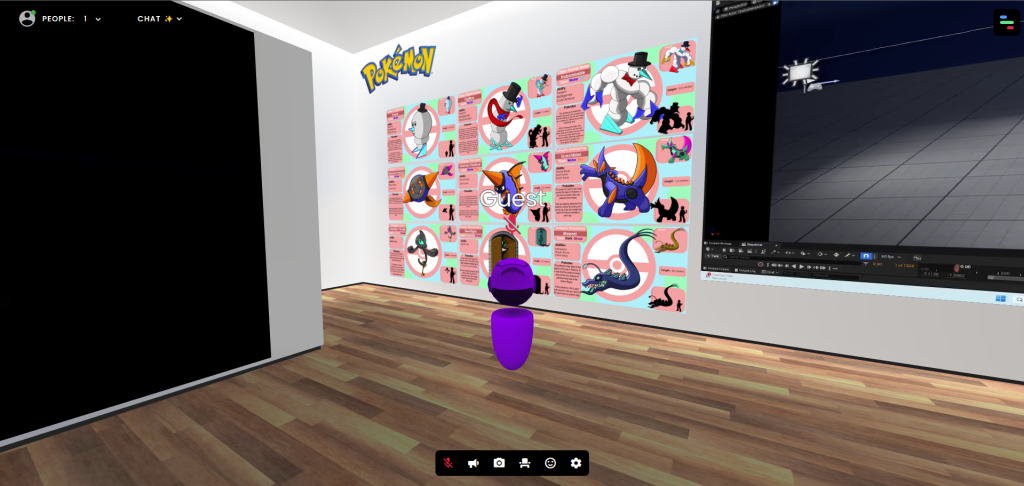
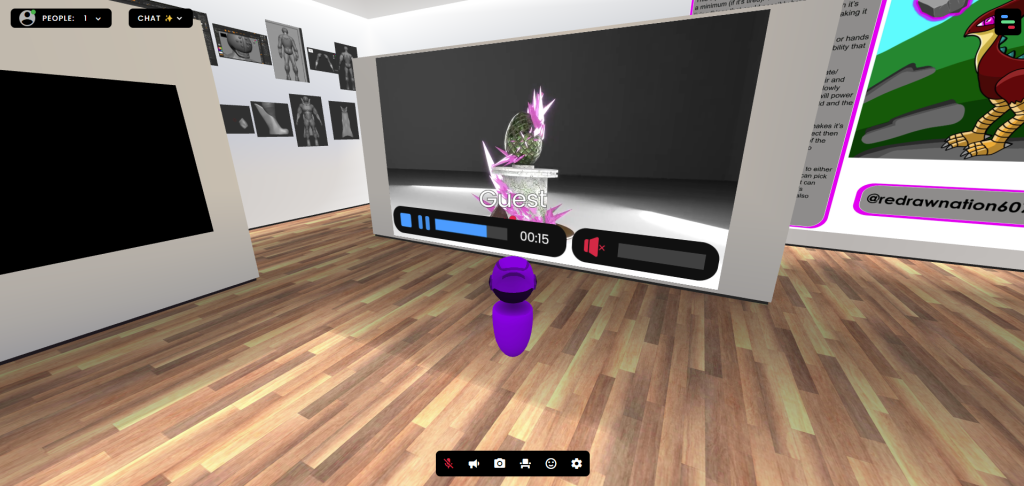
During Week 2, I was given a really exciting task of creating my own virtual portfolio of all my best work that I’ve done in the past whither it be university work or my own. As I got introduced into WebVR, I had a choice of different sceneries so I could put my art in them. I chose a classic museum scene for my art.

I added so much art in the virtual portfolio, it practically became full once I have finished placing all my best art I’ve done over the years.

Drawings

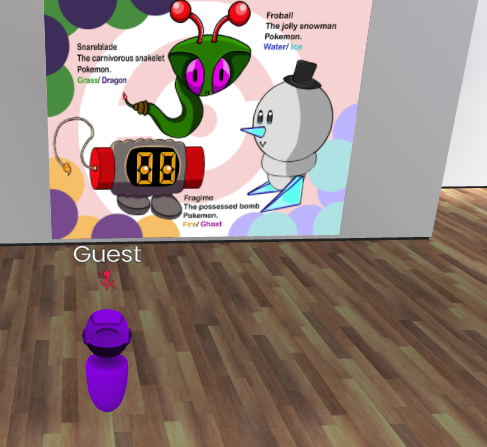
Pokémon Related Art

Videos

Models

Interactive Experiences

Do I plan to use this website again for my Final Project?

Maybe. Using this website for the first time made me realise that I really enjoyed experiencing this website. It made me remember why I like doing art and drawings, loving the feeling of my skill being recognised and put on museum like scene. Which also makes me even more proud of my artworks.

Advantages:

  • I had a fun time experiencing with this website
  • Made me look back at my art and felt an overwhelming sense of accomplishment.
  • I have quickly learned the basics of the website
  • Like the idea of an interactive portfolio as a general (seeing other people’s portfolios makes me more inspired)
  • Loved receiving praise for the art and the way I presented it.

Disadvantages:

  • Limitations to what art I can show in terms of the asset size
  • Other people have different tastes when it comes to art
  • The fact that only 8 people can view your work at a time is disappointing when wanting show the portfolio to a wider audience

Which Software will I consider Using more?

I will defiantly use the WebVR interactive portfolio maker more for my future not necessarily for the final project.

References

Websites

Dadson, C. (2023) What is Web VR? Virtual Reality directly from the browser. Design4Real. Available online: https://design4real.de/en/what-is-web-vr/ [Accessed 22 Oct. 2024].

GCF Global (2020) The Now: What is 360 Video? GCFGlobal.org. Available online: https://edu.gcfglobal.org/en/thenow/what-is-360-video/1/ [Accessed 22 Oct. 2024].

Sheldon, R. (2022) What is Virtual Reality? Tech Target. Available online: https://www.techtarget.com/whatis/definition/virtual-reality [Accessed 22 Oct. 2024].

thompson, alex (2016) Virtual Reality vs 360 Video | Pros and Cons | Blog | AMA. A Marketing Agency | Digital Marketing Leeds. Available online: https://weareama.com/virtual-reality-vs-360-video/ [Accessed 22 Oct. 2024].

Categories
Game Dev Logs

Game Collab Post Mortem

Introduction

After me and the collaborative games design group where done with the first and second part of the collab games design course, we moved onto our final segment of a three part course. This segment is the game collab post mortem assignment log where we reflect on the whole experience of finishing the game and the pitch also analysing what went right, what went wrong and what we have learned for future projects to undertake.

Reflection

Design

Prototype

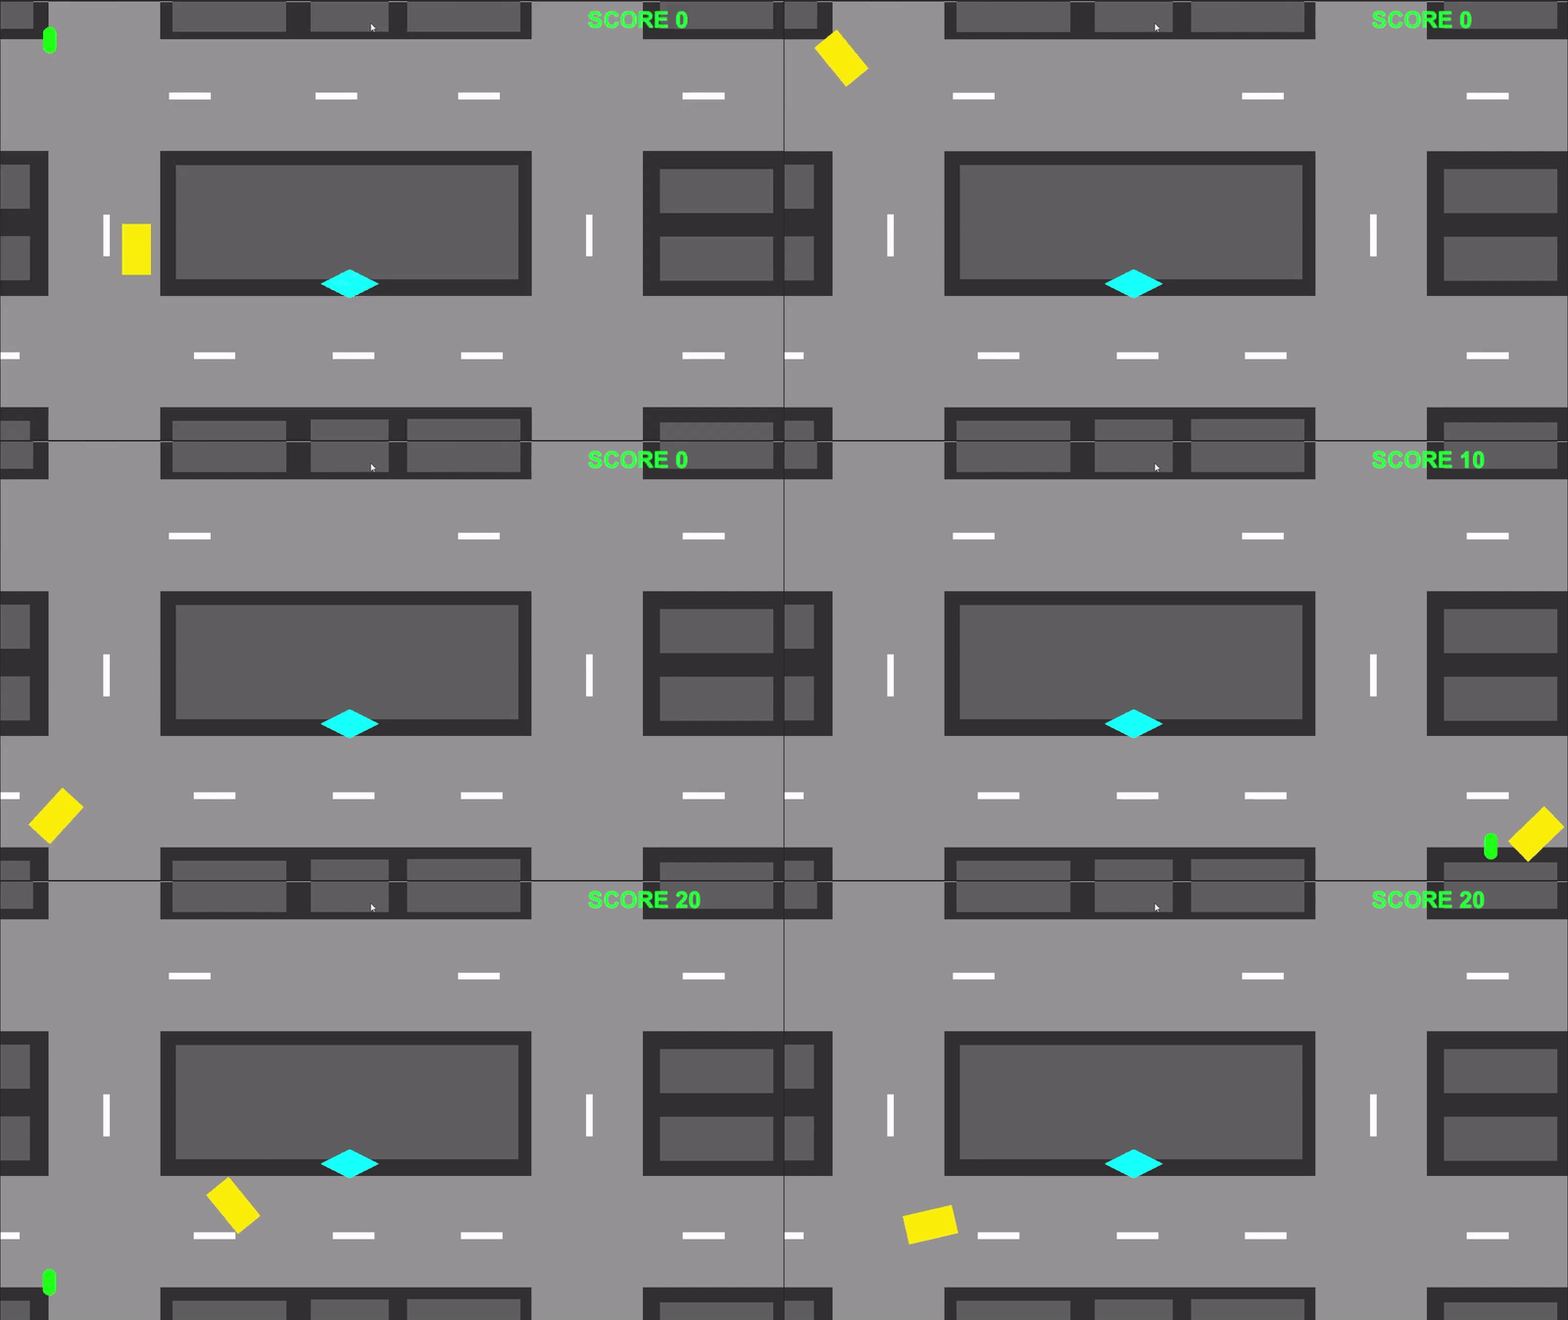
When creating the Taxi Game prototype, I focussed on the technical features of the game and making sure they work. I used a video tutorial that teaches me how to create car driving physics for my player. Following the tutorial, I successfully understood the coding and created it using the video as a guidance.

As it is an arcade game, I wanted the prototype to look simple so I gave it basic shapes and colours to show this arcade style. I can understand others saying that it looks boring and plain but it supposed to be a prototype and isn’t meant to have complicated visuals.

The design of the game also needed to include a scoring system and I used a separate video to help me. Overall, with the functionality being put into the prototype, it really presented the aim of the game pretty well and I believed that I did good in creating a solid game loop.

What I could improve on this prototype is to add more content like the enemies I planed to have or giving it better visuals. But as a prototype I kept it simple.

Main Game

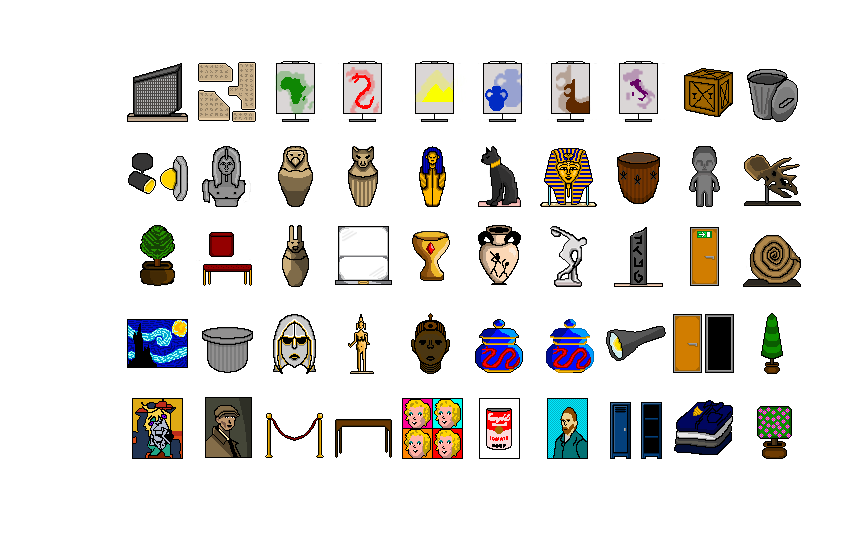
As for the design of the main game I was tasked to create props that you would see in a museum and a Sumerian level. In my opinion I believed that I got the museum props spot on with all the decorations, exhibits and extra props that can be used many times to fill out the empty space. Mainly due to experience of going to museums helped a lot.

But for the Sumerian level, I believe that I couldn’t do the same because as much as online resources can give me some understanding, of the props that can be seen in that level, since I had no experience of the Sumerian culture, my knowledge of creating props are limited with only the research I’ve done.

Art

Studio Logo

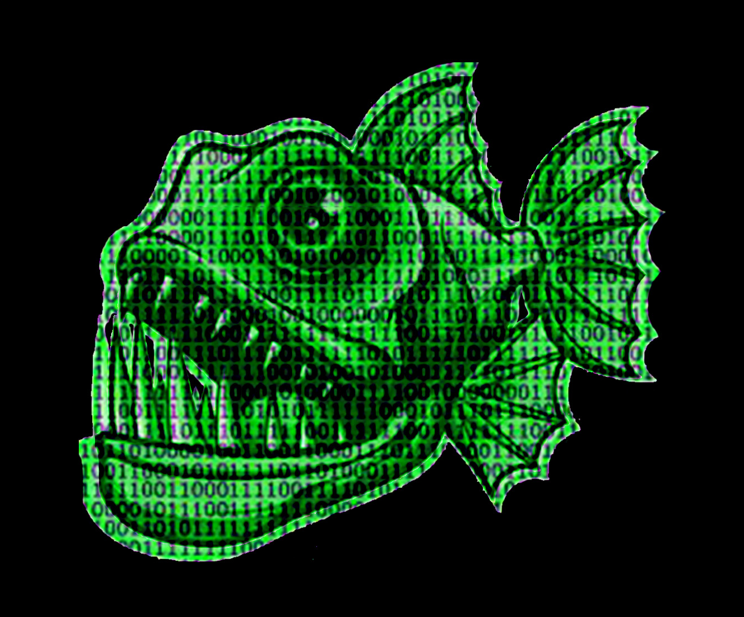
When making the studio logo for NeonByte Games, I wanted the main colours to be green and black to fit with the whole 0s and 1s binary code theme. Also, I chose a piranha to fit with the Byte name as it is a play on words for bite.

However, I could see why this logo may look boring, bland and unfinished because I only picked two different colours making the logo look incredibly monotone. It may look unfinished because there’s not much to look at (being a green piranha and some numbers with a black background).

The lessons I have learned when making the logo is to spend more time in thinking about the logo and practice creating logos that are more interesting to look at by adding more depth or colour for a games studio.

Prototype

When creating the Taxi prototype, I solely focused on the functionality of the game and did not think about the looks.

I did provide some looks to the protype by giving the taxi player a yellow colour, the setting is grey, the people who get’s pickup and dropped are green capsule shape and the drop of point is a diamond with the cyan colour.

The fact that I only provided the proto type with shapes and colours may hinder others from choosing the prototype given as it would look very boring as they would like to visually experience the game be seeing it play out.

I will take what I’ve learned and make sure that my prototypes looks slightly better than boring shapes and colours.

Main Game

When it comes to the art style, we as a collective group, wanted to create a game that has similar artistic styles as The Escapist 2 game. As a prop artist for the team, I believe that I have done a great job in providing my team with the props they need to make the levels of the game and integrate core game mechanics within certain props.

As a team, we all decided that we should stick with a 64 by 64 bit resolution for props to fit with the 64 by 64 bit style for the game.

However, when doing the artworks for the props of the game, there were some feedback from the another person in my group saying that the style in how I created my props for the game is different to the style of how the character artwork was done. I created my props with a black outline and the character artworks doesn’t. This resulted in a game with two different art styles.

Art style I used for the props

Art style used for the Character

So as you can see the art styles are different. I believed that what I did was an artistic choice I made to separate the props with the background. But others may see it as not being cohesive at all can look unfinished. Leaning that this was a possibility, I plan to take this feedback of sticking to the same art style and use it for future projects when I join in groups to make more games.

Teamwork

Pitch

When collaborating as a group of four, we discussed notes with each other, recorded our individual progress of those notes, each of us created our own game prototypes for a collective pitch that decides what one game we want to push forward for our main game.

Overall, we successfully collaborated as a group to create three prototypes and pitch them to our examiners. As a team we have successfully followed the criteria in making three prototypes and created a power point of our collective findings which leads to our final game decision.

When building the power point I believed that I did well in providing a prototype and adding information in my entire section of the power point being inspirations, ethical values and principles.

However in some cases, our teamwork wasn’t always great. The assignment given to us told us to create three prototypes and pitch them using a power point. As a collective group we ended up making four prototypes and did not have time to practice the pitch as a group and by our selves.

I insisted to stick with making three game prototypes so we don’t tire ourselves out and make space for practising the pitch. But the entire team thought it would be better to do some extra work (that probably won’t effect our grades) mainly due to having four people in our group. I believe this decision is one of the main reasons why we didn’t do as well in the pitch.

Learning from that, I must learn how to be more persuasive and understand different ways to influence a teams decision making by providing more evidence to my claims, make my claims sound more logical and ask for feedback for my claims and requests.

In terms of the pitch it self, I believed that I practised well before the pitch started. It made my talks fluent and straight to the point. But I did feel what I wrote (about my section of the power point where I talk about my game prototype) was too much and pushed back the other prototype games that we pitched.

Noticing this flaw, made me realise that I need to shorten my content in future collab game assignments and only talk about the important parts. Side parts and other boring topics aren’t good to add in a collaborative power point.

Main Game

When it comes to the main game being the thief game, we have successfully worked together, communicated adequately with each other, put a lot of time and effort into the main game and successfully created a game with a functional game loop and working mechanics.

Overall, we did a great job in creating the main game with it’s style, mechanics, narrative, goals and features. The end result is pretty good and it has a nice flow.

I believed that I provided my team with more than enough props for the game. Also any prop the coder asks me to create, I create it with no trouble at all. In terms of creativity, I am great at it and use creative software like photoshop so much that making 4 props is a 10 minuet job max.

However, we had difficulties with teamwork and communication within our group. After we finished the first part of our three part assignment, that being the prototype pitch, we had the easter break before we started the second part of the assignment which is to work together to make the game, document it, have video gameplay of it and either have a working link from itch.io or a functional downloadable version of the game.

During the easter break, me and rest of the team found out that one our members (who is our second coder) outright abandoned us with no warning. Making us a group of three. The team as a four included two creative artists two coders. With that unfortunate change, our new team consisted of two creative artists and one coder.

This made the game making process significantly harder and the quality of the outcome will change drastically (negatively without a doubt). This also causes a problem that forces our only coder hold twice the weight of making a functional game and puts more pressure on him to get things done.

When we saw in the Discord that one of our teammates left we were uncertain if he left indefinitely or he may come back at a later date. It wasn’t till weeks later we learned that has indeed left for good.

I as a person and a teammate, I felt that this was a fault on his behalf on why the game turned out the way it is and I did feel frustrated, confused and quite annoyed that this happened. I did tell my self and had others tell me there could be a million good reasons to why he left and I mustn’t look at them the wrong way.

At some parts of the course, communication was definitely lost resulting in outcomes of the project being completely different. Me (the prop designer) and our second creative artist (being the level designer) have both explicitly said to our coder that we wanted to create a prop that is designated to be the item the player steals in the first level of the game. That being the museum level. I created a prop that resembles The Rosetta Stone exhibit and the creative artists wants that to be the main object the player steals.

The coder unfortunately disregarded and completely ignored this request by using a prop that I made, that isn’t even meant to be an exhibit but a mere statue for the player to hide behind. This in particular upset me because our creative choices where ignored and for me, I spent so much time on the props I made and most of them don’t get used especially the centre piece that is The Rosetta Stone.

Most of these annoying and outright frustrating problems I don’t have control over but the only thing to learn from all this is to improve my communication with the team and now that I have experienced such unfortunate events during this course like the fourth member leaving us, I know how to overcome them emotionally and move on.

Gameplay

Prototype

When working on my prototype, I wanted to create an arcade style taxi driving game where you pick up passengers and drop them off at the drop off point. I focussed heavily on the functionality of the game and perfecting the mechanics so the art style is very basic.

I have successfully created a game loop where the player controls a taxi with real-life driving physics (with the help of a YouTube video tutorial), a pick up and drop off mechanic where the player picks up civilians and drop them off at the drop off point and a score system (with the help of another YouTube video).

There are a few gameplay mechanics I have not implemented that can make the gameplay even better, like a timer, a win screen and a loosing screen, a bigger map and enemies that can hinder your progress. Also, since it is prototype, I do not need to spend so much time on it and the gameplay should be basic and simple and doesn’t have to be perfect.

Main Game

For the main game, we wanted to create a thief game. Where the player needs to steal a certain object in each level and progress. The player needs to get through the level containing puzzles to solve and guards to avoid.

Gameplay wise, It’s pretty sophisticated with multiple puzzles, a nice level, actual guard ai, interactable objects, a few tasks to complete, a start, an end and a goal. As a game made by a group three, it’s pretty solid for what we where trying to achieve.

The props, characters and level design for the game are implemented well but in some areas of the level, I do see some tiny mishaps within the implementation of those props. Those include poorly cut out props and unrefined areas of the map that makes part of the game look very ugly.

I believe that the reason why this happened is because the person who is coding and implementing the props I made, never asked me for feedback when viewing the game (maybe the coder assumed that the way he implements some of the props in the map are fine to his eyes). The only thing to learn from this mistake is to communicate more, ask to see the work in progress of the game and ask for more updates on the progression of the game. This may help in providing feedback on time if there is any.

Testing

Prototype

When testing the prototype myself, there where some movement issues and tweaks I needed to fix. Those include the taxi player slide on the road like ice so I needed to make the player go to a slow stop when they remove there fingers of the keyboard another tweak is to optimise the speed of the player movement to make it move just like an average car or taxi (having it too fast makes in uncontrollable but making it too slow would feel draggy.

A way I fixed the movement is by following the YouTube tutorial I found where it provide guidance on how to make real life driving physics in a 2D top down game. This video helped me to learn about coding in Unity and understand why certain mechanics may not work as I hoped and I overcame those issues by understanding how certain coding works.

I shown others my prototype and they have also tested it. They told me that the prototype is good and there is a fair amount of game mechanics that work well together. They also stated that as a prototype, it is really well made and the style is basic but good for a first build.

I believe that the mechanics included (driving, pick up people/ drop off people and a score system) worked so well and I have successfully created a great game loop for a prototype.

Main Game

When testing the main game, I noticed that our game is pretty good in functionality, style, artwork, level, narrative and game loop. The overall final game works great (being made by three people) in some cases.

The positive part of the testing phase was that most of the mechanics worked pretty well, and the controls are easy to learn. Also the guards having their own ai can teach the player how to sneak by the guards.

Ever since our fourth member left, the quality of our games have dropped significantly and it is expected that the fewer people to work on a game the lower quality the game will be.

So judging the game, based on the dev count we did a pretty good job at making the game as a collective group of three. There where a few negatives when testing the game. Those include a mishap with the camera in the second level of the game (the camera being too uncomfortably close to the character compared to the first level). Another issue we faced was when we tested the game, it was nearly submitting time.

The lessons to learn from those mistakes is to have more communication and inform the coder that he is not being present enough in the lab sessions we where given (being present means he can show the game version to us at an earlier time so we as creative artists can give feedback) and learn to time manage more properly so the testing phase isn’t as late as it was.

Time Keeping

Prototype

When it comes to time keeping within the prototype making part of the project, I believed that I did a great job. It went smoothly like I hoped and I’m pretty proud of my self in that part of the course.

I successfully made a decent prototype of a game that has a good game loop, working game mechanics and a pleasant art style with good time to spare for practising the pitch and adding my parts of the course to the overall collective power point for the team.

In terms of learning something about this part of the course (when it comes to time keeping), I need to focus on replicating what I did for the prototype (preparing, completing and focusing on getting the prototype right and have time for the other parts of the pitch) because It worked for me and I wish to use this skill for future projects.

Pitch

When it comes to time keeping within the pitch part of the project, I believed that I had plenty of time in practising before the pitch starts. The pitch went fine. There were some good parts of the pitch like me having practised the pitch, resulted in me presenting it better.

However, there were some negative things that happened during the pitch part of my course. Those negatives include me spending too much time talking about my part of the pitch and leaving others little time to speak and we did not practice the pitch together as a group instead practiced by our selves resulting in the group not doing great when presenting the power point.

The few things to learn from this is to write less information when doing courses like these and communicate to others that when doing the pitch, we should practise together not just alone.

Main Game

When It comes to time keeping for the main game, we did a decent job in completing the main game and kept with the deadline for that part of the course. I believe that we, as a collective group, have done amazing in time keeping for the note making, prop making, level making and slightly on progression.

There where some cases of poor time keeping where the game is about to be finished and the deadline gets closer and we haven’t even tested the game yet. This is due to a lack of communication which made us test the game late. I did feel that for the last moment of the game production assignment was a rush due to our only coder being responsible for giving us (creative artists the working file for the game and the working video walk though.

A way I could improve and learn from that is to have better communication skills by asking to test the game early. The fact that our coder gave us the game late a good reason why we tested the game late.

Conclusion

In conclusion, I enjoyed working in this course and have learned a lot when taking part of a collaborative games project. I have a better understanding on the production part (making the prototype and proving props for the team), I know that I need to improve my communicational skills (due to the issues we faced), I have become more emotionally stronger when things go wrong or they don’t turn out well (with the fourth member leaving us and communication has been missed resulting in poor design choices). I plan to learn and get better for future courses and projects

References

Coco Code (2021) Points counter, HIGH SCORE and display UI in your game – Score points Unity tutorial. YouTube. Available online: https://youtu.be/YUcvy9PHeXs?si=CMLaqgMyGK-Ff4-L [Accessed 19 May 2024].

Pretty Fly Games (2021) How to create a 2D Arcade Style Top Down Car Controller in Unity tutorial Part 1. YouTube. Available online: https://youtu.be/DVHcOS1E5OQ?si=l6S04keePrNq6ErU [Accessed 19 May 2024].

Categories
Character Animation

Character Animation Portfolio

Introduction

When I first started this course, I was excited and looking forward to learning how to rig a character model and animate my character. During the first few lectures, I was given an assignment to animate a character model with a documented portfolio of my journey in this course. I was also advised to follow the style of my character when it comes to animating it. For example, if the character is a muscular man wearing gym clothing, I would animate them doing press ups or lifting a dumbbell.

In this portfolio, I will talk about the ideas and concept creation of my character’s movement, experimenting with other software and their animation features, I will include self recorded videos of references. Then use those references to mark key points for my character model and talk about my experiences with this course from start to finish.

Idea Generation

As a start, I decided to use the character I made for my Character Design course. Then thought of the animation sequences. Before any drafting and idea generating, I looked at the lore I provided with my character, and started generating ideas for the animation of the character.

From looking at the model I made, this character looks like an imposing force. A half human, half robotic hybrid with eight spider like eyes, aged metal armour and plating, dark blue tar-like body, a permanent eerie grin and a glowing purple orb that connects to a dark purple cape that used to be his clothing before he transformed into this amalgamation.

The animation sequences for this character needs to resemble it’s style. The lore of the character should impact the decision making of my animation sequences.

In my case, the character is a scientist who believes the technology he holds can modify, change and upgrade life if he integrates it to himself giving him the power to reshape and transform life into something better. Him being obsessed, stole the technology and fled to a rural cabin in the woods where he had a lab set up. He then realised during the escape, he unintentionally damaged the tech.

(This segment of the lore shows that he is not a nice guy as he stole a really powerful piece of tech and is willing to break the law by stealing such equipment)

As he took a closer look, the machine floated off the table a few meters and started to spark, crack and rotate uncontrollably and then halted to a stop. The scientist stared in confusion and suddenly the technology opened up and flew right into the face of the poor scientist completely clamping his head shut in the machine.

(This segment shows that he had made a grave mistake which lead to the character’s horrifying, permanent disfigurement) This gives off an eerie tone with the character.

The scientist tried his best to pry open the tech whilst his face is being burned, scorched and impaled by the mechanical mask he was forced to put on. He screamed in pain and agony while stumbling into his lab equipment. He then collapsed to the floor like a powered down robot slumped on his knees and blacked out.

(This segment shows the desperation and brute force he had to deal and this mirrors to how his personality will shape to be. He is no hero)

As he woke up, he realised is full body from top to bottom has transformed. His skin looked tar-like with a dark blue tone and his arms, legs and upper body became more muscular. His lab coat was ripped had been was altered to look like a dark purple cape.

He rushed out into the nearest lake and looked into the reflection. Feeling an overwhelming sense of anger, fear and regret he held his head and gave a horrifying shriek. He also realised that his voice became more robotic and his shrieks are more alien like.

(This suggests that the character is animalistic as he gave a monstrous roar)

He sat at edge of the river and put his hand on his head. He looked at a pebble picked it up and threw it into the lake. As the pebble flew into the air it glowed purple and hit a moving object in the water. The object stopped moving for a sec then it glowed purple and leaped out of the water. It was a purple glowing barracuda with a metallic jaw and sharp knife-like fins.

The scientist looked at the fish as it leaped and went back into the water and swam away. He took a pause and said to himself… Fascinating!

(This shows that this character may hate that he is disfigured but realises that it was a great price to pay for the power he wields)

The lore alone, can provide a good amount of ideas for the animation of the character as it builds a basic area on what the character is based of. Also I have been searching for videos and character animation styles on different websites.

The videos below shows what type of animation style I’m going for, when animating my character.

We where also advised to create our own recordings of decided movement of our characters. When attending the lectures, I had ideas of what my animations would look like. I was tasked to think of a list of 3 different animation styles that link with my character. The three that I have chosen, was a floating animation (where the character floats up in the air with ease and looks at the camera), an admiring animation (where the character looks at his hands in admiration and looks at the camera), and a realisation animation (where the character realises what he has become due to the accident in the lore).

I recorded my self doing some actions that will help me for reference.

Levitation

Admiration

Realisation

This may look weird and embarrassing but it will help me with what I want to achieve when making my character move.

Practice Process

For practice, I went on Maya and learnt how to rig a mesh and create IK controls for those rigs. This process was simple because the mesh I was rigging was a lamp. The ways to rig something in Maya is set it to rig mode not modelling mode and locate the skeleton tab on the top left near the windows tab and create joints. This is where your able add a skeleton within the model.

IK

FK

The images above show the IK and FK rigging practices.

Next, I practiced on an full body mesh. this will help me gain a better understanding of how to rig bones on a body model.

I then learned how to rig arms and fingers.

Character Rigging Process

After I understood how to rigg the practice body mesh, I decided to rigg my character model. The tutorials I have followed taught me how to rig and create the skeletal features for my character.

I managed to rigg my character’s feet, ankles, knees, hips, spine, chest, arms, elbow, wrist, hands, fingers, shoulders, neck and cape. This process was easy because I learned how to create the bones. Maya has a few modes and one of those modes include a rigging mode which will allow me to create bones, joints, etc.

Adding CTRLS

Next, I moved on to adding controls to my character’s skeleton joints. This next process taught me how to orient and control the handles for the skeleton movement. I also learned that it is imperative to freeze the transformations to the main controls for both IK and FK controls to keep the default movement as it enables me to easily revert the skeleton back to the default pose.

When I was rigging my character’s IK and FK switch for the arms, I managed to make the IK arm controls work but when I decided to move on to the FK controls and tested their functionality, the skeleton kept breaking when rotating the arms at a certain point and I couldn’t understand why. I’ve spent 2 weeks trying to understand why it wasn’t working (no progress made). I decided to simply just move on and stick to IK controls for my character’s arms and make new pole-vector FK controls for the elbows for more specific elbow movement.

I made controls for the feet and more pole-vector controls for the knees of my character. Since I used IK movement for the legs, I should make pole-vector FK controls for the knees. After I’ve done the legs, knees, arms, elbows and feet, I moved onto the cape.

When making the cape controls, I basically copied the same technique I used to make the arms to be able to control the cape. I did that for the left, middle and right hand sides of the cape.

After I completed the cape, I moved onto the fingers. It took a while but I managed create the orient controls for the each finger joints and managed to make them all work. This part of the course took a lot of time for me to complete as I needed to make sure I get all the controls I needed, to be fully functional.

Skeleton CTRLS

Weight Painting

After I applied the controls for each of the main joints, I moved onto weight painting. Before I did that, I have used the bind skin tool to make my skeleton affect the mesh. Weight painting allows me to control and monitor parts of the mesh that are influencing other completely different parts of my mesh.

For example, when I move my cape, it was heavily influencing my character’s backside, thighs, calves and shoes. The way to fix that is to use Maya’s Vertex Tool, double clicking the cape specific part of the mesh and used flood tool to remove the influence. When moving to the other parts of my body, I wanted to do the weight painting right. This means I spend time doing one body part and move on to the next body part.

I also learned that there is a colour hierarchy that determines the influence of mesh parts when it comes to weight painting. It goes from black (being not influential at all), to red (being heavily influential) and the rest of the colours blue, green, yellow, orange being influential (weakest being blue stronger being orange). There is a white colour in weight painting where it would give a part of a body a hard surface.

This process was straightforward as the task is monitor influences on my character so the mesh would look smooth when moving the joint controls. For my character, he will have some parts of his body look like a hard surface because he has metallic pieces of armour.

I have also learned about a really useful hammer tool. When used simultaneously with the vertex mode in Maya, it helps in smoothing/ normalising almost impossible to reach areas that have their faces contorted and extremely out of proportion. I used this technique when moving my character’s arms, legs and other body parts to extreme positions to fix and smooth all areas so when I move them again the characters body results in a smooth look.

Problems I have faced when weight painting

There was some parts of this process I found to be very annoying when weight painting. This annoying issue, occurs when I remove influence on parts of the body I don’t want. For example, my right arm is affecting the right side of the body. When I remove the influence, that I don’t want, and click off the specific body part I am working on, and click back onto the body part, the weight paints revert back to what it was originally. It basically removes/ destroys my progression.

Weight Paint View SPUP

After sorting out each body part and and tweaking with uneasy polygons, I focussed on fixing some unwanted influences on certain parts of my body that are anything above the blue (the weakest influence while weight painting in Maya). The video below shows all the fully working controls with the fully finalised weight painting. I believe the time I spent with this part of the course was quicker than I expected and I really wanted to spend enough time animating my character.

CTRLS With the Mesh

Animation

Next I went onto doing the animating for my character. When it comes to the animating, there are 12 principles of animation that we can follow in our animated sequences.

The first animation I worked on, was the levitation animation. This animation isn’t the hardest nor the easiest sequence I’ve done but it was a good way to ease into the new things. The overall task is to move different parts of the body and mark them on the timeline below.

The animation required me to make my character levitate off the ground with ease and look at the camera at the end of the animation. I needed to get the basic main movements covered. Examples include the legs, arms, body, head and chest. The animation principles that apply to this sequence include follow-through (for the cape), squash and stretch for the (arms, body and legs), straight ahead (for the some parts of the animation that includes specific arm, finger and feet movement), pose to pose (for the main movements like the arms, legs, body and head) and anticipation (this is when the character bends his knees to and leaps to levitate).

Levitation Block Out

After I have done the main block out of this animation I would need to move onto creating the next animation block out sequence. This sequence is the most difficult sequence in my opinion because it requires me to link and merge movement with two or more completely different body parts.

For example, when my character grasps his head in extreme anxiety and fury, both heads and hands need to move with each other in order to create a head grasping sequence. After this part of the sequence my character then screeches at the camera.

The animation principles included within this sequence are anticipation (for the arms before the screech), straight ahead (for the some parts of the animation that includes specific arm, finger and feet movement), squash and stretch (for the arms during the yell and legs during the anxiety attack) and pose to pose (for the main movements like the arms, legs, body and head).

Realisation Block Out

Then I worked on one of the more easier animated sequences. In terms of animation principles, the most visible ones are stage (character is going to be mainly stationary), straight ahead (for the some parts of the animation that includes specific arm, finger and feet movement) and pose to pose (for the main movements like the arms, legs, body and the head twitches).

This sequence shows my character admiring his new look and as he does, the machine clamped on his head forces him to twitch like a broken robot.

Admiration Block Out

Fully Rendered Animations

After I fine tuned the animated sequences, (making my character move realistically with breathing and slight limb and head movement), I moved onto rendering the animations with the help of Viper. I followed a tutorial guide to successfully animate the character.

For some reason, the textures wasn’t applied when I viewed the links of the animation Viper sent me. So I used a different medium to compensate the failure of applying the texture to the animated render by using Premier Pro’s attribute editor to apply a purple tint to the videos. I truly believe that this was a good call on my end because when I first received the fully rendered animations, they were in a desaturated, grayscale, monotone style and it feels boring to look at.

Admiration

Levitation

Realisation

Conclusion

In conclusion, I have learned a lot about this course and it taught me things I never did before. I had a lot of fun in learning something new with this course and it made me realise my strengths and weaknesses. For example, I struggled with applying certain controls to my character, but I breezed through the weight painting process (mainly due to my character mesh not having multiple layers and my character being pretty simple for weight painting).

The animation part of the course was very fun and I quite enjoyed creating movements for my character. It was a shame that I didn’t manage to apply the character textures to the animation (mainly due to not having enough knowledge of Viper Rendering on Maya). I may have some idea to the reason why this is happening (the file of the textures in Maya may be different to the ones I used for the render because I copied the texture file from another source. And time was running out so I did what I can for the “Character Animation” course).

I did try to rectify this situation by changing the tint of my render videos. I applied a purple tint on the attribute editor of the video in Premier Pro and gave it the purple look. I thought about this change and the possibility that it may dock my grade a bit but remembered that this course judges on the rendered animation of the character not the texture.

There are a few lessons I have learned when doing the animation course. I understood why it’s important to perfect edge loops in Maya (for character design) and having Ngons (edge loops with more than four corners) within the mesh of my character can effect the weight painting process. The negative things that happen includes my mesh showing annoying holes and random triangles sticking out of my character (when looking up close). Saving back ups of each project is vital to keep your work safe and can allow you to back track if you did something wrong that is irreversible.

Reference list

Blizzard (2019) [NOW PLAYABLE] Sigma | Overwatch. www.youtube.com. Available online: https://youtu.be/nWEpjzgMqyU?si=AXYH1wu9U-iXPihl [Accessed 23 Feb. 2024].

BombyWhat, Marvel Comics and Sony Pictures Releasing (2021) Venom Let There Be Carnage All Roar Scenes (Epic) | Venom vs Carnage. www.youtube.com. Available online: https://youtu.be/3-zW8NUeI7c?si=Cg7q4W3pFGNMFNQd [Accessed 29 Feb. 2024].

Lmp, A. (2023) Levitating IDLE. ArtStation. Available online: https://www.artstation.com/artwork/zPz8YL [Accessed 23 Feb. 2024].

Totten, C. (2021) 12 Principles of Animation. GIF. Available online: https://www.gamedeveloper.com/game-platforms/12-principles-for-game-animation [Accessed 7 May 2024].

Categories
Game Dev Logs

Game Collab Dev Log

Introduction

For this segment of the course, the task was to create a game with a dev log of what each person has done. We have done a presentation for this beforehand (me making the studio logo, then moving onto making the prototypes and then moving onto the game production phase after one game has been chosen).

As for the logo, I made it simple and straightforward.

The logo resembles that of a piranha fish with neon green algorithm 1s and 0s embedded within.

I am in a group of four people and my role as a creative artist is to make props for the game and provide my team with the prop sheets for them to use.

Note Making

Before we started doing the practical aspects of the course (making the game and designing certain aspects of the game, we went on Trello (a free workspace website where a group of people can write and share live notes with each other). Those include Level Design notes, Mechanic notes, Character design notes, Prop notes, Progress notes, and Game style notes. These Notes helped me get organised with how much I needed to do in the course.

When we where doing our notes, we as a group wanted the game to have an Escapist 2 art style. So going for a 64 by 64 bit canvas would be best for the game we are working on the game.

The Escapists 2 Review | Trusted Reviews

Prop Designing

As a creative designer, It is my job to provide the props for my team. The software I chose to use to make the props is Photoshop. I was told by my group to make the props fit within a 64 by 64 bit canvas so it can look nice when resizing and fits with the style of the game. So what I did to make sure that I create a 64 by 64 bit prop is to create a 64 by 64 bit square outline to limit the size of my drawings. As an extra, I added a colour palette near every new prop I make to access the right colours with ease.

Video 1

Video 2

Video 3

Video 4

The videos above shows a speed draw of all of the props being made. Each video is 3 minuets long. And when I edited the videos on Premier Pro, I decided to split the collective 18 videos into 4 separate videos. When making this speed video, I needed to optimise each video’s speed and duration so it doesn’t skip or present some slide show video.

Since the first level of the game is set in a museum, the props I will need to make includes exhibits, decorations, interactable items, and other details. I tried my best to stick to what props fit with the first level.

When making the props, I wanted to use real life artworks in real life museums placed into the game. Those real-life artworks include hieroglyphs, The Rosetta Stone, The Younger Memnon, Canopic Jars, Egyptian Coffins, The Gayer-Anderson cat statue, A mummy mask, a triceratops skull, a Greek vase, the Townley Discobolus, an ammonite fossil, an Anglo Saxon helmet, a gold Goddess terra statue, a Chinese vase and paintings made by Vincent Van Gogh, Pablo Picasso, L.S Lowry and Andy Warhol. I want people that play the game, feel good for recognising the many props when they play. It is also a nice way to teach players that such artworks and artifacts exist in the real world.

I also created museum props that can be used multiple times and scattered around in different places. Those props include, signs, wooden storage boxes, trash cans, light sources, plants, glass exhibit boxes, seating areas, doors, disguises, flashlights, tables, barricades and lockers. Those types of props are specially designed to fill out an empty space as much as possible.

After fully making the museum props, I sent them to our team’s coder via on Discord.

After creating the museum props, I then decided to work on the props for our potential 2nd level for the game. Before I did that I added more notes on Trello. The second level will have significantly less props compared to the museum level. That’s because the props for this level can be used multiple times.

Next, I have created props for a second level for our game on Photoshop.

Video 1

Video 2

Video 3

These videos show the props we will be implementing if we made a second level. They all show my entire creative process (I find inspiration online and redraw it in a 64 by 64 style). Most of these props are designed to fill out a space. Those props include, pots, stalls, bags, palm trees, tapestry, bowls of fruit, barrels, rocks, store bought goods, hieroglyphs and certain interactable objects.

Communication

During the entire course, we have been communicating with each other with the use of either Teams or on Discord. This helped us a lot with planning out what we needed to do, knowing where each one of us is at with the course, asking our teammates for anything and overall general communication.

The video below shows our entire communication within Discord. It includes plans, talks, artworks and general work related stuff.

The Video footage of the game and Link

As the footage shows, we have created a fully working game with interactable objects, cool game mechanics and a nice scenery.

Reference list

Ancient Egyptians (2011) The Younger Memnon. Available online: https://www.britishmuseum.org/collection/object/Y_EA19 [Accessed 27 Apr. 2024].

Ancient Egyptians (2017) Rosetta Stone. Available online: https://www.britishmuseum.org/blog/everything-you-ever-wanted-know-about-rosetta-stone [Accessed 27 Apr. 2024].

Anglo Saxon Helm (1939) Anglo Saxon Helm. Available online: https://www.nationaltrust.org.uk/visit/suffolk/sutton-hoo/history-of-sutton-hoo [Accessed 26 Apr. 2024].

Exekias (2013) The Greek Vase. Available online: https://www.nytimes.com/2013/12/08/books/review/john-h-oakleys-greek-vase.html [Accessed 27 Apr. 2024].

Gogh, V. (1889a) Starry Night. Available online: https://www.etsy.com/uk/market/starry_night_painting [Accessed 26 Apr. 2024].

Gogh, V. (1889b) Vincent Van Gogh, Self-portrait. Available online: https://www.vangoghmuseum.nl/en/art-and-stories/stories/all-stories/5-things-you-need-to-know-about-van-goghs-self-portraits [Accessed 26 Apr. 2024].

Lowery, L.S. (1925) Self Portrait. Available online: https://www.kingandmcgaw.com/prints/l-s-lowry/self-portrait-1925-431361#431361::border:50_frame:880229_glass:770007_media:1_mount:108644_mount-width:50_size:525,620 [Accessed 26 Apr. 2024].

Myron (1791) The Townley Diskobolos. Available online: https://www.britishmuseum.org/collection/object/G_1805-0703-43 [Accessed 27 Apr. 2024].

One of the Sri Lankan Kings (1898) Goddess Tara Statue. Available online: https://www.britishmuseum.org/collection/object/A_1898-0702-142#:~:text=A%20female%20deity%20(T%C4%81r%C4%81)%2C,preserved%20on%20face%2C%20traces%20elsewhere. [Accessed 26 Apr. 2024].

Picasso, P. (1937) The Weeping Woman Picasso Painting. Available online: https://www.tate.org.uk/art/artworks/picasso-weeping-woman-t05010 [Accessed 26 Apr. 2024].

Team 17 (17AD) The Escapists 2. Game. Available online: https://store.steampowered.com/app/641990/The_Escapists_2/ [Accessed 4 May 2024].

Warhol, A. (1962) Campbell’s Soup. Available online: https://www.moma.org/collection/works/79809 [Accessed 26 Apr. 2024].

Warhol, A. (1967) Marilyn Monroe. Available online: https://www.moma.org/collection/works/61240 [Accessed 26 Apr. 2024].

Categories
VFX

Visual Effects Portfolio

Introduction

When I first started this course, I was looking forward to learning about how to make VFX in Unreal Engine. During the first few introductory lectures I had, we where given this terms assignment which was to create either, a TV commercial, video game cutscene, intro or other action sequence, a particular sequence in a film or TV Show, a music video, etc.

Also I must document my journey through this process as a portfolio form this includes introduction, research process, concept design, visual effects making process, sequencing process, editing process and finally the conclusion/ reflection and references in a website known as WordPress. For my project, I wanted to create a starting cutscene for a game.

Research Process

I went on google and gathered images of different VFX designs I aim to create. I chose a range of VFX styles and colours. Most of the VFX I have chosen, relate to magic and whimsical effects. This research have already solidified my decided idea for the VFX I’m going to create for a potential cut scene for a game.

The VFX styles I have chosen where from different parts of media. Those include games, films and 3D level making software. This moodboard helped me realise what type of VFX I wanted to use in my video game cutscene. When I thought about this course, I remembered I made a game on unity a while back for a university course. This made me wonder, why can’t I make a fully fledged remastered cut scene of what happened before the events of the 2D top down shooter game Cloaks of the Deceitful?

This course also ties in with the level design course within this university terms assignment. So the level must take place in an opera house and if I have not got props for the theme, I can’t go through with this idea. Luckily I did found the perfect free pack that includes an opera house kit. From the VIP hanging area of the opera house to a grand piano.

Concept art

For the concept art, we were given a task to create a storyboard of the sequence and the VFX that comes with it.

This storyboard will be the basis of what’s going to happen within my scene. The orb that comes from the moon goes into the opera house and enters the theatre and corrupts the mask giving it sentience. I talked about what specifically happens with this scene. I have added arrowed markings within the storyboard to show movement within the 2D scene. I will include more than one type of VFX styles. Those include:

This VFX list is the premiss and the idea that I aim to do in terms of this course. The orb with a trail that comes from the moon that also follows a path, lightning sparks, purple smoke, purple particle effects and light purple cracks.

Also, I would like the VFX orb to make an object move after it collides into it. Then the object rises off the table or stand and starts spinning and producing lightning sparks, clouds of smoke and particle effects. Thirdly, I want the object to drop back on the table and the eye sockets of the mask glow purple and the screen cuts to black.

I believe that the VFX and cutscene I plan to make is very ambitious and I hope that the sequence works as planned. Also hoping that I can somewhat replicate my idea into unreal engine. I was recommended to create a rough VFX timeline of my sequence from start to finish. This took me some time because it required me to predict the durations of certain sequences within my cutscene starts. When they start and when they finish.

I did try to create animatics for my sequence. But I did spend more time than I thought on just making the animatics and I was told, if I created the storyboard, and a rough timeline, I wouldn’t need to finish the animatic fully because as long as I had the idea fully formed in my head, I am fine.

Test and Exploration

I did explore with creating camera shots and scenes within unreal engine. I also experimented with particle effects in unreal engine. I learned how how to make three different VFX within this new unreal test project.

First, I created a cherry blossom effect in unreal engine and I have explored with the blueprints and made it so that the particles scatter off the side and slide on the floor. I coloured the particles pink so they resemble cherry blossoms.

Next, I have created a fire effect in unreal engine and have tweaked the blueprints colour, particle spread, and gravity to simulate a realistic fire.

The third VFX test I made was a purple explosion. as this was one of many effect styles I plan to use for my sequence. I grabbed an explosion effect on the niagra particle system and changed the colour and created the particle shown below.

I decided to move on from creating the test particle effects and have started on creating one of my main effects. The first effect I focussed on, is the floating orb with the trail effect.

VFX Making and Other

I went on YouTube and have found an interesting particle effect ribbon trail tutorial that helped me explore the technical aspect of the Niagra particle system in quick succession.

As I went through the video following the details, exploring and messing with the functionalities of the Niagra system.

This is the outcome of the trail I created. It’s supposed to look unstable and crazy with the one random ribbon that is bigger than the rest can enhance that randomness.

The pictures above shows my prosses when making the orb. I made it so that instead of the VFX spewing out of one end, altered it so that its spawns in a ball, simulating the orb.

This is a result of my first VFX sequence I made and believed to be very successful. This will be the VFX that will traverse though the level and interact with the mask and is what makes the mask levitate and spin. The next VFX I created was spiralling smoke which will circle around the mask when it spins adding more unstableness within my sequence. This will allow me to explore more on the types of VFX provided in the Niagra particle system.

When exploring with the gadgets and gizmos within unreal engine’s Niagra system, (adding new features to the main system, changing and tweaking the particle spawn, velocity, update and etc). I wanted the smoke particle effect to spiral around the mask to add this sense of mystery within my sequence. The image below shows my progress of this VFX.

I managed to create the effect as if it’s spiralling around when it spawns. the image below reveals how I successfully made the effect spiral around an object.

The shape primitive being torus is one feature I needed to get that spiral effect. Examples of shapes that won’t work is a Cone because it just goes up like the average smoke. Furthermore I changed the Torus Distribution Mode to direct instead of random. This makes the particles spawn in a spiral whilst random on the other hand, spawns the particles like a ring.

I then decided to create a mask prop for the VFX sequence and for the level. I went on google to find a basic theatre mask clipart and opened up Maya to create the prop using a plane with the clipart implemented flat on the plane and went through some options to allow me extrude the face of the mask upwards and removing faces to hollow out the the middle for the eyes, eye brows and mouth. Creating this model below.

I then exported the file as an FBX and saved it in my unreal engine file within the My_Meshes folder inside the Content folder of the engine and this is how it looked.

Then I realized that there was an issue…

The mesh breaks when approaching the mask up close. I went back to maya and had to change the model entirely. I have used the image I found on google and have modified a plane on maya to reshape the plane to look like the shape of the mask and used the face tool and removed the parts that are meant to be hollowed out. I just needed to sacrifice a bit of the facial structure removing chin, cheek, and eye brow features making an almost flat mask resulting with the material and mesh fully fixed and not breaking which is a change I’m willing to make.

Now that I have fixed the mask, I can use it as part of my VFX sequence without much compromise on how far the camera or viewer can stand near the mask before the mesh and material breaks.

Moving back to creating more VFX, I decided on creating a lightning spark effect that’s meant surround the mask as it spins. I went on YouTube to find tutorials and found this.

I used this video and explored with making the VFX on my level following the the tutorial to the letter and have managed to create some lightning effect that can surround an object. But when I applied the Niagra effect onto my mask, the lightning sparks went through the mask not around it. I decided to work on a different VFX sequence that being the explosion effect putting the lightning effect on a side for now.

I explored with the colouring, sprite size, spawn count and speed when making my explosion effect. I did create a basic purple explosion with some grey rubble. Now that I have made the effect, it is time placed it near the moon of my level and played the effect loop and realised that the effect is invisible from a far because the moon is too bright and the effect is too small. I decided to just make one massive explosion effect that is so big that I can see from a far. Tweaked the particle spawn, colour, size and life time, the outcome of this VFX is shown below.

This video clip shows how successful this proses went after I’ve learned from my mistakes. It looks amazing from a distance and I’m glad that it worked.

Next, I got back to work on the lightning spark effect that actually goes around an object. I have followed a video that explained how to create the this particle effect.

With a few tweaks and changes to the original video, I successfully made the my own lightning spark effect for my sequence.

The final VFX I will create is two slowly glowing eyes effect that will appear at the end of the sequence when the climax of the scene ends to set an ominous after tone. I was told that I can make the glowing eyes a material and move it within sequence can provide the same result. With all the other effects I had and the later steps I needed to do, I later decided not to do it as I had plenty other VFX styles I made for the video.

Sequence Making

After making the whisp (Orb and Trail), lightning, explosion and smoke, I moved on to making the sequence. The first sequence is the establishing low angle shot of the video. For this sequence, I got a single camera tool and placed it between some city buildings facing up slightly to the moon framing it on the centre. With every cine camera actor made, a timeline sequence is applied. Within, I implemented the Niagar explosion VFX system on this sequence to play from start to finish at the beginning of my shot. I also implemented another VFX sequence that flies out from the moon, and out of the camera’s view using a camera rig rail tool in unreal engine.

“An explosion occurs on the moon and a purple whisp of dark magic flies out..”

I basically followed the video below and it taught me how to rig not only cameras but almost any object. I used this video to rig the full whisp on the rail whilst facing the whisp where the rail is going (this is important because of movement and rotation) and let it go from 0 to 1 in position of the rail using keyframes. Zero being the start of the rail one being the end of the rail.

I also made sure that the whisp wasn’t visible at the start, so I hid it behind the moon, for the sequence to start the rig rail system. I also made sure that the whisp is no longer visible with the help of buildings to obstruct the particle effect visibility (this will help tidy and connect the shots together). Then I used more keyframes for the extra camera movement.

The next sequence, is a wide city shot showing more of the scenery with another rig railed VFX section embedded within. I also added more keyframes to move the camera. Similar to the first shot, I rigged a different whisp orb and trail to another rig rail system, placed the whole system on the sequence timetable and key framed it from start to finish. Also making sure that the whisp isn’t visible at the start and end of the every sequence (having the whisp enter into scene and exit the scene) making the shots flow well together. I made the camera pan to follow the whisp movements when it goes off screen. This makes the whisp hard to follow and adds more mystery within my video. I wanted the sequences to be as smooth as possible so few and long shots are preferred.

“The orb flies into the city…”

The third sequence, is an aerial shot of a corner of the city where the whisp goes down the street and off screen. I wanted a bit of variety within my 60 second video so I added this new shot type on the timeline to differentiate the previous shots. I did the same with the first few shots with the camera rig rail whisp technique. Again making the whisp enter scene and exit the scene in that sequence.

“The orb flies from street to street…”

The fourth sequence is another wide shot of the city revealing the next location of where the video will occur. This is the entrance of the opera house where the main sequence will take place. In this shot, I have created another rig rail system and another VFX system is applied on it. Same with the other shots, I made it so that the VFX will enter the scene and will exit the scene.

With more and more shots being made, I needed to bare in mind that the many VFX systems, I have put in the level, are always visible and when I place cameras around the map, I need to think about the camera’s precise location and focal length so that the VFX sequences for other or previous shots won’t be included in this shot. Same goes for all the other shots, avoiding the break of continuity. I also need to move VFX sequences to my liking for the shots of the entire video.

“The whisp flies through the city and in the entrance of the opera house…”

The fifth sequence is the first and last quick shot in the video. In this shot, I have included a fifth rig rail system with a fifth VFX system embedded (with the rail going from the hallway to the main opera house theatre) and a camera looking down at the hallway of the opera house. I made this quick shot because I want emphasise the the unstableness and the unpredictability of the VFX included by making it elusive for the camera to track.

With this scene, I had to put the VFX closer to the door because the trail of the orb is visible on the previous scene. This is not good when simulating the whole video as it breaks continuity.

“The wisp quickly turns the corner and enters the theatre…”

The sixth and final shot, was the sequence I put the most effort in. This whole sequence includes the sixth rig rail and the sixth VFX system, camera movement, object movement, a completely different VFX system that was created and some clever keyframing techniques/ other technical details.

The image below shows the complexity of this sequence.

The image below shows what keyframes I used and how I have used them.

The image above includes all the technical details I used to make this entire sequence. As I was making this, I learned that the general key framing system embedded within this sequencing mode of this software is really helpful. It allowed me to create a nice and slow camera dolly zoom to add a dramatic effect with the mask object, create clever made sequences (when VFX sequences start or finish and whether they should be visible or not) and this section of the course made me learn about sequencing techniques I have never used before and allowed me to problem solve the issues I had with this shot.

The final rig rail system that has the VFX embedded within is apparent within this final scene as it is the catalyst for what’s about to happen next. With the help of keyframes, It allows me to play out the rig rail system from start to finish.

Plus, with the ability to change the visibility of the rig rail system, I can deactivate its visibility when it hits a certain point on the timeline. So visually when the whisp touches the mask, it disappears as if it entered the mask. With the help of more keyframes I then made the mask move on impact of the whisp.

Then I moved onto the mask movement section, I added transform keyframes to mark movement point on the timeline. I started slowly with few keyframes (making the mask rise slowly and tilt from left to right almost hypnotic like). I made the mask look straight at the camera and then went crazy with the movement by adding lots of transform key frames on the timeline marking one twist and turn to the next.

This is the climax of the video so I made the mask move sporadically as if it’s twisting and transforming into something ells. It spins and tilts randomly until it slows down to a halt in the air and quickly drops on the music stand. All of this object movement is achievable using keyframes and I learned a lot during the making of this shot.

Now that I have simulated the mask movement and the other keyframed sequences, I now need to implement the final VFX sequence I have made. The last VFX system is the lightning trails with a light orb and sparks jittering uncontrollably.

When implementing the lightning VFX system into the sequence, I have made it so that it only turns on at a specific time, and it will turn off at a specific time. In the sequencer, I have added key frames of the visibility of the effect. (Visibility is turned off until it reaches to another key frame that turns the visibility on and then off again) A trigger keyframe of when the VFX starts and finishes and another trigger for when the lightning starts and finishes.

The paragraph above is the outcome of my findings when doing this segment. I did however get caught up with some issues during this part and have independently fixed those issues using basic problem solving and a decent amount of knowledge of the software. Those issues include, a problem with the lightning VFX system where I watch the sequence play out (as a test) and in some cases the lightning part of the VFX doesn’t turn on and in other cases it works just as fine. Similar to a coin flip (I have no clue if the lightning part will turn on or will stay off).

This problem was solved by realising that I have unknowingly put a deactivated visual keyframe underneath an activated visual keyframe. This resulted in the two keyframes cancelling out each other. Making the sequencer decide whether or not to turn on the lightning or keep it off thus giving me the unpredictable coin flip effect when I watch the sequence play out.

The second problem I had, was that when I made the lightning VFX system deactivate at a certain point, the lightning trail particles still played out even when I deactivated the visual keyframe of the VFX system. Leaving me with rainbow trails that are still visible to the viewer at the end of the sequence when all the VFX are gone. This took me some time but I finally figured out the solution to this strange issue.

Basically the solution to this problem was that when I activated the lightning part of my VFX using a trigger keyframe, I did not add one to the end to deactivate the lightning part of the VFX system. (Making the problem easy to understand in the end but somehow took me time to grasp why it happened in the first place)

Those problem fixes are important to the visual aspects of the video and me fixing those issues improved the sequence even more in my opinion.

This whole process allowed me to problem solve and understand the software even more. Learning new things along the way and gain better knowledge of what I am doing for the course.

Another note I want to add, that is not an issue I faced but a design choice I made, was that I did make another VFX system for the video but decided not to implement it in the sequence because it clutters and makes the scene too much for the viewer. The VFX I made was a spiralling plume of smoke that is meant to circle around the mask as it floats in the air.

The image below shows what could have happened in my video. I felt that with the added smoke in the scene, can clutter the shot and drives the focus away from the mask. I did also show this image to four others and they all agreed that the scene did look cluttered and that encouraged me to stick with just using the lightning VFX.

The image below is the improvement.

Now that I have fully completed the final sequence, I then added it to the master sequence where all my finalised and fully finished shots are kept and export the master sequence as a fully rendered film.

“The whisp is at it’s final destination and it slowly looms towards a theatre mask that is ominously placed on a music stand. It collides with the mask. The object slowly rises off the stand and tilts almost hypnotic-like then readjusts to face the camera and glowing orbs and jittering sparks of lightning consumes the mask as it rotates and flips in random locations (as if the dark magic is transforming the object into something terrifying). The lightning and sparks abruptly goes away and the mask slowly readjusts itself again and lands back onto the music stand. The light’s go out…”

I then followed the official Epic Games Dev website to understand how export the master sequence into video form.

Editing the video on Premier Pro

Now that I have exported the video from the master sequence in Unreal, I can then move on to editing the video in a video editing software. The software I chose was Premier Pro mainly because I have prior knowledge of the software before I started my university years.

But before I edit the video, I need to source the sound and music files for the 60 second video. Luckily I have prepared what need, so this process didn’t take long. YouTube was the place I found my files. The video downloader used is called YTD-YT Video Downloader in the Microsoft store.

When finding the sounds and music for my video, I used a technique where I save the video in a private playlist. If I’m happy with the all the sound files I download them. And put them in a folder I have prepared for this part of the course.

The sounds that I have downloaded include 2 music tracks that are the same song but will be cleverly spliced together for effect. The music I have chosen was Beethoven’s Moonlight sonata (A Orchestral version and a dark orchestral version of the song). Doing some research ahead of time, I can definitely use those music files. So copywrite problems won’t happen because the author of the music has died years ago.

The sound effects I have downloaded where, whooshing sound effects, explosion sound effects, implosion sound effects, falling object sounds, electric sparks sounds, a big switch sound effect, dark magic sounds and spooky laughter.

Now that I have all the sound files, I was ready to make the fully edited cleaned out 60 second video for my course. To me this part was like piecing together a fun puzzle. I had a great time in making this video and the sounds and music files I have gathered where perfect for this.

The first few sound effects I worked on was the explosion sound effect, the whooshing sounds the dark magic sounds and the whisp/ mask collision sound effect. I wanted to work on the sounds with the more convoluted editing styles.

For the explosion sound effects, I used two different explosion sounds (an implosion sound effect and an explosion sound) and lowered the overall volume of the two sounds to simulate something that is far away. I did the same for the dark magic sound effect. Where the further the object that is in the scene, that is producing sound, the lower the volume of that sound effect will need to be.

And when the mask and hallway scene play out, I need to make the volume of the dark magic sound louder because its near the camera and closer to the viewer. All this volume changing is achieved using keyframes.

With the whooshing sound effect, I used different provided sound bites that I have placed on the timeline. And when the whisp does a turn or changes directions, the sounds play out to realistically simulate something is flying by the camera. During this section of the editing, I needed to cleverly time sounds with the visuals.

The collision mask sound effect was placed at the right time for when the whisp interacts with the mask the sound plays as the mask moved to simulate real a life collision sound.

The sound effects I have edited at this stage, add realism into my video (whooshing sounds, explosion sounds, object collision sounds and energy sounds) and it is time to move on to the extra sound effects that enhance the mysterious theme of the video.

The next half of the editing process was adding the sounds that didn’t need that much changes to the volume like the spooky laughter, the lightning sparks and the big light switch shut off sound effect at the end.

For the laughter, I have timed it so that when the mask is about to spin the laughter starts. Made the volume not too high (so not to overwhelm the viewer) or too low (to avoid making it too quiet to hear) for the main video. This resulted in a dark spooky outcome that was meant to enhance the sinister theme of my video.

I then worked on the lightning sparks sound effect. I spliced two different sound effects together. One, a constant surge of sparks and the other is spontaneous spark sounds. Together results in an unpredictable surge of dark magic.

The final sound effect I added, to induce more sinister connotations in the video, was the big switch turn off sound effect. I cleverly, placed this sound effect in the timeline, matching it with the abrupt cut to black. This sound played with the cut to black at the end of the sequence would be perfect as it puts the viewer on edge even at the end of the video. Also, the sound echoes, adding even more tension to the scene.

Now that I placed all the sound effects into the scene, It is time to add the music in the video. This section is the most easiest part of the editing process because I have a concrete timeline video of events that happen as it plays out. Meaning I have the classical version of the music for the start of the video to the point where the main scene happens with the mask movement. The music will be cleverly spliced with the darker version of the same music revealing the sinister side of the whisp.

The way I achieve this is with the help of keyframes. At a certain point of the video the classical version of the the music will die down in volume and a darker version of the music rises in volume. More splicing is needed to abruptly end the music with a silence before the complete stop of the the video.

For this section, I cleverly put the climax of the music and the end of the music together (listening very closely to any noticeable jumps in the sound track). It got to a point where I was very impressed with the end and decided to watch and listen to the whole video.

The image above shows which segment is which and where I placed them on the timeline.

Now that I have fully made the video, and I’m proud of the outcome. It is finally time to export the video into an MP4 format and post it on YouTube for all to see.

The video below is the outcome of my work.

Conclusion and Reflection

In conclusion, I am very proud of my work. I have learned a lot during this course. This includes creating VFX using the Niagar system, making the sequences on Unreal Engine, learning new techniques like the rig rail system (to get the outcome I wanted), revisiting old techniques like exporting the master sequence into a video form and having fun with creating the video on Premier Pro.

I have shown my video to many different people, family and friends. They said it was a great experience and have praised me for my efforts and determination. Very little feedback was given, which I was surprised to hear.

When I started this course, I told others what my intentions where for the theme and style of the video, and have explained what I want to happen in the video as a concept idea. They where excited to see what the final outcome will look like.

I have successfully made the concept I had, into reality and have surprisingly stuck with the main premiss. I also thought that the idea to make an opera house themed VFX video with explosions, whisps, lightning effects and moving masks was a bit too ambitious.

But I was determined and kept working, putting my full effort and attention on this course. In my opinion, I believe when I put my mind into creating projects like this, I can produce the best outcomes and love to show others what I’ve been working on.

Reference list

Video Tutorials and Sound effects/Music used

CIVAR (2023) Unreal Engine Camera Rig Rail: Crafting Immersive Cinematics like a Pro. www.youtube.com. Available online: https://youtu.be/-VpHY_aeVT8?si=UFlaM2zqwGF4iDWG [Accessed 13 Jan. 2024].

All Sounds (2018) Big Switch Sound Effects All Sounds. www.youtube.com. Available online: https://youtu.be/TjwFBwO-yiE?si=ajMV_VhkHwZuGsas [Accessed 10 Jan. 2024].

andrea romano (2010) Beethoven – Moonlight Sonata (FULL). www.youtube.com. Available online: https://youtu.be/4Tr0otuiQuU?si=mcvLM3SGPB6EO_TB [Accessed 10 Jan. 2024].

BerlinAtmospheres (2020) Falling Object SOUND EFFECT Falling Object Falls Down – Fallendes Objekt fällt herunter SOUNDS SFX. www.youtube.com. Available online: https://youtu.be/EAMEnrCsmJ8?si=tpITK9BOEo2UxTz1 [Accessed 10 Jan. 2024].

JJ Art (2021) Dark magic VFX. www.youtube.com. Available online: https://youtu.be/WM3js-UxVsI?si=Ii7LsXkNbQvh1F9X [Accessed 10 Jan. 2024].

Pandora Journey (2023) MOONLIGHT SONATA (Dark Orchestral Version) – David Eman & Pandora Journey [Epic Villain Music]. www.youtube.com. Available online: https://youtu.be/Qhlt4td3bZQ?si=pmRQmMvNuHkFng91 [Accessed 10 Jan. 2024].

Rosen Engel (2012) Spooky Sound – Scary Laugh. www.youtube.com. Available online: https://youtu.be/QpehDEmmv5U?si=3lbHa78t-cv8m6J5 [Accessed 10 Jan. 2024].

Sandra Michelle (2019) Electricity Sound Effect. www.youtube.com. Available online: https://youtu.be/TEFn1sB_XzI?si=AeNqUoALVxqvkd1_ [Accessed 10 Jan. 2024].

Septic Shark (2021) The Flash Lightning – Black Screen Effects. www.youtube.com. Available online: https://youtu.be/wTkEGYgjYVA?si=ZWiQai6urlzXfQZy [Accessed 10 Jan. 2024].

SFX sounds (2022) Cinematic Boom – sound effect – [High quality]. www.youtube.com. Available online: https://youtu.be/dz6Lp_PyX_Q?si=aKwl_VBmuAxs3kvg [Accessed 10 Jan. 2024].

Sounds Recorded (2017) Implosion Near Sound Effect. www.youtube.com. Available online: https://youtu.be/8FujlPV6J8M?si=QUULj0cBBq7Aav7o [Accessed 10 Jan. 2024].

Stock Sounds (2021) ELECTRIC SPARKS Sound Effect. www.youtube.com. Available online: https://youtu.be/fiPBgVngs40?si=IkslwgNP2UhMuYAN [Accessed 10 Jan. 2024].

The Bhavya shah (2021) 20 FREE CINEMATIC WHOOSH Sound Effects (No Copyright). www.youtube.com. Available online: https://youtu.be/Hj7-pltIVng?si=hJKCRxF7DCw-Wwa9 [Accessed 10 Jan. 2024].

Trickyz360 (2020) Explosion Sound Effect With Echo In Distant. www.youtube.com. Available online: https://youtu.be/O3ofvtnkPNI?si=HGx0k4u1ZIhnWLXQ [Accessed 10 Jan. 2024].

Breez-E Game Studios (2023) Create Dynamic Electrifying Visuals with GIMP & Unreal Engine | Step-by-Step Niagara VFX Tutorial. www.youtube.com. Available online: https://youtu.be/8obgGB5A8YA [Accessed 5 Oct. 2023].

CGHOW (2022) Magical Trails Aura in UE5 Niagara Tutorial | Download Files. www.youtube.com. Available online: https://youtu.be/ruEvaZUC7sA?si=rHiqMGixTG8ChG_g [Accessed 5 Oct. 2023].

Royal Skies (2023) Unreal5 Niagra VFX: Ribbon Trails (60 SECONDS-!!). www.youtube.com. Available online: https://youtu.be/lXPSNIak64Y?si=NkXTXetiLHleR4MS [Accessed 5 Oct. 2023].

Unreal Engine Packs

ArtcoreStudios – Environments (2022) Opera House Kit in Environments – UE Marketplace. Unreal Engine. Available online: https://www.unrealengine.com/marketplace/en-US/product/opera-house-kit [Accessed 22 Sep. 2023].

Dekogon Studios (2018) Construction Site VOL. 2 – Tools, Parts, and Machine Props in Props – UE Marketplace. Unreal Engine. Available online: https://www.unrealengine.com/marketplace/en-US/product/construction-site-vol-2-tools-parts-and-machine-props [Accessed 22 Sep. 2023].

Dekogon Studios – Props (2018) Construction Site VOL. 1 – Supply and Material Props in Props – UE Marketplace. Unreal Engine. Available online: https://www.unrealengine.com/marketplace/en-US/product/construction-site-vol-1-supply-and-material-props [Accessed 22 Sep. 2023].

Dekogon Studios – Props (2022) City Street Props in Props – UE Marketplace. Unreal Engine. Available online: https://www.unrealengine.com/marketplace/en-US/product/8162a702d7c747e9ac544dff38af78c8 [Accessed 22 Sep. 2023].

Epic Games (2018) Soul: City in Epic Content – UE Marketplace. Unreal Engine. Available online: https://www.unrealengine.com/marketplace/en-US/product/soul-city [Accessed 22 Sep. 2023].

Epic Games – Props (2022) City Sample Vehicles in Epic Content – UE Marketplace. Unreal Engine. Available online: https://www.unrealengine.com/marketplace/en-US/product/city-sample-vehicles [Accessed 22 Sep. 2023].

JessyStorm’s Assets – Props (2023) Grocery Store Props Collection in Props – UE Marketplace. Unreal Engine. Available online: https://www.unrealengine.com/marketplace/en-US/product/grocery-store-props-collection [Accessed 10 Jan. 2024].

SilverTm – Props (2019) Industry Props Pack 6 in Props – UE Marketplace. Unreal Engine. Available online: https://www.unrealengine.com/marketplace/en-US/product/3e2a3cb997cf47b1ab782a67957bfed0.

Switchboard Studios (2022) Vehicle Variety Pack Volume 2 in Props – UE Marketplace. Unreal Engine. Available online: https://www.unrealengine.com/marketplace/en-US/product/9a705589d1994c6e8757fdbedaf698af.

Moodboard Images

80LV (2020) Magic VFX & SFX. Ellie Harisova. Available online: https://80.lv/articles/unity-digest-magic-vfx-sfx/ [Accessed 26 Sep. 2023].

Agentics (2022) VFX Lightning and Sparks. Agentics. Available online: https://www.argentics.io/the-art-of-vfx-in-video-games [Accessed 26 Sep. 2023].

ArtStation (2020a) Dark Magic VFX. Gabriel Sanches. Available online: https://akashenen.artstation.com/projects/X1O8RD [Accessed 26 Sep. 2023].

ArtStation (2020b) Purple Orb. Alex Vinogradov. Available online: https://yarpoplar.artstation.com/projects/AdaWW [Accessed 26 Sep. 2023].

Dreamstime (2023) Magic VFX Illustrations & Vectors. Dreamstime. Available online: https://www.dreamstime.com/illustration/magic-vfx.html [Accessed 26 Sep. 2023].

Flickr (2015) Will o’ Whisp. Underworld Ascendant. Available online: https://www.flickr.com/photos/130354179@N07/16417722686/ [Accessed 26 Sep. 2023].

TuneDigital (2023) Magical Symbols VFX. TuneDigital. Available online: https://www.triunedigital.com/products/magical-symbols [Accessed 26 Sep. 2023].

Warner Bros (2007) Harry Potter Morsmordre. Harry Potter Wiki. Available online: https://harrypotter.fandom.com/wiki/Morsmordre [Accessed 26 Sep. 2023].

Warner Bros (2023) Hogwarts Legacy. Avalanche Software. Available online: https://store.steampowered.com/app/990080/Hogwarts_Legacy/ [Accessed 26 Sep. 2023].

Categories
3D Character Design

3D Character Design Portfolio

Introduction

When I first started this course, I was really excited because the idea of learning something new with creative software is fun for me and I like to be creative with my work. This course required me to create a 3D character in a software known as Zbrush, texture it, bone rigging and animating our character using websites like Mixamo and document my journey the way through by creating a portfolio writing an introduction, noting down the research I made on the course, talk about my concept art and 3D character creation process and finally the conclusion on WordPress.

Research Process

I went on google and gathered images of different well designed characters I knew throughout my life. When looking back at the moodboard, I have noticed a pattern with the characters included. Most of the characters on that moodboard are known to be villainous.

The characters I have chosen where from a multimedia of different art styles, films, TV shows, games, and YouTube. I was defiantly aiming for the cool looking and slick character designs and most of them apply to villain designs. With this moodboard, I had lots of options and ideas for my character design. I also thought about how cliché most of the characters are and what their powers they possess. I try to think of something unique with my idea for a 3D character design.

In contrast I also realised most of the characters (the villains) where created due to an incident or event that took place that forced them on their path. This lead me to believe the statement “Villains aren’t born, there made” and it’s their own life experiences that made them believe in what they believe. During the lab session, I was given the opportunity to sketch up a rough outline of my character (also I did copy a reference pose from the internet but it was to help me drawing the character’s bodily features).

Concept Design

I then started drawing my character by drawing the outline, drawing detailed features, adding baseline colour, shade and highlights and effects. Eventually I came up with this design and thought up with the lore and backstory.

I have dived into colour theory when I started creating my character. Most menacing villainous characters usually have dark colour pallets and I wanted the character to have the ability to create dark matter from his hands and can manifest objects and living organisms making them more sentient when his power morph and transform them in his image. So, the colour I chose was dark purple because it the power fits the colour palate really well.

When I first had ideas about my character design I was aiming for one of the eyeless monsters from Doom. I went on google to find an image that best suits my plan and I have successfully found it.

I didn’t want it all flesh and bones like the image above I wanted the head to be a metallic piece of technology that has clamped onto the character’s head like a clam and it’s machine structure forces the character to smile by stretching it’s mouth. I also did add eyes to the character resembling some spider.

I actually had fun with this task. As I was creating this character, I was in a state of flow with my work and it felt great. I have done work similar to this in the past and I felt that I can make a fully fledged characters and this course helped me improve my artwork and decide on a definitive style.

A few days after, I have received some feedback about my character. The feedback was the character design is good but they preferred to see a design aspect on the character’s past appearance put on the characters present appearance as a reference to the past and the second feedback is having the technology spreading throughout the body like a virus.

I felt that the feedback I received helped the redesigned character looks even better than before. Furthermore, I have created more designs of what my character would look like if it was flipped to show it’s back flipped to show it’s left and right sides.

Thanks to this, I can visualise this character into a 3D model and it could help me with the thickness size and hight measurements of the character. I have also dived into shape and silhouette theory where I add basic shapes on my character to determine it’s style, theme and meaning of the character. I have also created a silhouette version of my character and looking at it, the shape is very recognisable.

This image has an empty alt attribute; its file name is Character-Shape-and-Shadow-Theory-1024x768.jpg

3D Modelling

I then started making a basic blockout of my character. The software I will be using Zbrush will help me achieve that. I used the lab session videos to use as tutorials to help me in constructing the blockout. The next set of images will show my step by step process.

When I made the blockout of my character, I’ve learned a lot about the functionality of Zbrush and the multitude of different ways advance in Zbrush. One important technique includes creating and adding more clay shapes on to the default ball of clay you get when you open the software this helps in creating bigger or fleshing out models.

I did learn Zbrush before this course for a limited time but I only learned about sculpting using the basic brushes. With this recent practice, I now know how to add more clay onto my model and which tools I should use the most to help me create the final character model. Those tools include the move tool (which allows me to reshape the clay piece to my liking), clay build up tool (which allows me to add detail onto my model those include muscles, veins etc) and the dam standard brush allows me to create dents and strokes into the model.

I decided to move on from the basic model blockout and started on the head. I copied my concept and created a 3D modelled version I did have a few image references to help me gain a more understanding of my ideas. I went through some struggles when creating the jaw of my character until I decided to stick with the original design making the character’s teeth clench permanently. The next set of images will show my progression of the face and rough jaw of my character.

Here, I have used the shapes to create the head and used the dam standard tool to create the crevice of the machinery head.

In my opinion, I believe that the latest image above is what I am aiming for when doing this character. I may need to tweak the jaw to make it more of a hard surface than a normal human cheek with flesh and muscles because I want the entire head to be robotic.

I decided to reshape the chest a bit to fit a grown strong man posture and have merged the chest part and stomach part of the model together and dynameshed the two shapes to get a smoother outcome. The legs was something I worked on next as I was just using the move tool to drag parts of the model to fit the plane’s man pose I got for the model. I made the proportions look right and the image below shows that it was successful.

After that, I moved on with the arms and have done the same twith the legs. Having to mirror and weld, made it easier to create a symmetrical body build for the character.

Kept moving it so I get the proportions right.

In the picture above, I used the move tool to reshape the elbows and wrists to better fit the strong man build for my character. The buttock was added later.

The hands where a bit too long and weirdly shaped so I decided to temporarily change the shape of the hands so I can make them into actual fingers later.

I moved on from the hands for now and decided to work on the neck of my character. I have used reference images of strong man builds and have looked into their neck and shoulder structure. For this process, I used the clay build up tool and the dam standard tool to model the structural integrity of the neck and shoulders.

When making this character, I believed the few things I will struggle with in this model is the hands, feet or teeth because they require constant tweaks and long time spent fixing to get it right. The teeth was what I worked next I basically modelled one tooth from a sphere and used some careful rotating and placing each copied tooth. The pollygroups and auto grouping tool helped me a lot when making the character’s rows of teeth on one side of the face.

I have yet to do the other side because the mirror and weld tool in Zbrush is complicated and when I mirror and weld one tooth it puts that tooth on the other side but makes the entire set of teeth on the right disappear.

I have found a way to overcome this issue by ungrouping the teeth subtool and then mirror and welded the subtool and got the result I needed which was having the teeth on the left hand side of my character. Since Zbrush is left hand dominant, I had to make sure the left hand side looked good so I can then mirror and weld the subtool making another row of teeth on the right hand side.

After I’ve added the new set of teeth on the left, I decided it was the best time to add realistic gum textures on my character’s teeth. I’ve used the clay build up tool to define the roots of the teeth and the texture of the gums. I’ve been told to lower the bottom of the mouth a bit to make it look better and I did.

Hangry the Pig

Dina Fritz (Titan Form)

These images above are the inspiration to my character’s set of teeth.

I believed that I did very well with my character’s teeth and have accurately modelled and shaped the gums successfully. The character may have more teeth than the average human as this is intentionally designed to fit the whole style and theme of the character. The machinery that clamped onto the head of my character added more teeth to the human form during the transformation as if the tech is upgrading and eerily morphing the human anatomy to become a better design.

I moved on to work on the hands and started working on every finger joint remembering to work on the left hand side for when I mirror and weld the fingers to match the other side. I used the smooth tool to round out the blockout squared fingers, the move tool to carefully mould the finders to the hand and the clay build up tool to add texture to the hands.

I was given feedback to make the fingers more relaxed as I am doing the character at an a pose and bone rigging the character can be made easier if I made the fingers more relaxed.

Next, I decided to focus on the muscle work of the entire character and some other major details. Those include raising the arms spacing the gap between the limbs and the torso of the character to avoid the clay clipping together when animating the character in Mixamo.

I noticed when merging the subtools of the hands and arms together, the history of each tool gets wiped when I separate them again. But this is fine as long as I am happy with the hands and their shape.

The hands and lower arms of the character was missing wrist joints so I merged the hands and fingers together and moved the combined parts down slightly, used the move tool and lower the arms more to create a wrist like shape to how I would like it and split the hand subtools apart knowing I needed to merge the right clay parts back together (for example, the split subtools of the left and right index finger I merge together and etc.)

Then I worked on the legs using the clay build up tool to add more muscle and the knee bones to the front and back of the character.

I worked on the shoes after. I created some basic looking footwear by using the move tool and reshaped it to look like boots.

This may look like I just got some clay made a boot in minutes without that much attention but I thought about my character’s theme and style how the machine provided more teeth to the character. This can give me enough freedom for me to add metal plating on my character. Which then lead me to the design below.

I eventually worked on the armoured plating for the character. Starting with the chest and stomach pieces. I grabbed a few new shapes to model and began making the stomach plating. Was thinking about making it spherical, ovular, square, increasing the number of plating, none of them looked right so I settled on making one triangular plating and it looked perfect.

Next was the upper arm armour plates. The method I used was to extract a part of the arm with the right level of thickness and subdivide the new subtool to make it more smoother like metal.

Then I worked on the chest pieces, I added two new spheres, made them look like armoured plating and placed them on the chest area of my character. Before I moved on to mirror and welding the armour piece to the other side of my character, I asked one of my colleagues for some feedback on my character.

He told me that everything looked great except the chest armour. He preferred it to look like what I did to make the arm pieces. Extending a certain part of the character as a separate subtool and subdivide it.

To this…

Overall, I think the body of the character looks great. The limbs, hands, chest, shoes, head and armour pieces match perfectly and all I need to do next was to make the cape. I took a plane from the insert shape tool and created a cape my character will wear. Used different cloth tools and the smooth tool to create the ideal realistic looking cloth for my cape.

I also created a joining neck piece of my cape that wraps around my character’s neck and a jagged collar similar to both Doctor Strange’s and Evil Doctor Strange’s cape design. To finalise the design, I thickened the cape’s structure so it dosen’t look like a piece of paper and it was clipping through the neck and shoulders of my character.

Retopology

Now that I’ve done the cape, the character is fully completed and is ready to be put in Maya for retopology. This is the stage I was dreading because I needed to create a polly surface that streatches throughout my model whilst creating square faces lessening the resolution of my character and cape. I started from the neck down, constantly creating nice square loops around my character. Others told me to create main loops to easily connect the detailed loops together.

The hands are the most tedious when doing this possess because it requires the most edge loops to look like fingers and not a low polly claw.

I kept falling into the trap of making the squares spiral down to the end of the limb, body part ect of the character. This is not great when doing retopology as it requires to create loops that connect back to each other when the UV unwrapping stage happens.

Adding more edge loops gives the poly surface more faces that will then fit the character model.

More edge loops

Less edge loops

I added more retopology to my character and added extra edge loops. During this process, I have learned that it’s best to create edge loop rings around different parts of the body so it’s easier to expand and make more loops to fit the whole body than to start with one part of the body and go down.

UV Unwrapping

Then I moved on to the mouth plus eye sockets of my character and have used the cut and sew tool to separate the main parts of my body and transform them into nets and UVs.

I have cut and separated the model into different parts. Those include hands, shoes, legs, cape, chest and head. I then used the auto UV tool to unwrap the model into nets.

After I have unwrapped everything, I have assigned parts of my character (Polly surfaces and shapes) materials so it would be easier for me to know what material goes where when editing in substance painter.

This may look weird at first, but it will allow me to determine which material to use on which part. For instance, red parts will be made of metal, dark blue parts are the tar-like skin, the green parts will be the purple glowing orbs, the yellow would be the mouth and the cyan will have a cape material.

Substance Painter

I’ve experimented with substance painter and it’s many unique materials and managed to successfully textured the model. One of the things I’ve experimented on was a zipper paint style and have turned on the symmetry to paint a zipper on the mouth of the character.

The picture above shows what material I’m going to use for the skin of my character. I want the skin to look like this dark purple, blue, black tar-like slippery, shiny substance. This is best suited for my character because it resembles Venom’s skin from marvel.

Venom

As you can see Venom’s skin looks viscous and tar like which will be perfect for my character since the machine that clamped my character’s head gave him added muscle growth and covered his entire body like the Symbiote body protection ability.

For the cape, I previously wanted it to have a lighter colour like my concept art, but it didn’t match the dark theme of my character at all. So I gave it a dark purple colouration to match the style of my character.

For the mouth, I had a couple of ideas since I didn’t retopologize the teeth properly. My first idea is to make the mouth completely shut with metal plating similar to the bottom part of a knights helmet.

The next idea I had was to make the mouth completely black with the same texture I used for the body but it looked weird and decided it wasn’t going to work.

The third idea however, lead me to applying a skin texture and changing it’s colour to be dark red and used a paint tool and turned on the symmetry and cleverly created a row of teeth using a zipper brush. I have shown this to another student and he told me that this made the character even more terrifying then ever. So I went for a dark red with zipper teeth. It also matched the character’s style too.

For this section, I used a silver metal surface and have applied some rough metal texture to show that the character has been in tough scenarios where his metal armour would age and change colour.

Finally, I have created the purple glow texture for the eyes and orb that connects the cape. I made the colour purple to match the style of the character and added a luminant glow feature and tweaked the glint so it would portray a realistic glow with realistic reflections. I have used the video below to achieve it.

And this is the final result…

Looking at it from substance, I feel very proud of what I did and appreciate how it all came together well.

After putting it back into Maya (fully textured) I decided to render it out on unreal engine using the camera functions and movement keyframes to create this turntable of my character. Added some lighting within the scene and changed the default day sunlight to night to set this ominous tone. I looked for tutorials online on how to export a sequence in unreal but unfortunately I didn’t find any.

This lead me to use OBS the screen recording software to record the sequence.

Conclusion and Reflection

In conclusion, I am very proud in how it turned out. That I have successfully created a 3D fully rendered and textured model of my character to a very good standard. I have learned a lot during this course and have felt that I have put everything I have into finishing it. This course allowed me to dive into 3D modelling, teaching me what tools to use and how to use it, how to retopologize, how to UV unwrap the model, texture the model, put it back to maya and render it in unreal engine.

Originally, I wanted to create a character that has a doom eyeless monster style face with a permanent grin showing some sort of teeth, a strong man physique, metallic plates and shoes, a sharp cape and an overall evil appearance. Reflecting back, I believe that I achieved what I wanted to make when I made the concept art of my character and have surprisingly stuck to the idea.

There where some sacrifices I needed to make when creating my character. Those include, the textured markings on my character’s concept art needed to be simplified when at the substance painter texturing stage because it can overcomplicate the design or overcomplicate the process for me, the collar cape connection for my character needed to be a simplified shape that wraps around the neck and the set of teeth for my concept art wouldn’t work on my character because it needed gums to have it remotely like a human head. With the changes I made, I think it was for the betterment of the design.

I also learned that asking help from other students and staff can be really helpful to advance to the next step of my course. I was really struggling with the last few bits of my course. Mainly due to few experience and the lack of available staff to help me due to it being a Christmas break.

Fortunately, I did find some help by asking the 3D game design teams section for the University students and found a student who can help me with stuff that I am stuck on. The student then helped me with the completion of my course guided me on UV unwrapping, texturing and importing to unreal.

I got to be extremely honest with my self. If that student wasn’t there to help me with the last bit of this course, I would be in a very different situation (Still in the UV stage because recourses I find online aren’t helpful and the staff not being there to help me is at it’s worst when your on the last bit of the course, pushing me out in the open to independently solve it with zero guidance and no knowledge while my mental health deteriorates by the minuet with all the stress).

This made me realise that asking help from other students can do as much help as the staff can. Also, this encourages me to ask students for guidance when I’m stuck on something. Furthermore this course has taught me new things like how to model a character and understand new software like Zbrush. I had a lot of fun with this course and hope to use what I’ve learned for future projects.

Reference List

Video tutorials I’ve used

Z Instructors (2021) Substance Painter Emissive Tutorial. www.youtube.com. Available online: https://www.youtube.com/watch?v=YyGFwHUkaDM&t=211s [Accessed 30 Dec. 2023].

FlippedNormals (2018) How to Retopologize the Body in Maya. www.youtube.com. Available online: https://www.youtube.com/watch?time_continue=1&v=_TYOgI9kJtU&embeds_referring_euri=https%3A%2F%2Fcanvas.hull.ac.uk%2Fcourses%2F66812%2Fpages%2Flab-zbrush-to-maya-part-1%3Fmodule_item_id%3D986675&source_ve_path=Mjg2NjY&feature=emb_logo [Accessed 20 Nov. 2023].

James, How Do I? (2022) Exporting Textures from Substance 3D Painter to Maya Arnold. www.youtube.com. Available online: https://www.youtube.com/watch?v=-cKtZP3bxRg [Accessed 22 Dec. 2023].

Moodboard Images and other Inspirational Images

Marvel (1984) Venom. Marvel. Available online: https://marvel.fandom.com/wiki/Venom_(Symbiote)_(Earth-616) [Accessed 30 Dec. 2023].

Glowstick Entertainment (2018) Hangry the Pig. Steam. Available online: https://store.steampowered.com/app/332950/Dark_Deception/ [Accessed 5 Oct. 2023].

Kodansha ltd (2013) Attack on Titan Dina Fritz (Titan Form). Hajime Isayama. Available online: https://attackontitan.fandom.com/wiki/Dina_Fritz_(Anime) [Accessed 5 Oct. 2023].

Blizzard Entertainment (2016) Zenyatta. Overwatch Wiki. Available online: https://overwatch.fandom.com/wiki/Zenyatta [Accessed 6 Oct. 2023].

Blizzard Entertainment (2022) Kiriko. Overwatch Wiki. Available online: https://overwatch.fandom.com/wiki/Kiriko [Accessed 6 Oct. 2023].

Capcom (2021) Karl Heisenberg. Vilains Wiki. Available online: https://villains.fandom.com/wiki/Karl_Heisenberg [Accessed 6 Oct. 2023].

Glowstick Entertainment (2018) Gold Watcher. Dark Deception Wiki. Available online: https://dark-deception-game.fandom.com/wiki/Gold_Watchers [Accessed 6 Oct. 2023].

Marvel (1972) Ghost Rider. Marvel database. Available online: https://marvel.fandom.com/wiki/Johnathon_Blaze_(Earth-616) [Accessed 6 Oct. 2023].

Marvel (2023) Miguel O’Hara. Vincent Pauvarel. Available online: https://www.youtube.com/watch?app=desktop&v=GXRbwS7Gr3s [Accessed 6 Oct. 2023].

Mattel Playground Productions (2013a) Morphos. Wiki Fandom. Available online: https://villains.fandom.com/wiki/Morphos [Accessed 6 Oct. 2023].

Mattel Playground Productions (2013b) Ultralinks. Wiki Fandom. Available online: https://villains.fandom.com/wiki/Ultralinks [Accessed 6 Oct. 2023].

Mattel Playground Productions (2022) Mortum. a1whitney. Available online: https://www.deviantart.com/a1whitney/art/Max-steel-mortum-926049308 [Accessed 5 Oct. 2023].

Mob Entertainment (2022) Boxy Boo. Steam. Available online: https://poppy-playtime.fandom.com/wiki/Boxy_Boo [Accessed 6 Oct. 2023].

Mytona Fntastic (2021) Keymaster. Propnight Wiki. Available online: https://propnight.fandom.com/wiki/Killer [Accessed 6 Nov. 2023].

Nintendo (2006) Dry Bowser. Nintendo Wiki Fandom. Available online: https://mario.fandom.com/wiki/Dry_Bowser [Accessed 6 Oct. 2023].

Panic Button Games (2019) Revenant. Apex Legends Wiki. Available online: https://apexlegends.fandom.com/wiki/Revenant [Accessed 6 Oct. 2023].

PopCross Studios (2023) Dresden Oakland. PopCross Studios Wiki . Available online: https://popcross-studios.fandom.com/wiki/Dresden [Accessed 6 Oct. 2023].

Steel Wool Games (2021) Burntrap. Five Nights at Freddy’s Wiki. Available online: https://freddy-fazbears-pizza.fandom.com/wiki/Burntrap [Accessed 6 Oct. 2023].

Warner Bros (2017) Scarecrow. Injustice Gods Among Us Wiki. Available online: https://injustice.fandom.com/wiki/Scarecrow [Accessed 6 Oct. 2023].

Zag Studios (2016) Hawkmoth. Miraculous Ladybug Wiki. Available online: https://miraculousladybug.fandom.com/wiki/Gabriel_Agreste [Accessed 6 Oct. 2023].