Introduction
When I first started this course, I was really excited because the idea of learning something new with creative software is fun for me and I like to be creative with my work. This course required me to create a 3D character in a software known as Zbrush, texture it, bone rigging and animating our character using websites like Mixamo and document my journey the way through by creating a portfolio writing an introduction, noting down the research I made on the course, talk about my concept art and 3D character creation process and finally the conclusion on WordPress.
Research Process
I went on google and gathered images of different well designed characters I knew throughout my life. When looking back at the moodboard, I have noticed a pattern with the characters included. Most of the characters on that moodboard are known to be villainous.
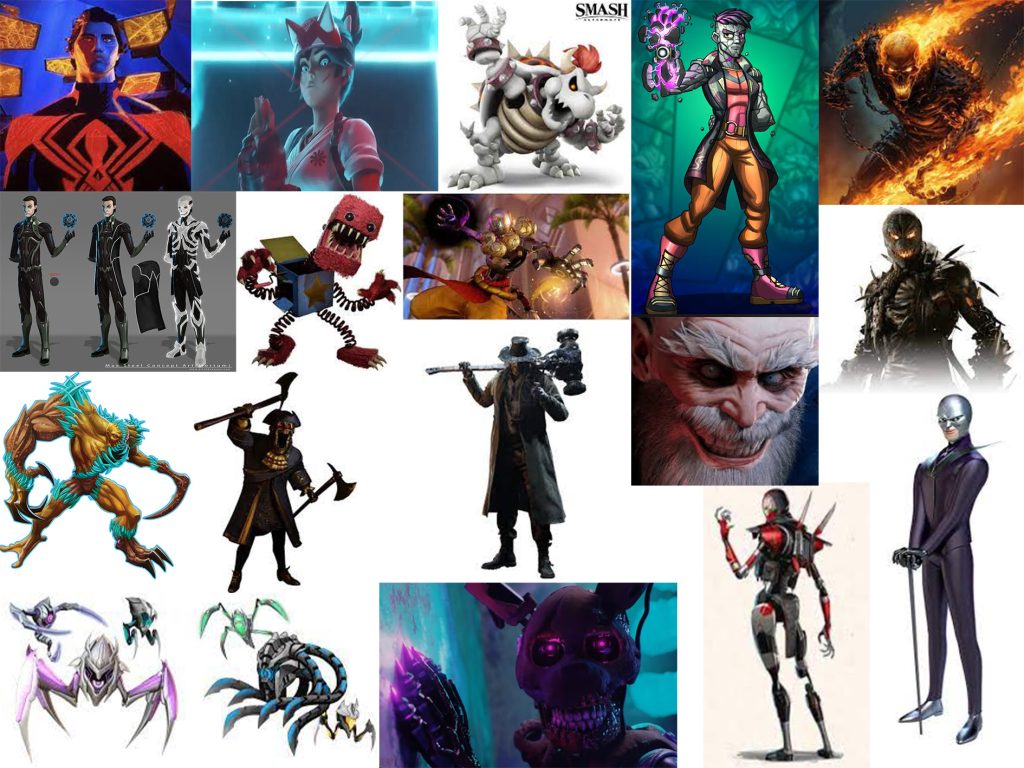
The characters I have chosen where from a multimedia of different art styles, films, TV shows, games, and YouTube. I was defiantly aiming for the cool looking and slick character designs and most of them apply to villain designs. With this moodboard, I had lots of options and ideas for my character design. I also thought about how cliché most of the characters are and what their powers they possess. I try to think of something unique with my idea for a 3D character design.
In contrast I also realised most of the characters (the villains) where created due to an incident or event that took place that forced them on their path. This lead me to believe the statement “Villains aren’t born, there made” and it’s their own life experiences that made them believe in what they believe. During the lab session, I was given the opportunity to sketch up a rough outline of my character (also I did copy a reference pose from the internet but it was to help me drawing the character’s bodily features).
Concept Design
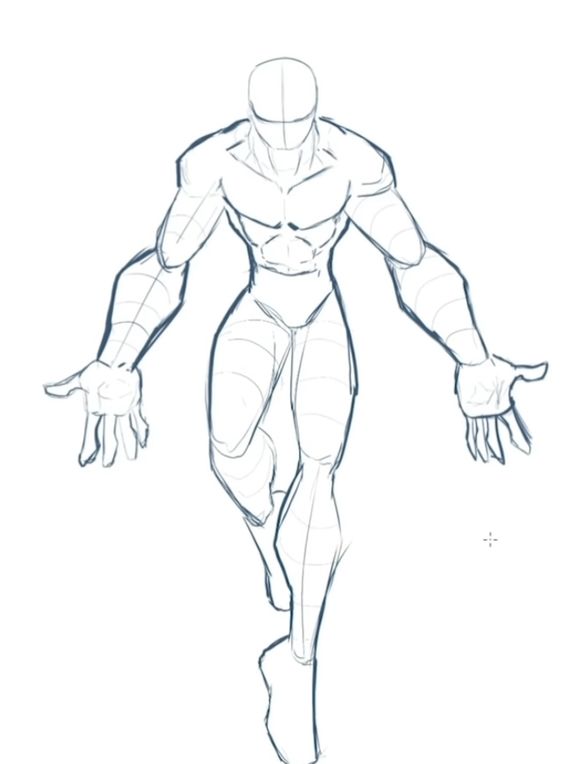
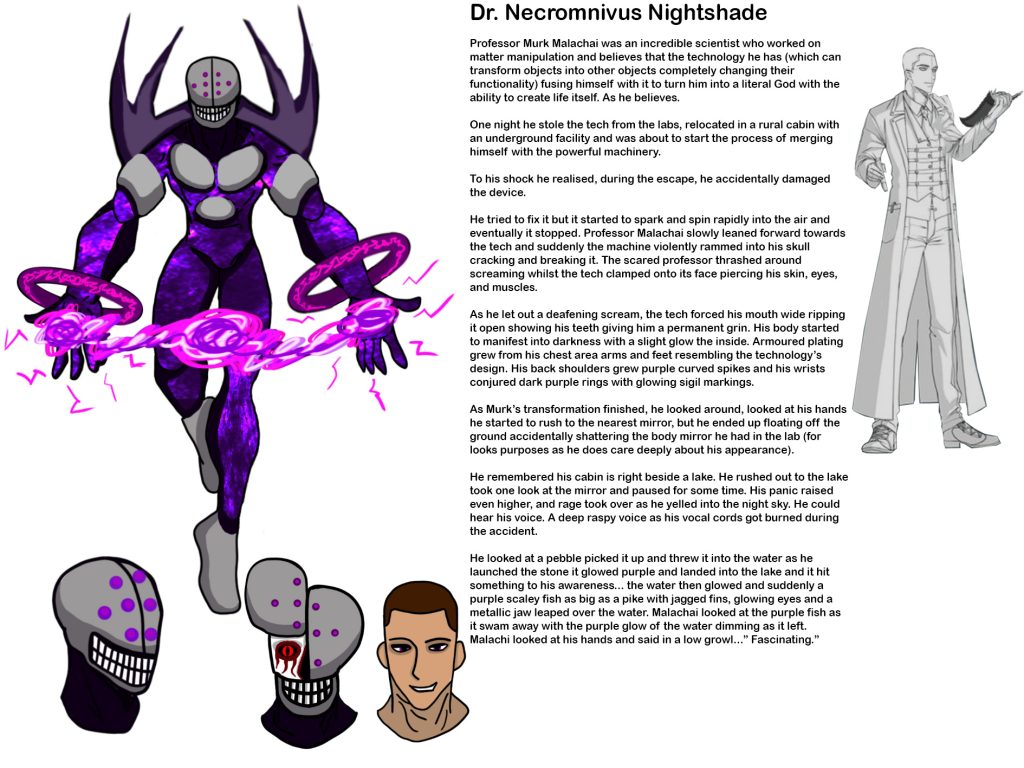
I then started drawing my character by drawing the outline, drawing detailed features, adding baseline colour, shade and highlights and effects. Eventually I came up with this design and thought up with the lore and backstory.
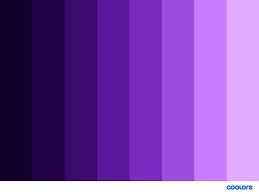
I have dived into colour theory when I started creating my character. Most menacing villainous characters usually have dark colour pallets and I wanted the character to have the ability to create dark matter from his hands and can manifest objects and living organisms making them more sentient when his power morph and transform them in his image. So, the colour I chose was dark purple because it the power fits the colour palate really well.
When I first had ideas about my character design I was aiming for one of the eyeless monsters from Doom. I went on google to find an image that best suits my plan and I have successfully found it.
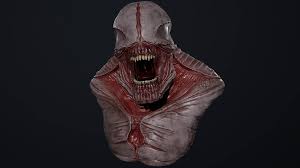
I didn’t want it all flesh and bones like the image above I wanted the head to be a metallic piece of technology that has clamped onto the character’s head like a clam and it’s machine structure forces the character to smile by stretching it’s mouth. I also did add eyes to the character resembling some spider.
I actually had fun with this task. As I was creating this character, I was in a state of flow with my work and it felt great. I have done work similar to this in the past and I felt that I can make a fully fledged characters and this course helped me improve my artwork and decide on a definitive style.
A few days after, I have received some feedback about my character. The feedback was the character design is good but they preferred to see a design aspect on the character’s past appearance put on the characters present appearance as a reference to the past and the second feedback is having the technology spreading throughout the body like a virus.
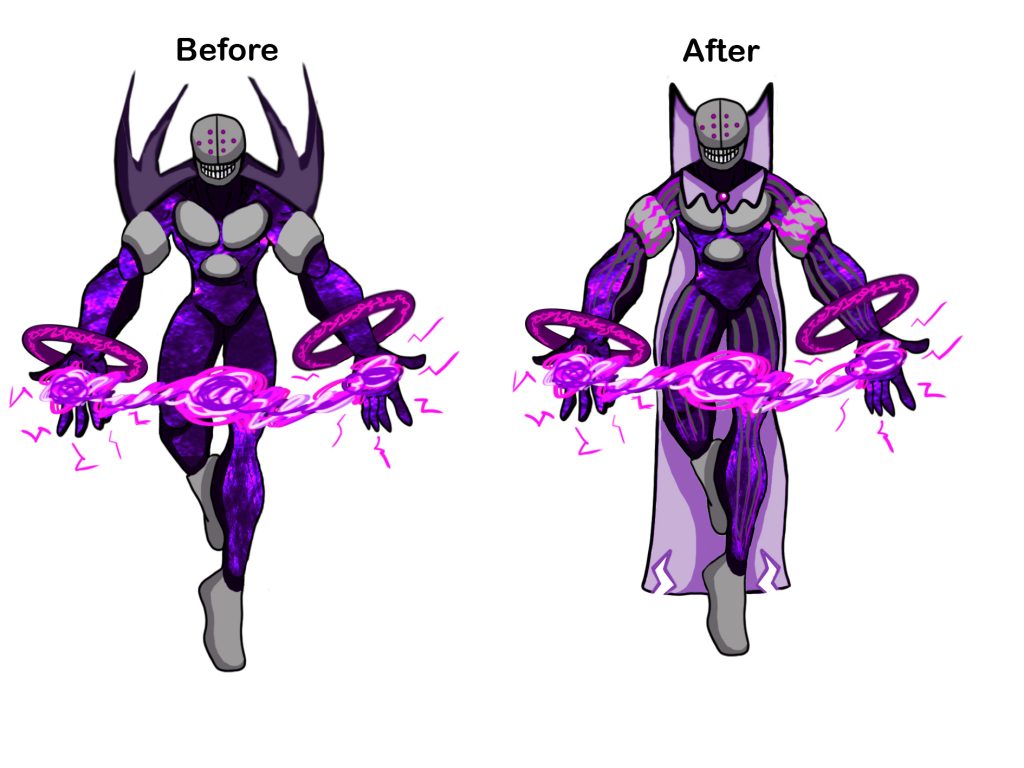
I felt that the feedback I received helped the redesigned character looks even better than before. Furthermore, I have created more designs of what my character would look like if it was flipped to show it’s back flipped to show it’s left and right sides.
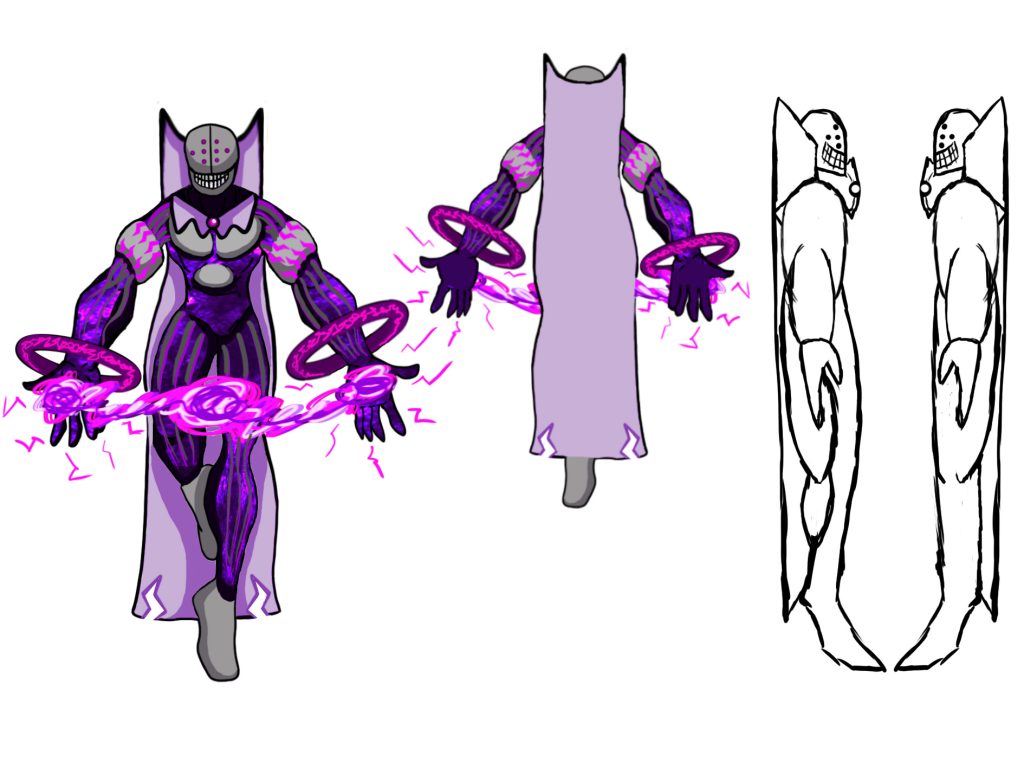
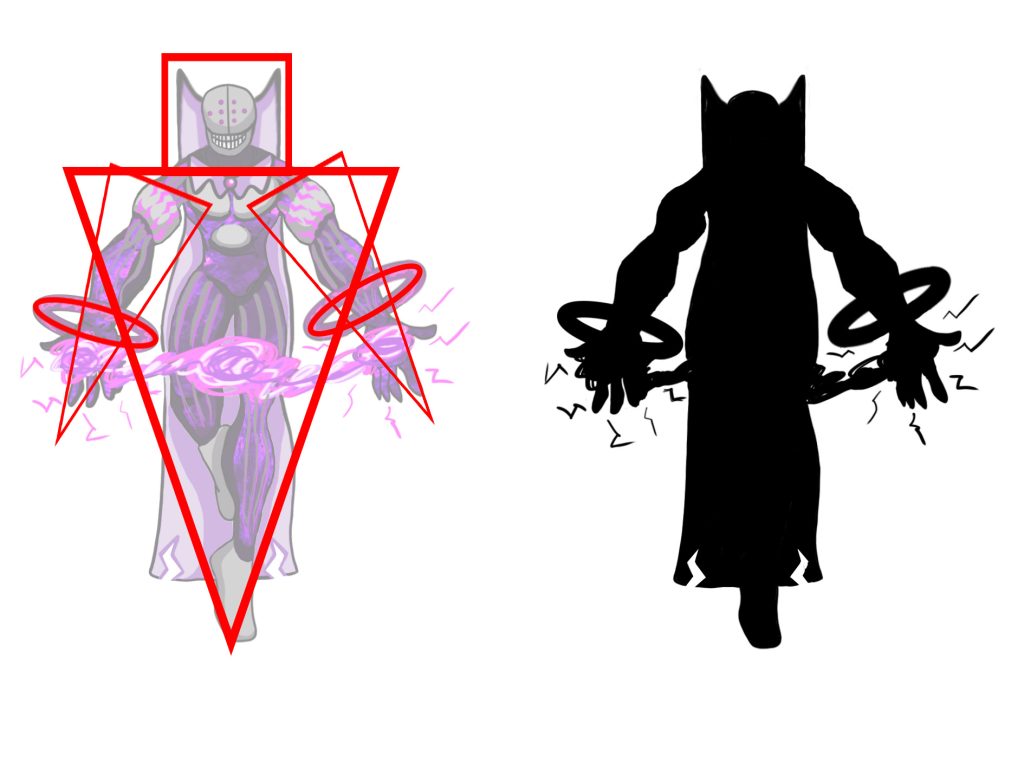
Thanks to this, I can visualise this character into a 3D model and it could help me with the thickness size and hight measurements of the character. I have also dived into shape and silhouette theory where I add basic shapes on my character to determine it’s style, theme and meaning of the character. I have also created a silhouette version of my character and looking at it, the shape is very recognisable.
3D Modelling
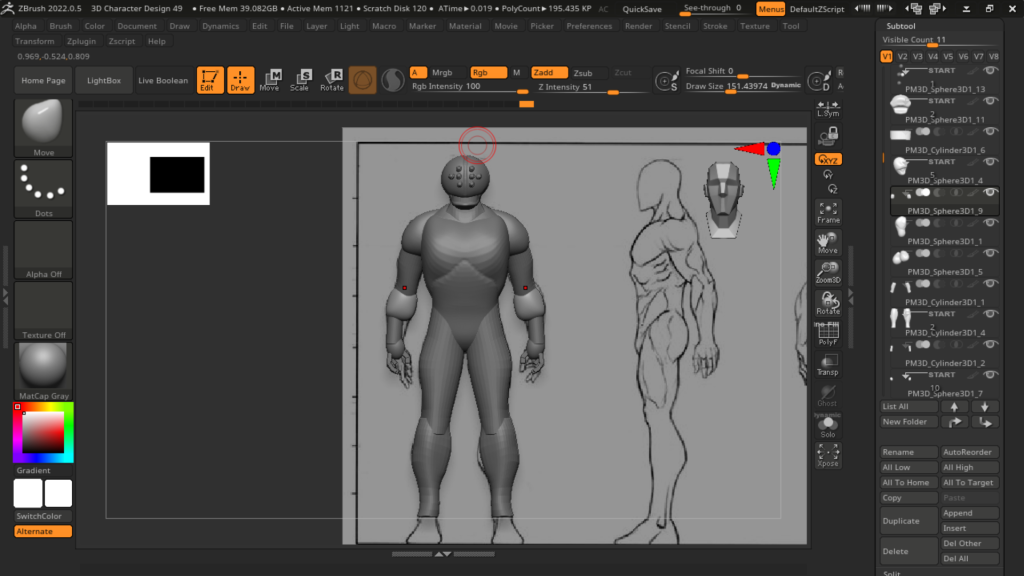
I then started making a basic blockout of my character. The software I will be using Zbrush will help me achieve that. I used the lab session videos to use as tutorials to help me in constructing the blockout. The next set of images will show my step by step process.
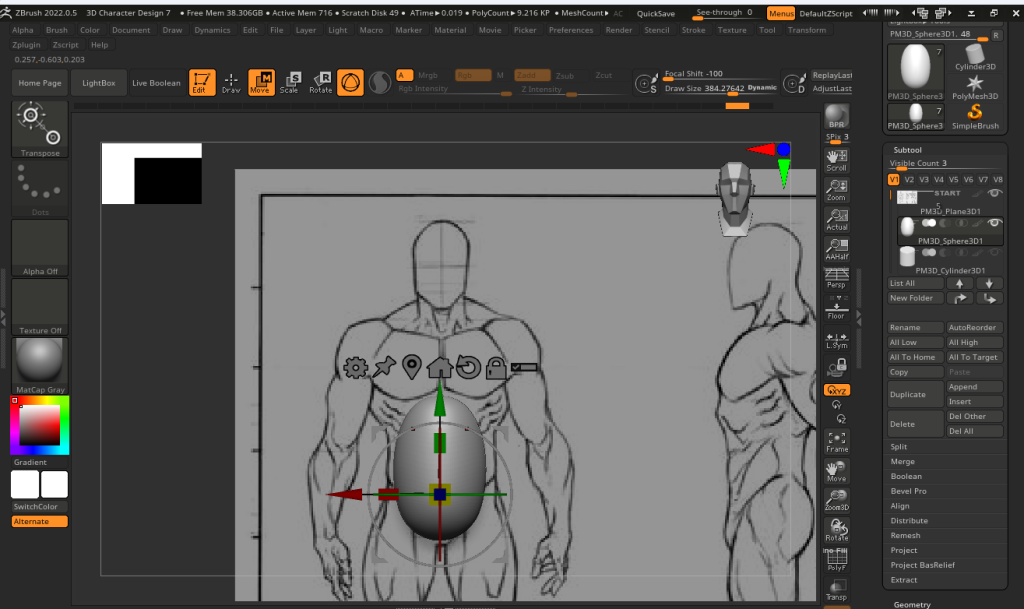

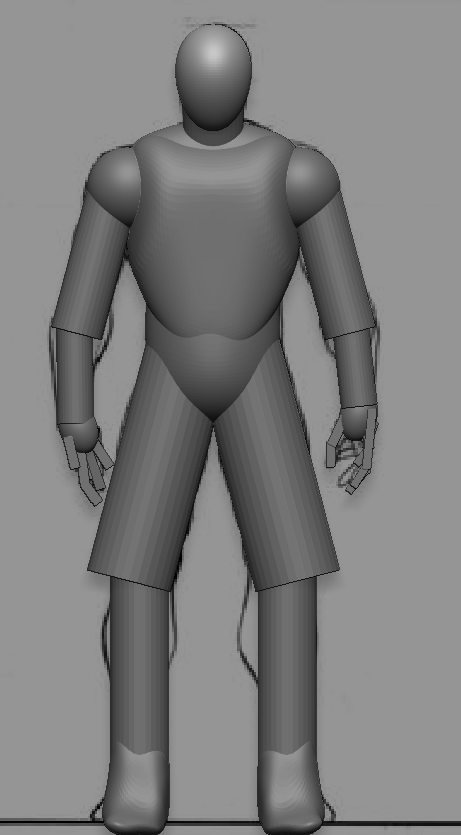
When I made the blockout of my character, I’ve learned a lot about the functionality of Zbrush and the multitude of different ways advance in Zbrush. One important technique includes creating and adding more clay shapes on to the default ball of clay you get when you open the software this helps in creating bigger or fleshing out models.
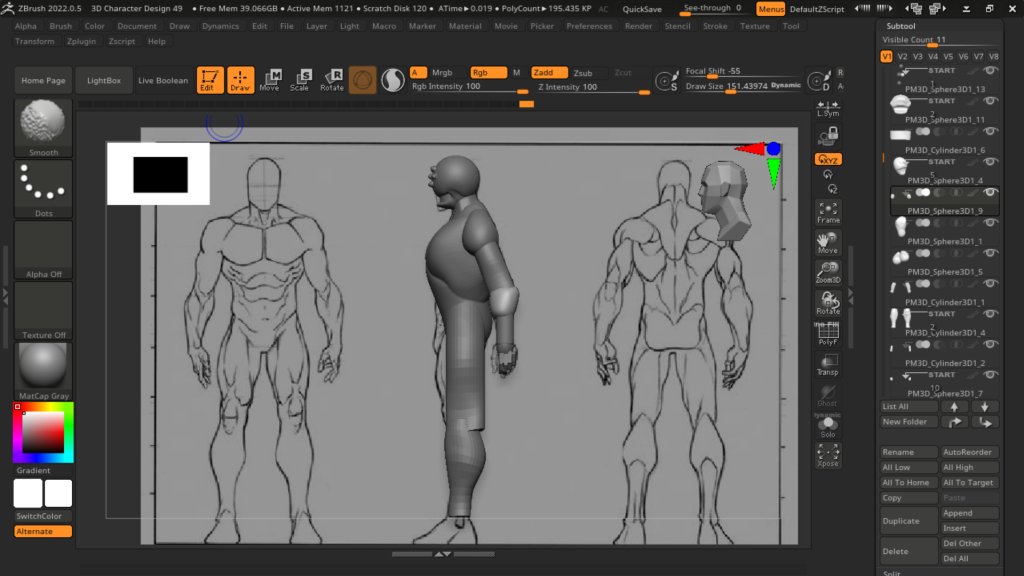
I did learn Zbrush before this course for a limited time but I only learned about sculpting using the basic brushes. With this recent practice, I now know how to add more clay onto my model and which tools I should use the most to help me create the final character model. Those tools include the move tool (which allows me to reshape the clay piece to my liking), clay build up tool (which allows me to add detail onto my model those include muscles, veins etc) and the dam standard brush allows me to create dents and strokes into the model.
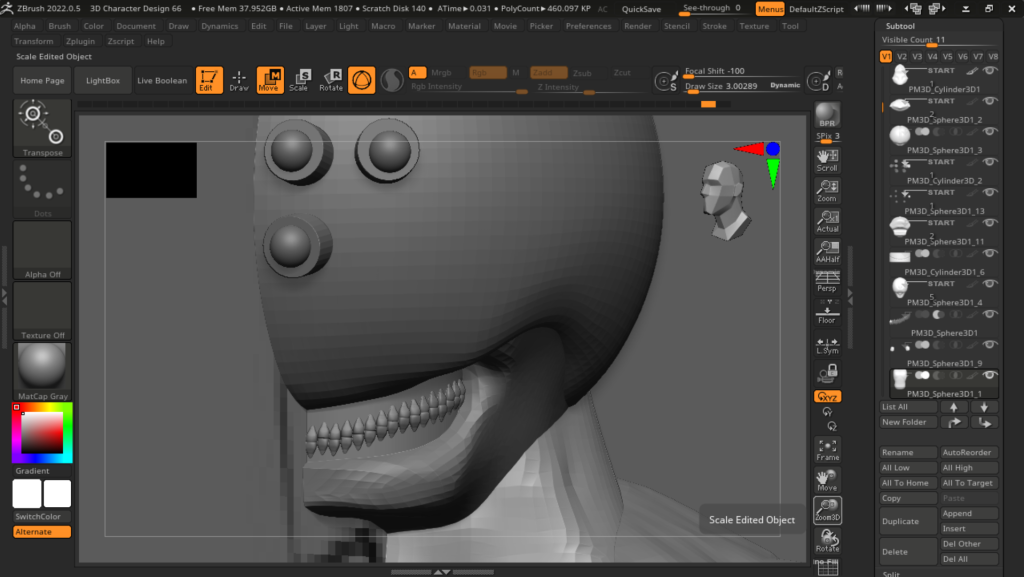
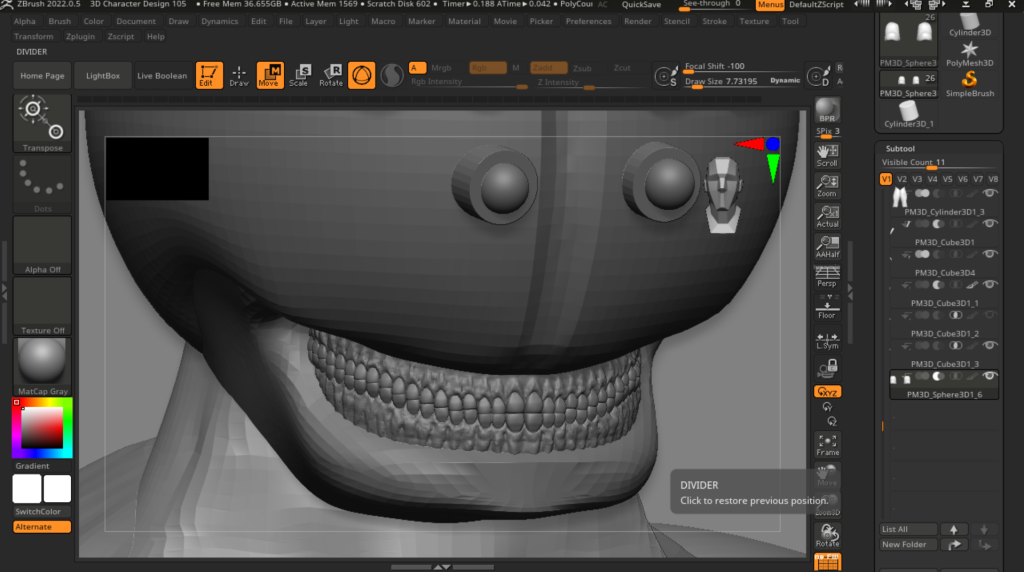
I decided to move on from the basic model blockout and started on the head. I copied my concept and created a 3D modelled version I did have a few image references to help me gain a more understanding of my ideas. I went through some struggles when creating the jaw of my character until I decided to stick with the original design making the character’s teeth clench permanently. The next set of images will show my progression of the face and rough jaw of my character.
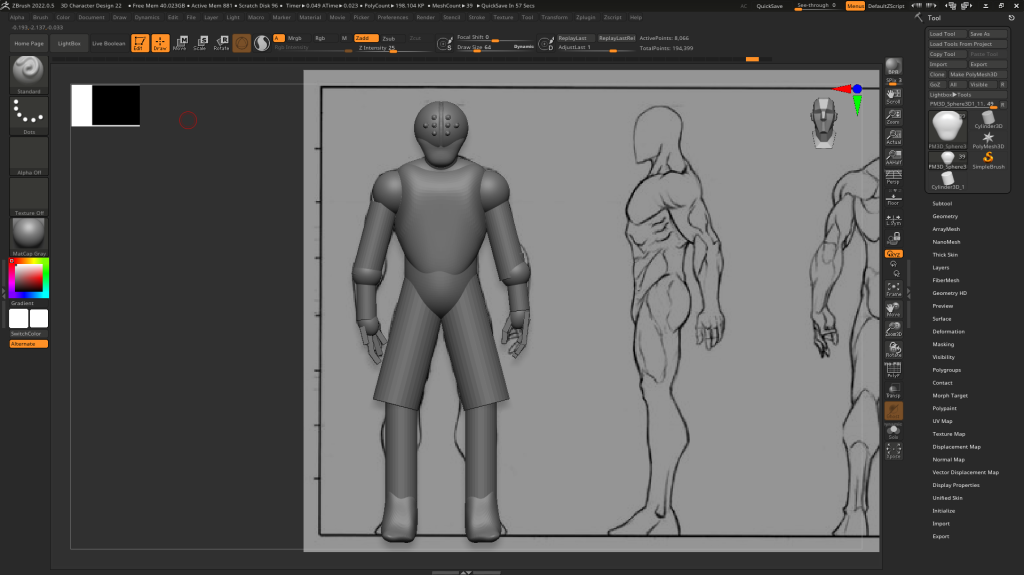
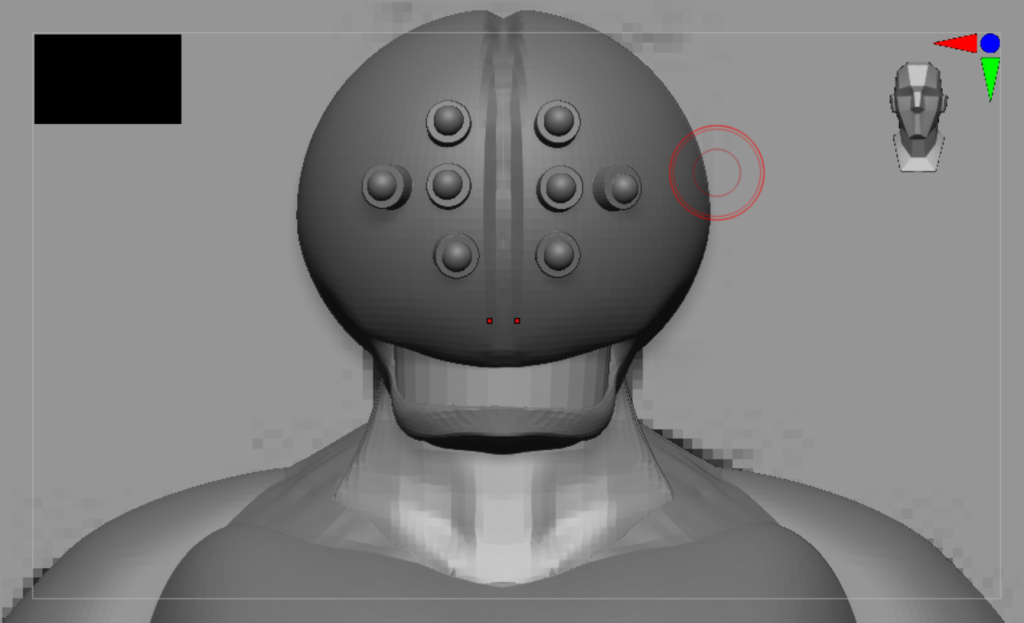
Here, I have used the shapes to create the head and used the dam standard tool to create the crevice of the machinery head.
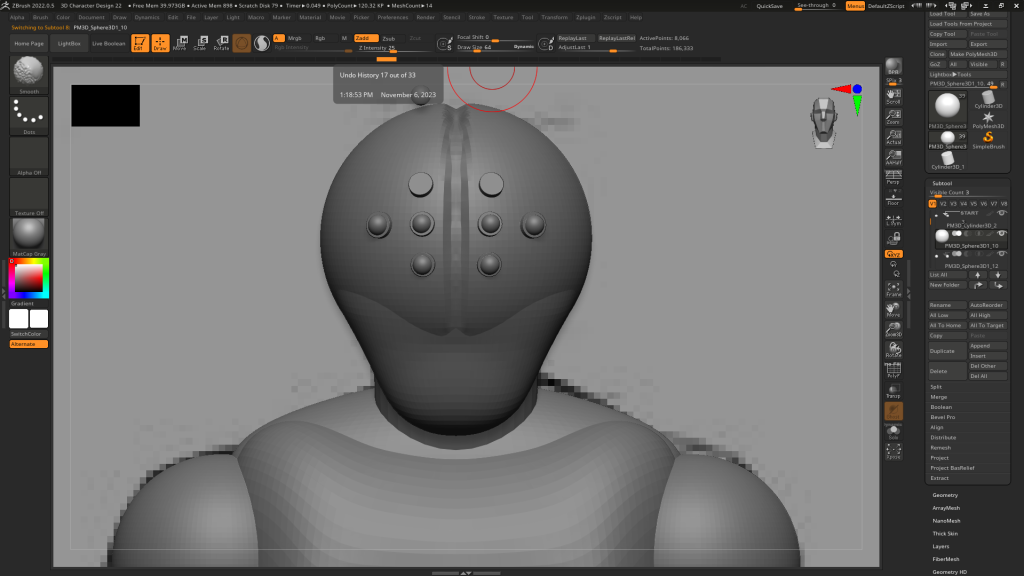
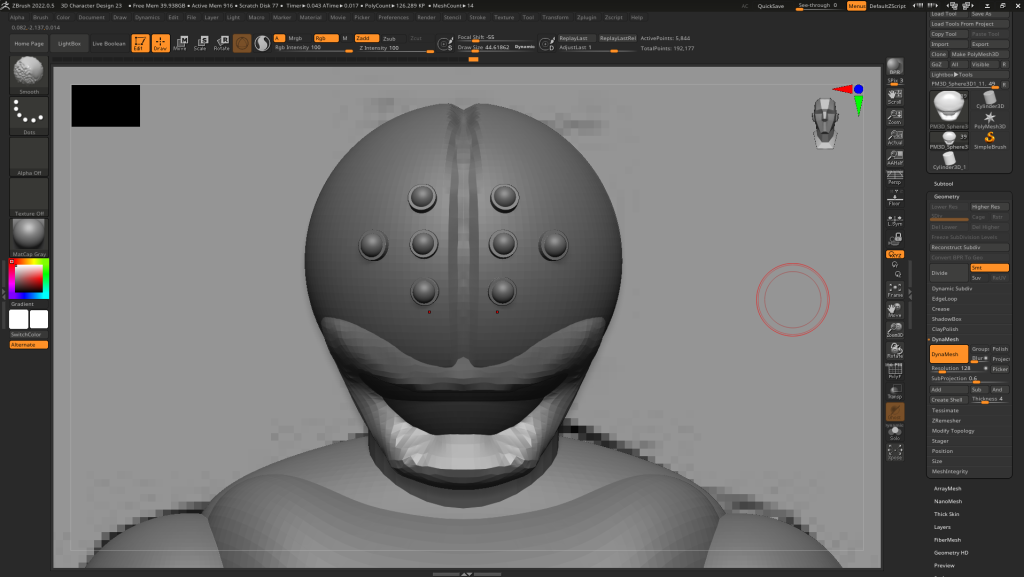
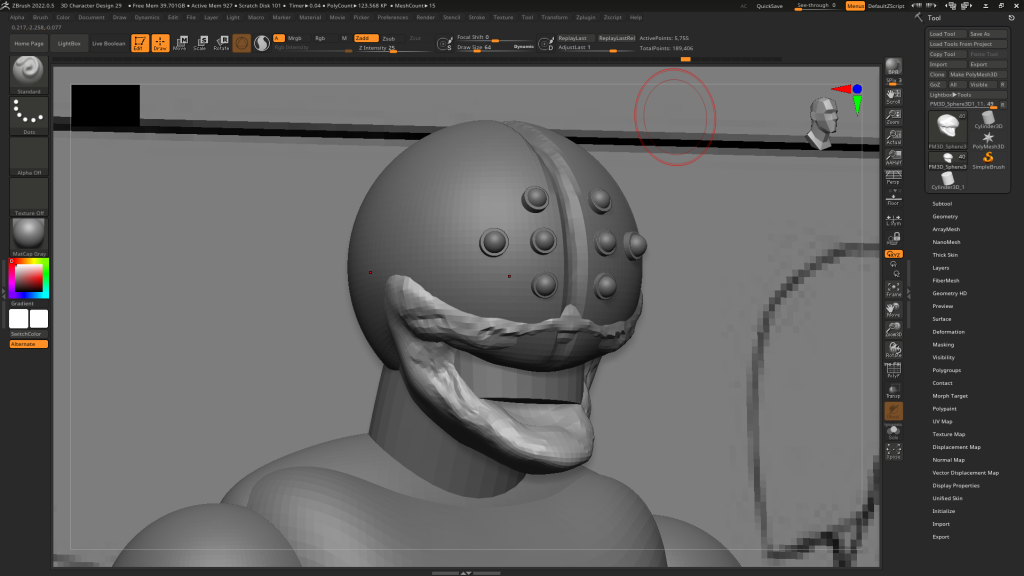
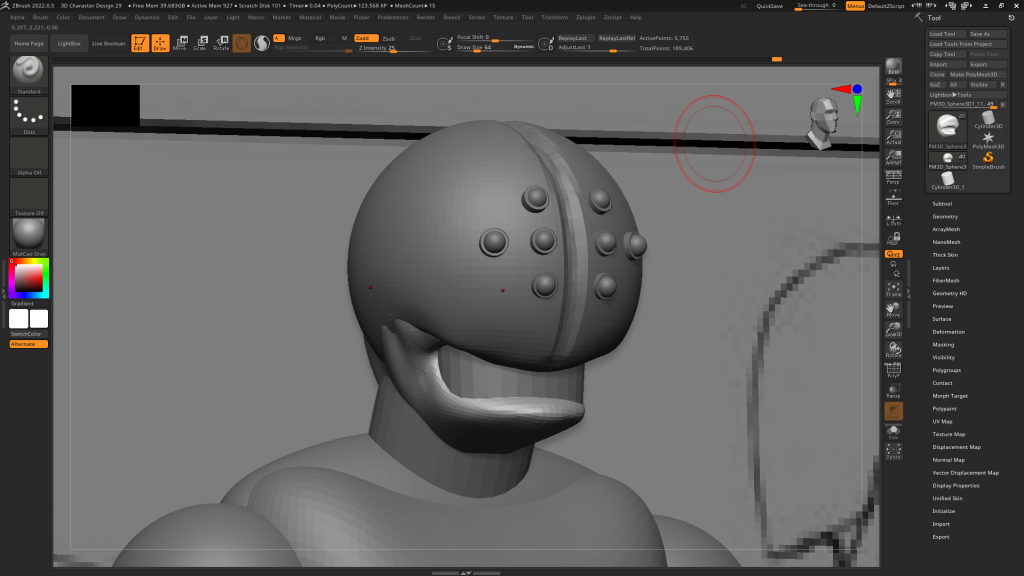
In my opinion, I believe that the latest image above is what I am aiming for when doing this character. I may need to tweak the jaw to make it more of a hard surface than a normal human cheek with flesh and muscles because I want the entire head to be robotic.
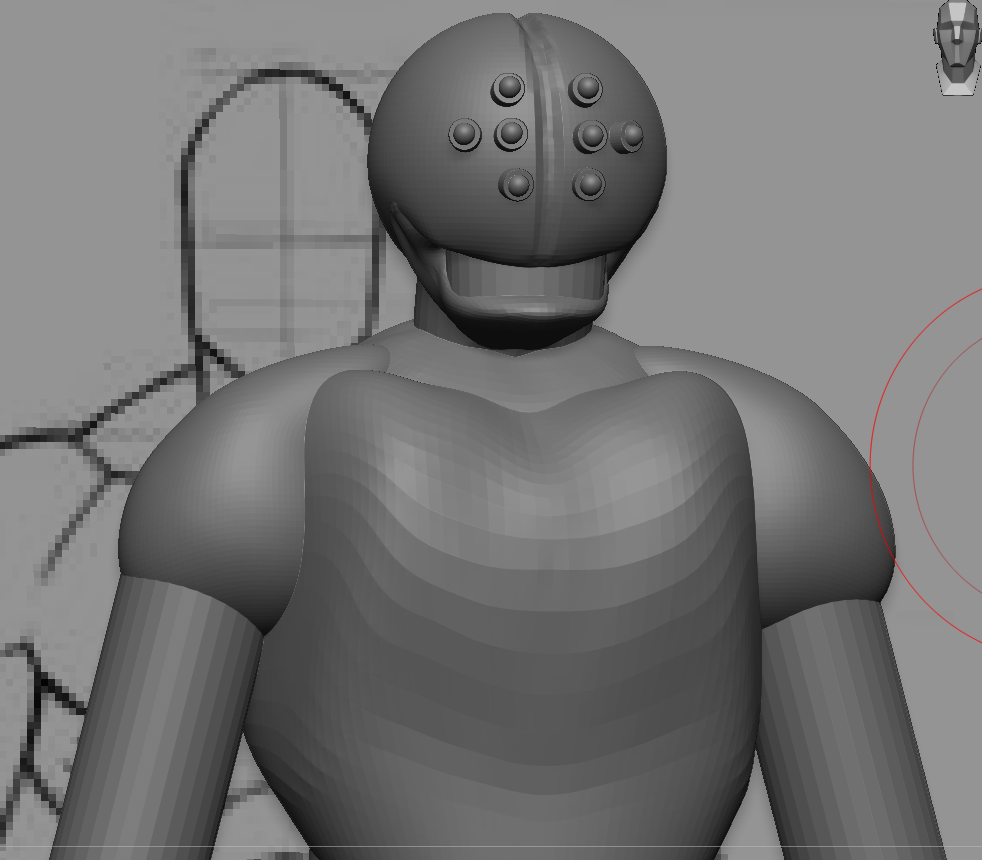
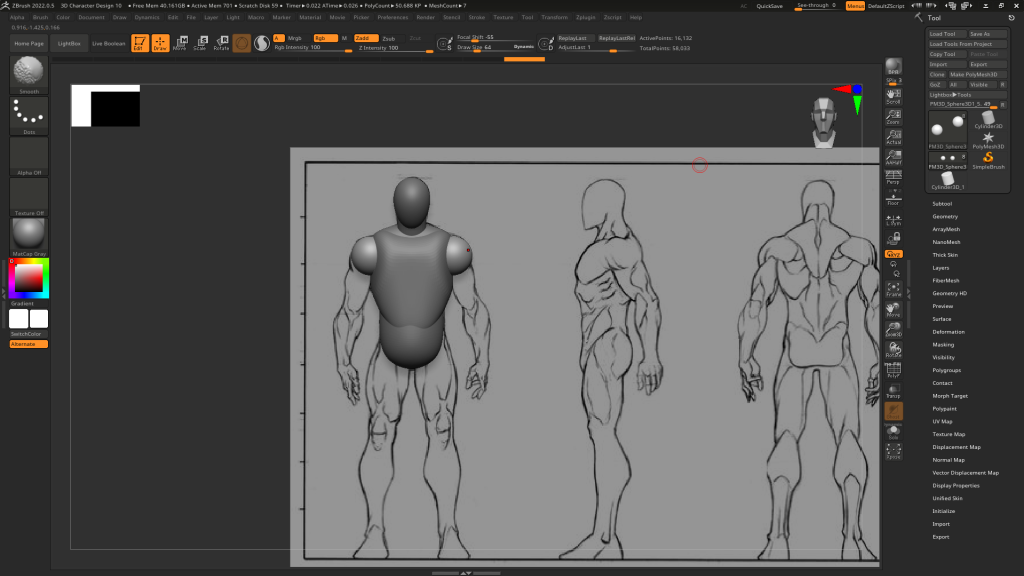
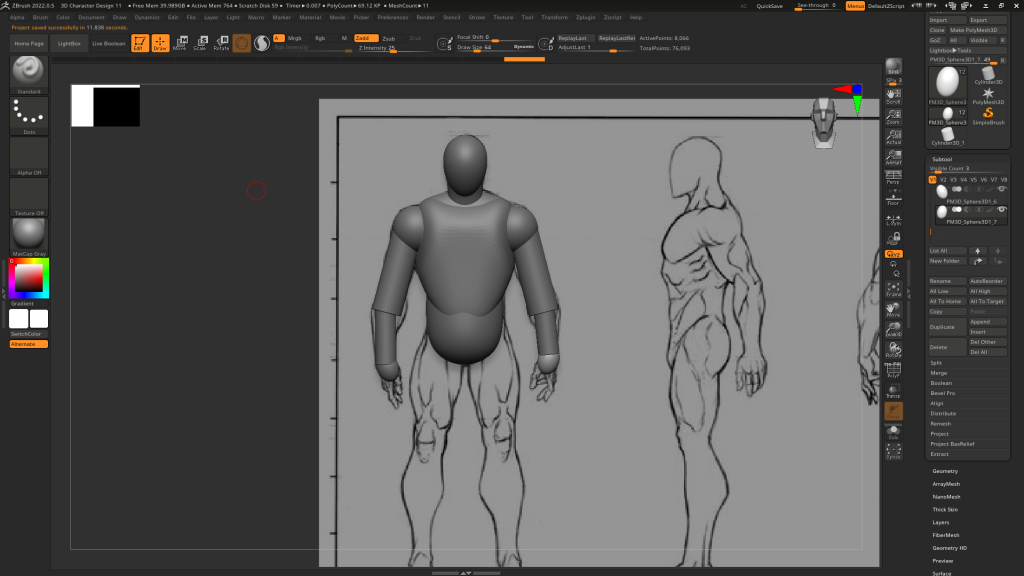
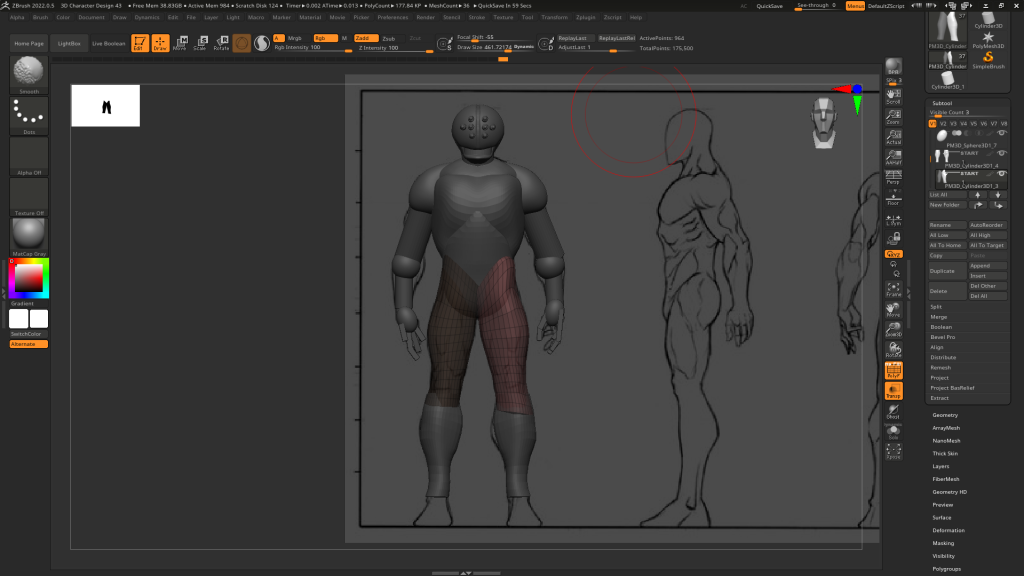
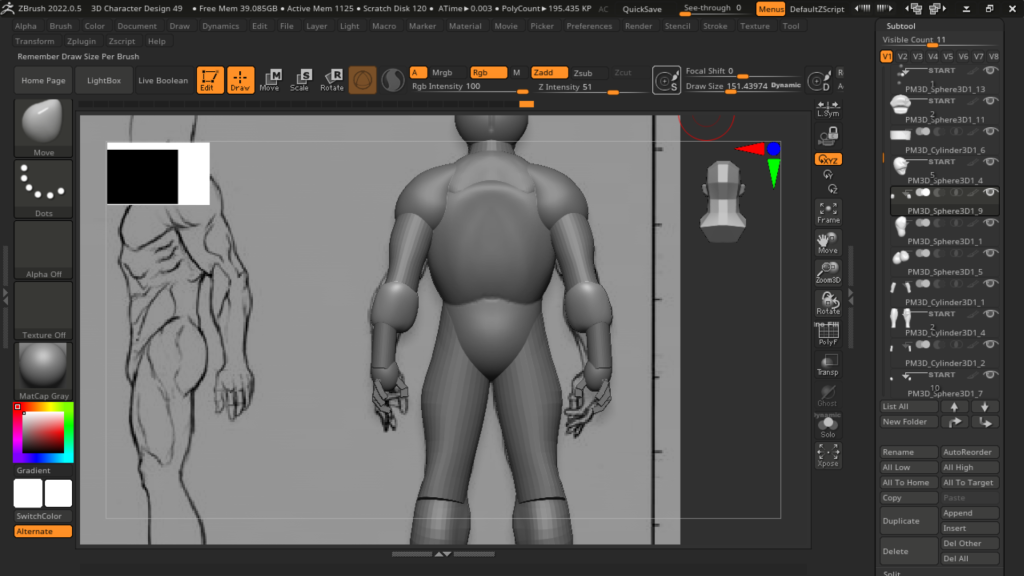
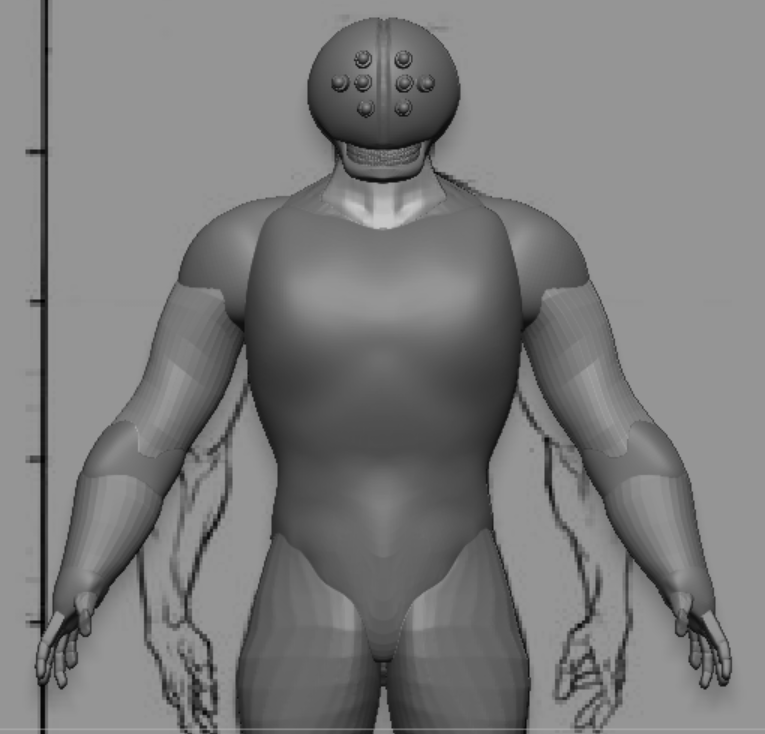
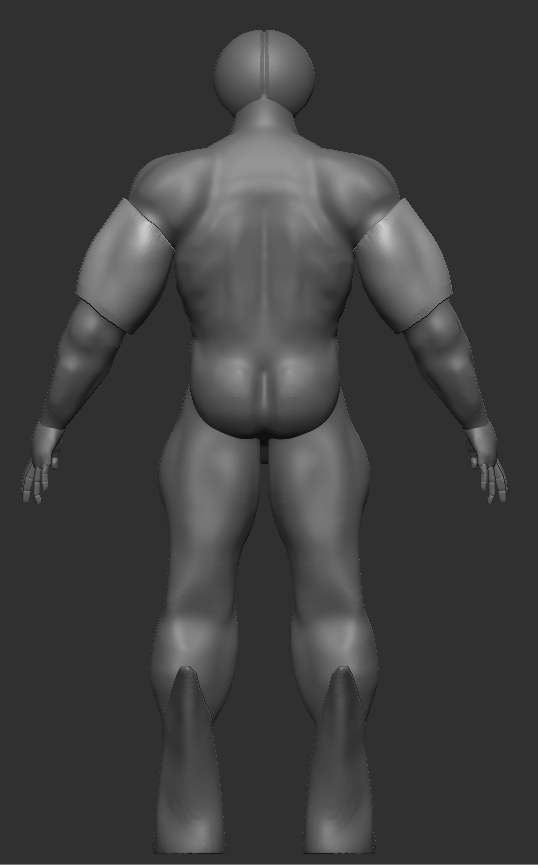
I decided to reshape the chest a bit to fit a grown strong man posture and have merged the chest part and stomach part of the model together and dynameshed the two shapes to get a smoother outcome. The legs was something I worked on next as I was just using the move tool to drag parts of the model to fit the plane’s man pose I got for the model. I made the proportions look right and the image below shows that it was successful.
After that, I moved on with the arms and have done the same twith the legs. Having to mirror and weld, made it easier to create a symmetrical body build for the character.
Kept moving it so I get the proportions right.
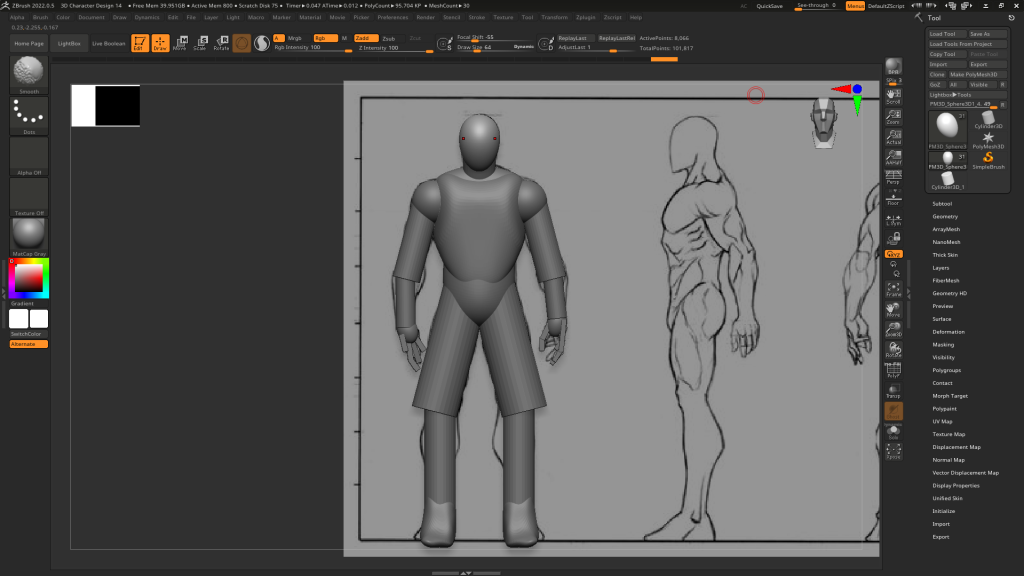
In the picture above, I used the move tool to reshape the elbows and wrists to better fit the strong man build for my character. The buttock was added later.
The hands where a bit too long and weirdly shaped so I decided to temporarily change the shape of the hands so I can make them into actual fingers later.
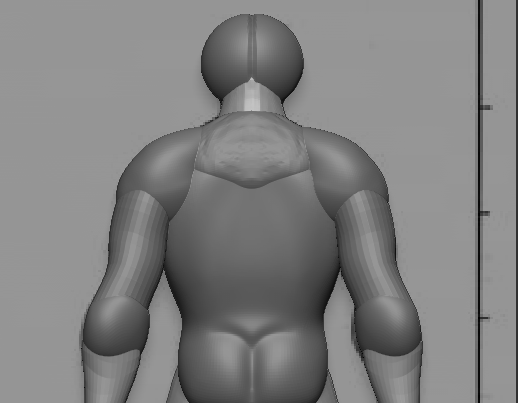
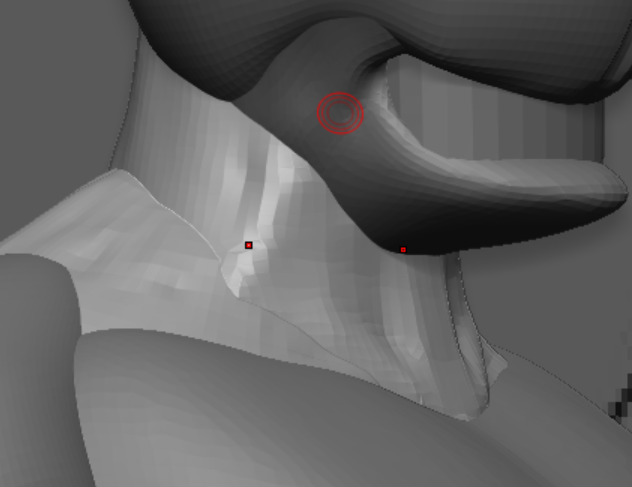
I moved on from the hands for now and decided to work on the neck of my character. I have used reference images of strong man builds and have looked into their neck and shoulder structure. For this process, I used the clay build up tool and the dam standard tool to model the structural integrity of the neck and shoulders.
When making this character, I believed the few things I will struggle with in this model is the hands, feet or teeth because they require constant tweaks and long time spent fixing to get it right. The teeth was what I worked next I basically modelled one tooth from a sphere and used some careful rotating and placing each copied tooth. The pollygroups and auto grouping tool helped me a lot when making the character’s rows of teeth on one side of the face.
I have yet to do the other side because the mirror and weld tool in Zbrush is complicated and when I mirror and weld one tooth it puts that tooth on the other side but makes the entire set of teeth on the right disappear.
I have found a way to overcome this issue by ungrouping the teeth subtool and then mirror and welded the subtool and got the result I needed which was having the teeth on the left hand side of my character. Since Zbrush is left hand dominant, I had to make sure the left hand side looked good so I can then mirror and weld the subtool making another row of teeth on the right hand side.
After I’ve added the new set of teeth on the left, I decided it was the best time to add realistic gum textures on my character’s teeth. I’ve used the clay build up tool to define the roots of the teeth and the texture of the gums. I’ve been told to lower the bottom of the mouth a bit to make it look better and I did.
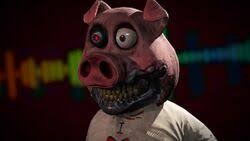
Hangry the Pig
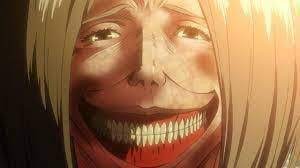
Dina Fritz (Titan Form)
These images above are the inspiration to my character’s set of teeth.
I believed that I did very well with my character’s teeth and have accurately modelled and shaped the gums successfully. The character may have more teeth than the average human as this is intentionally designed to fit the whole style and theme of the character. The machinery that clamped onto the head of my character added more teeth to the human form during the transformation as if the tech is upgrading and eerily morphing the human anatomy to become a better design.
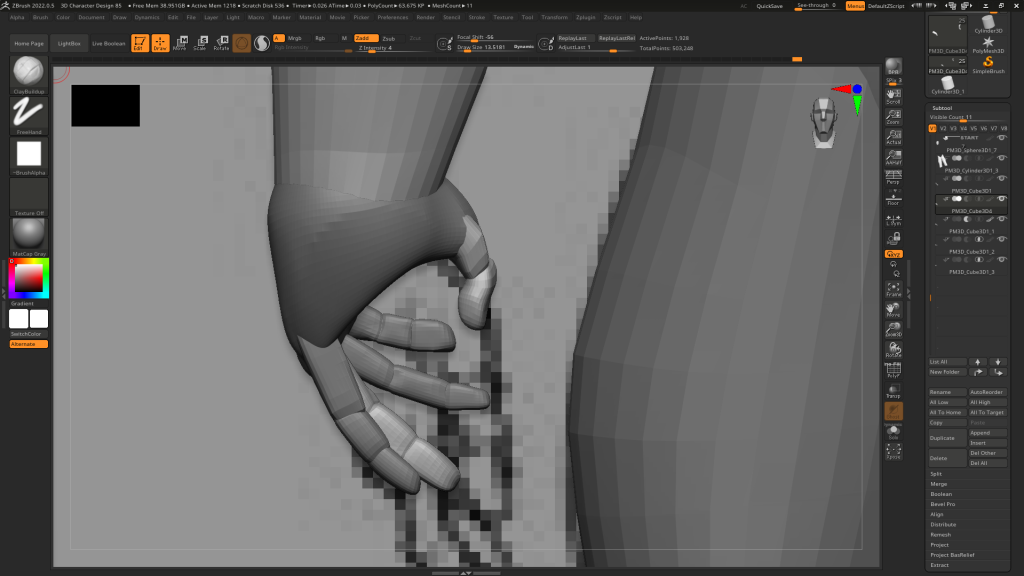
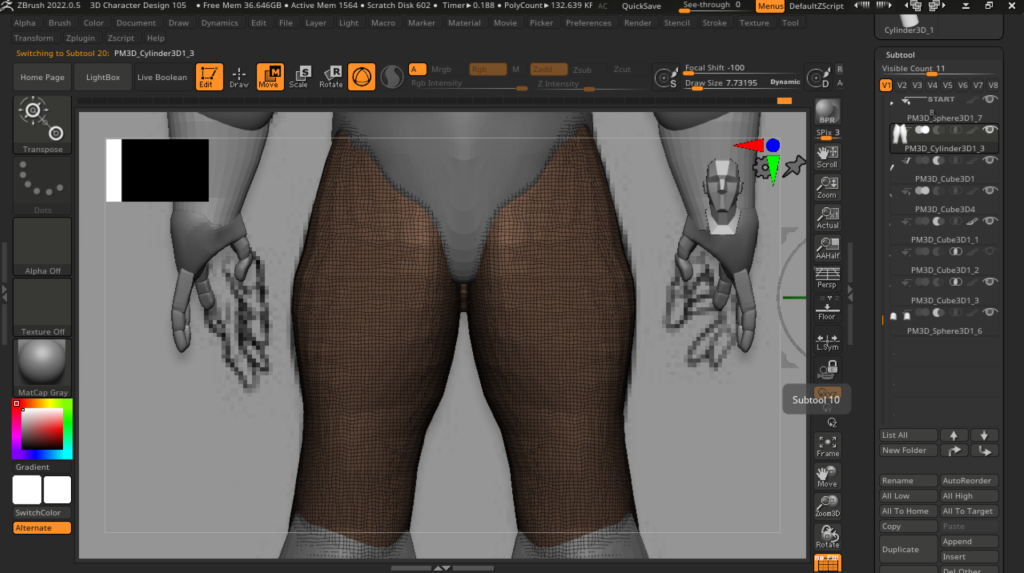
I moved on to work on the hands and started working on every finger joint remembering to work on the left hand side for when I mirror and weld the fingers to match the other side. I used the smooth tool to round out the blockout squared fingers, the move tool to carefully mould the finders to the hand and the clay build up tool to add texture to the hands.
I was given feedback to make the fingers more relaxed as I am doing the character at an a pose and bone rigging the character can be made easier if I made the fingers more relaxed.
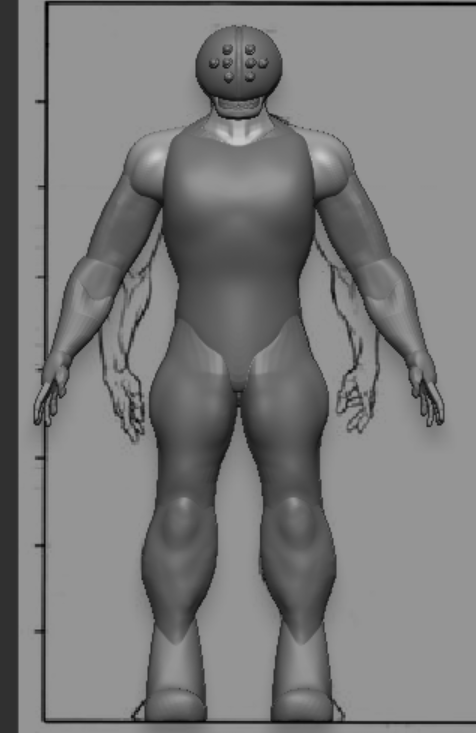
Next, I decided to focus on the muscle work of the entire character and some other major details. Those include raising the arms spacing the gap between the limbs and the torso of the character to avoid the clay clipping together when animating the character in Mixamo.
I noticed when merging the subtools of the hands and arms together, the history of each tool gets wiped when I separate them again. But this is fine as long as I am happy with the hands and their shape.
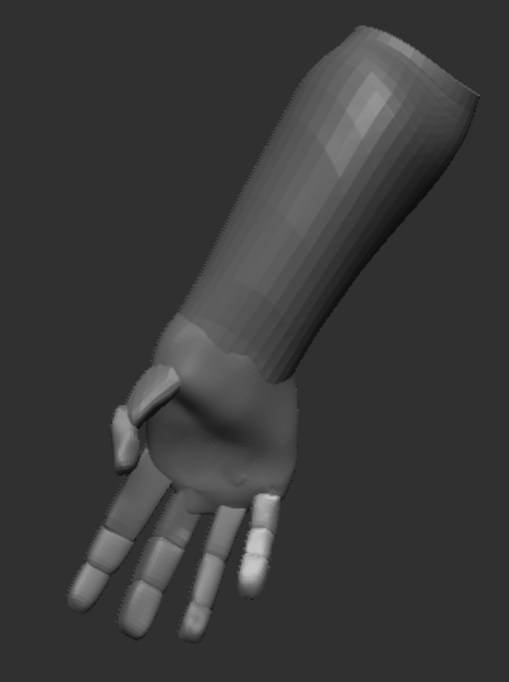
The hands and lower arms of the character was missing wrist joints so I merged the hands and fingers together and moved the combined parts down slightly, used the move tool and lower the arms more to create a wrist like shape to how I would like it and split the hand subtools apart knowing I needed to merge the right clay parts back together (for example, the split subtools of the left and right index finger I merge together and etc.)
Then I worked on the legs using the clay build up tool to add more muscle and the knee bones to the front and back of the character.

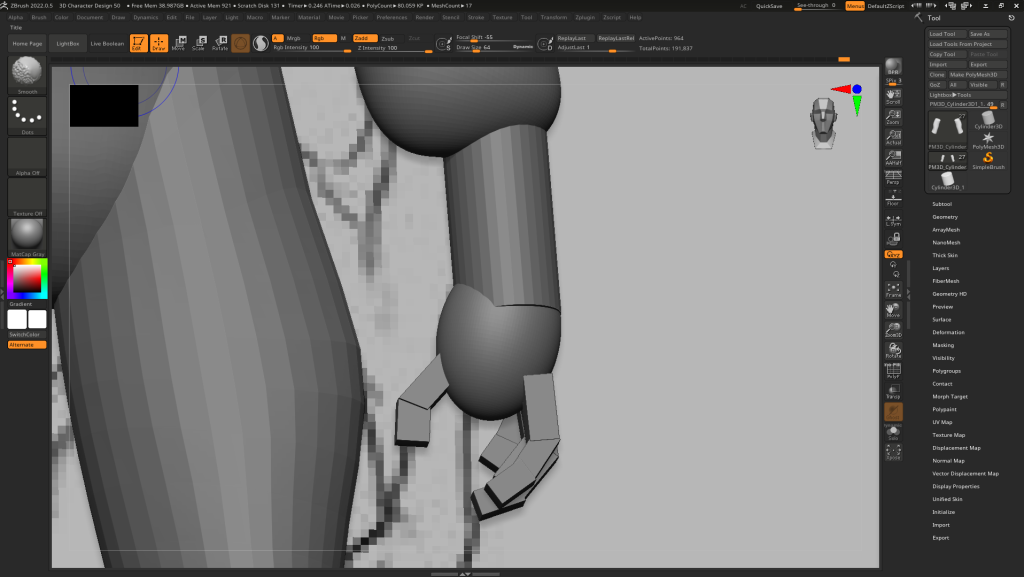
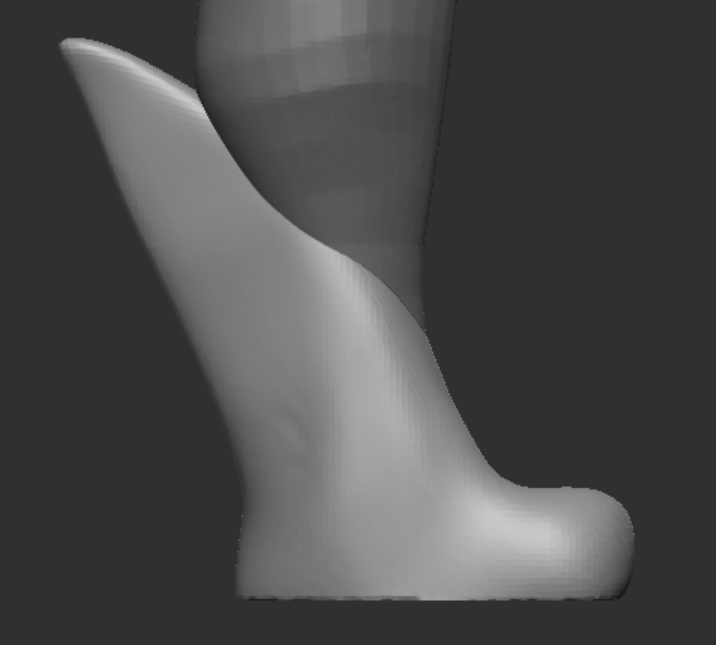
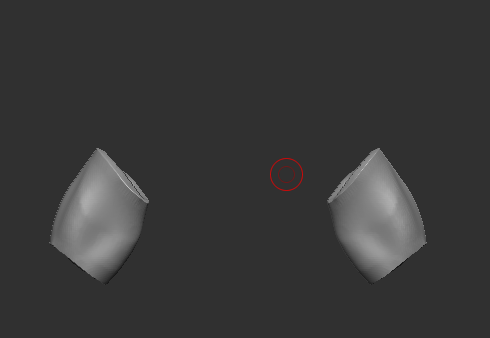
I worked on the shoes after. I created some basic looking footwear by using the move tool and reshaped it to look like boots.
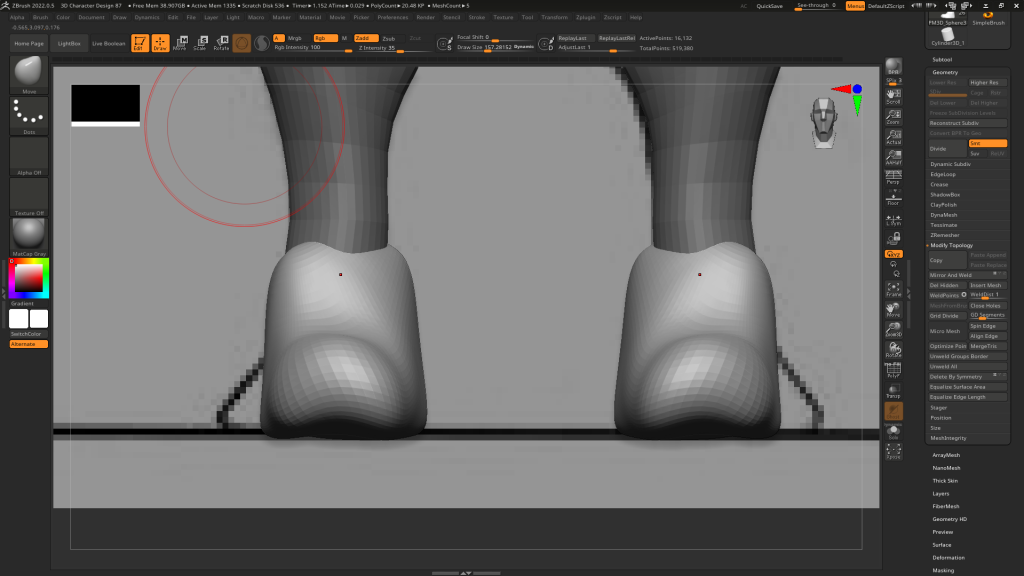
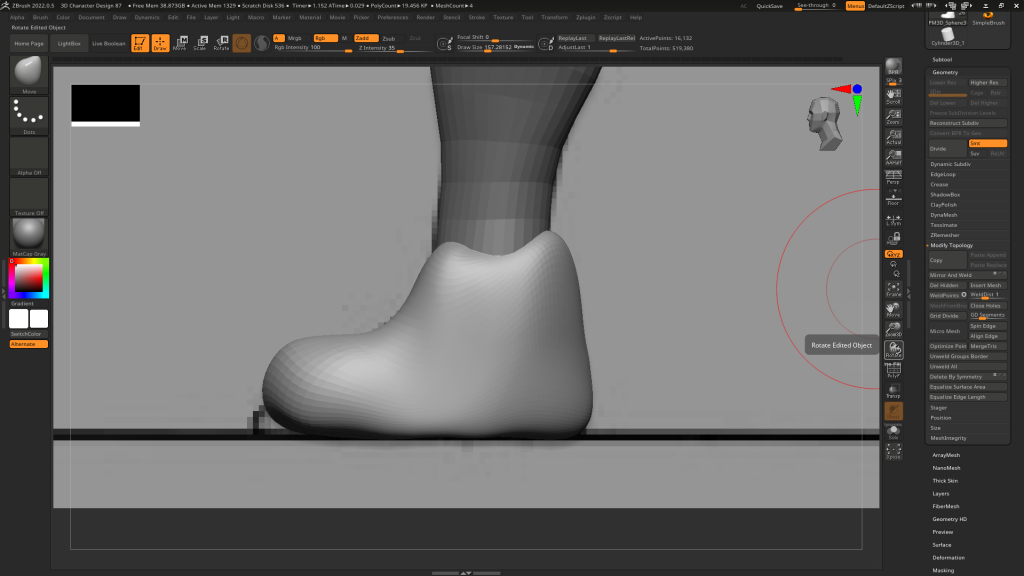
This may look like I just got some clay made a boot in minutes without that much attention but I thought about my character’s theme and style how the machine provided more teeth to the character. This can give me enough freedom for me to add metal plating on my character. Which then lead me to the design below.
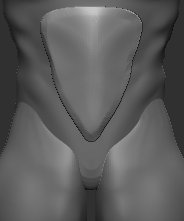
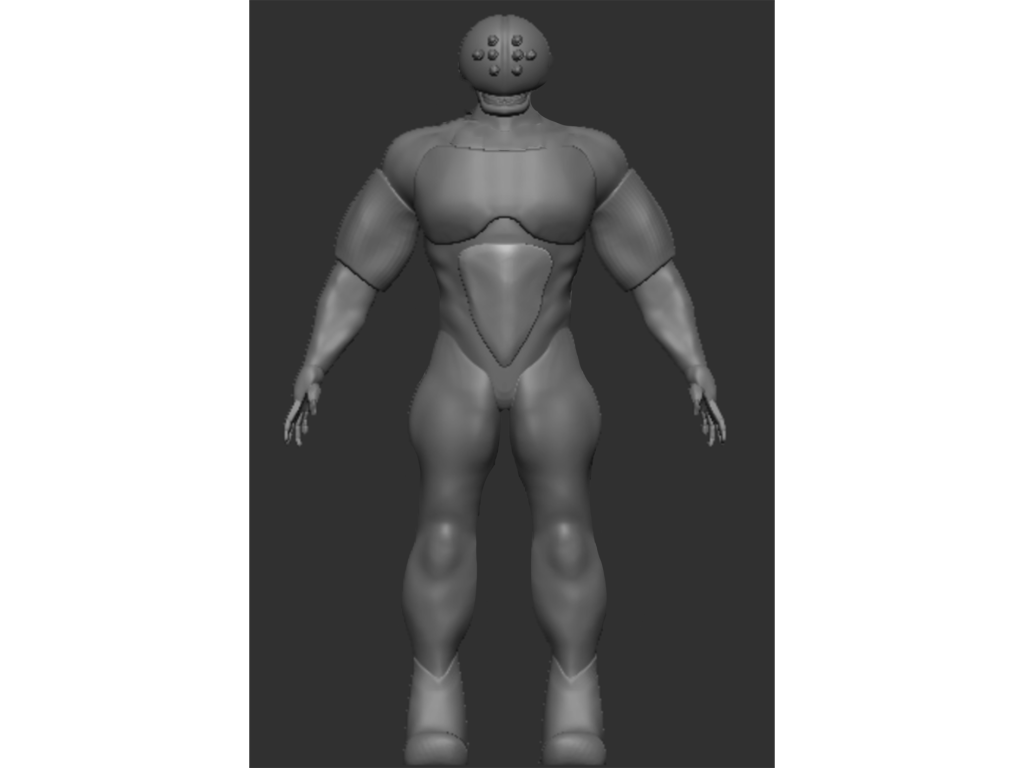
I eventually worked on the armoured plating for the character. Starting with the chest and stomach pieces. I grabbed a few new shapes to model and began making the stomach plating. Was thinking about making it spherical, ovular, square, increasing the number of plating, none of them looked right so I settled on making one triangular plating and it looked perfect.
Next was the upper arm armour plates. The method I used was to extract a part of the arm with the right level of thickness and subdivide the new subtool to make it more smoother like metal.
Then I worked on the chest pieces, I added two new spheres, made them look like armoured plating and placed them on the chest area of my character. Before I moved on to mirror and welding the armour piece to the other side of my character, I asked one of my colleagues for some feedback on my character.
He told me that everything looked great except the chest armour. He preferred it to look like what I did to make the arm pieces. Extending a certain part of the character as a separate subtool and subdivide it.
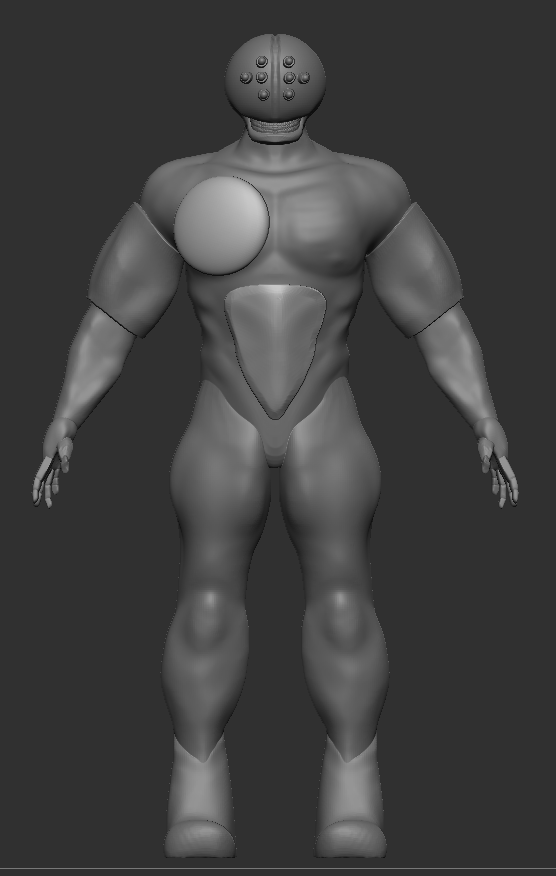
To this…
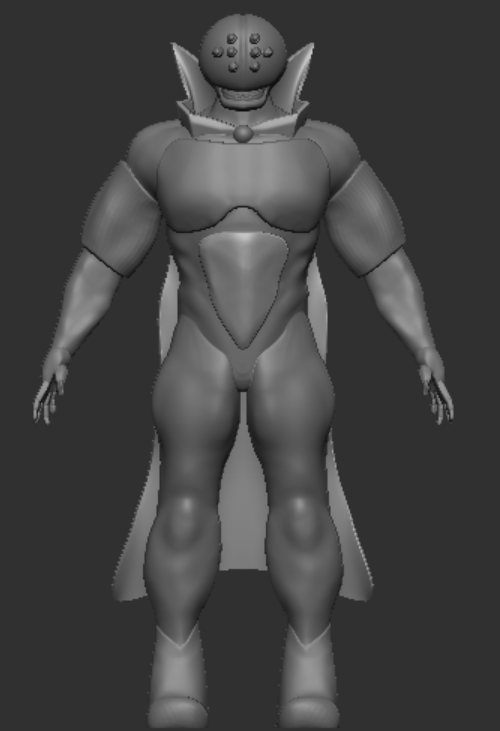
Overall, I think the body of the character looks great. The limbs, hands, chest, shoes, head and armour pieces match perfectly and all I need to do next was to make the cape. I took a plane from the insert shape tool and created a cape my character will wear. Used different cloth tools and the smooth tool to create the ideal realistic looking cloth for my cape.
I also created a joining neck piece of my cape that wraps around my character’s neck and a jagged collar similar to both Doctor Strange’s and Evil Doctor Strange’s cape design. To finalise the design, I thickened the cape’s structure so it dosen’t look like a piece of paper and it was clipping through the neck and shoulders of my character.

Retopology
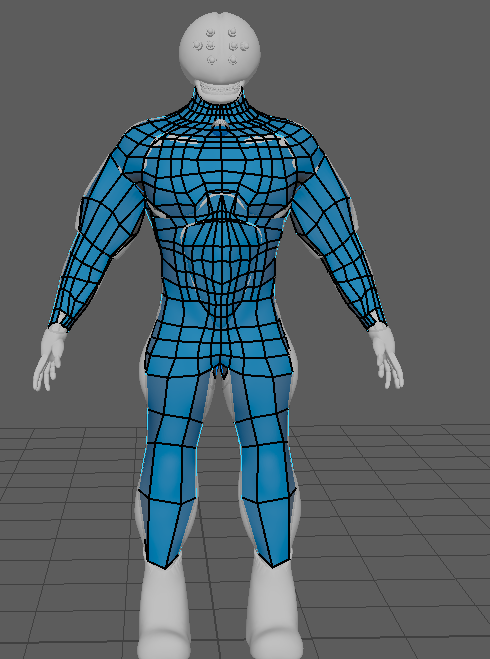
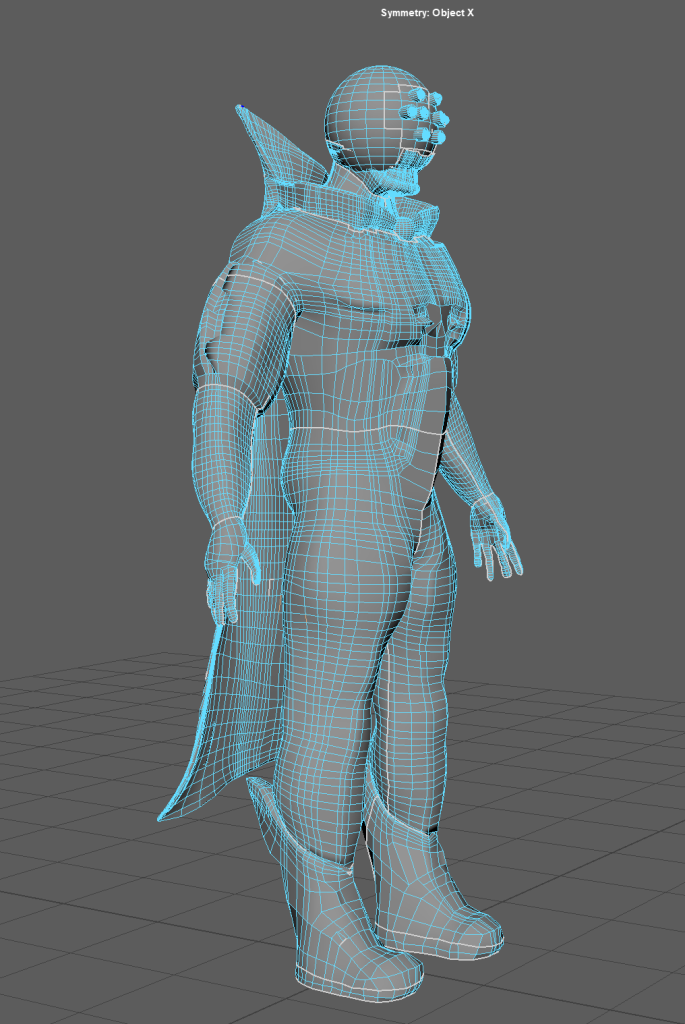
Now that I’ve done the cape, the character is fully completed and is ready to be put in Maya for retopology. This is the stage I was dreading because I needed to create a polly surface that streatches throughout my model whilst creating square faces lessening the resolution of my character and cape. I started from the neck down, constantly creating nice square loops around my character. Others told me to create main loops to easily connect the detailed loops together.
The hands are the most tedious when doing this possess because it requires the most edge loops to look like fingers and not a low polly claw.
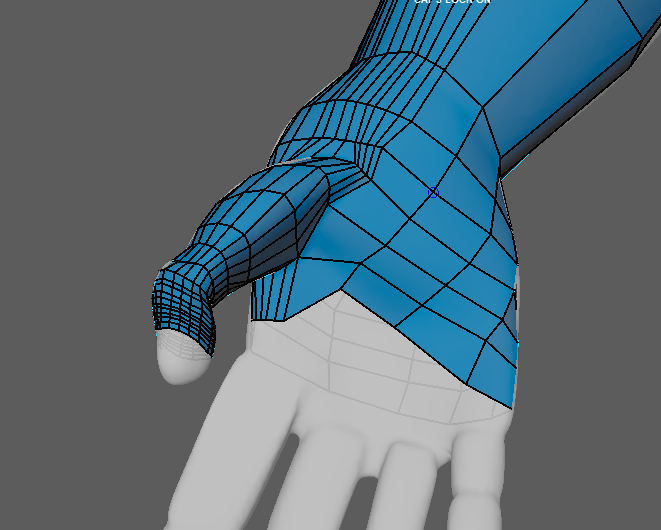

I kept falling into the trap of making the squares spiral down to the end of the limb, body part ect of the character. This is not great when doing retopology as it requires to create loops that connect back to each other when the UV unwrapping stage happens.
Adding more edge loops gives the poly surface more faces that will then fit the character model.
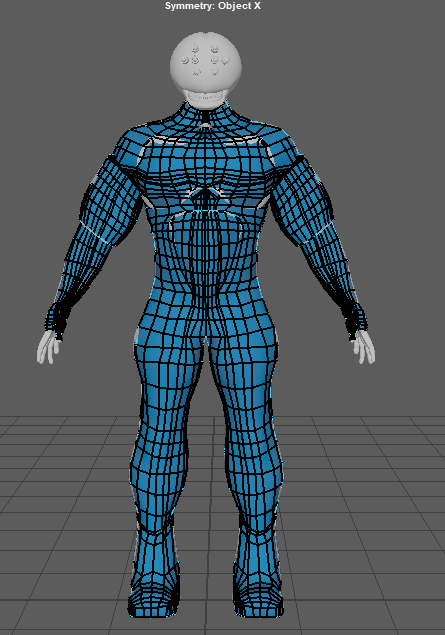
More edge loops

Less edge loops
I added more retopology to my character and added extra edge loops. During this process, I have learned that it’s best to create edge loop rings around different parts of the body so it’s easier to expand and make more loops to fit the whole body than to start with one part of the body and go down.
UV Unwrapping
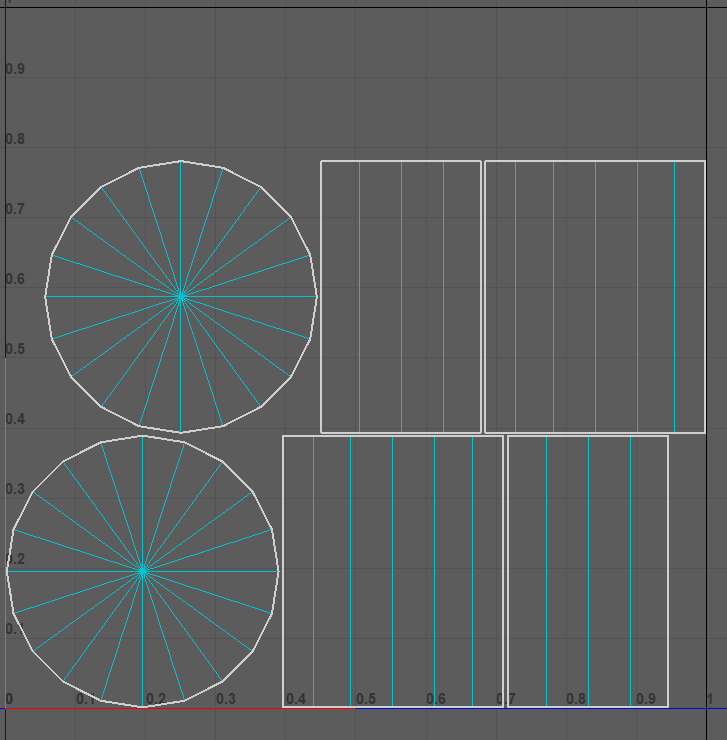
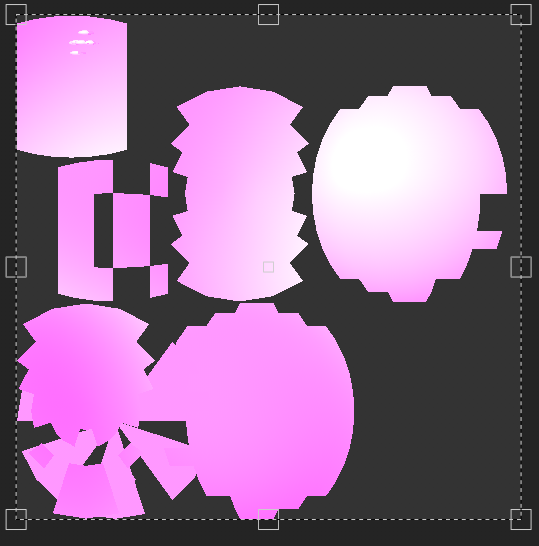
Then I moved on to the mouth plus eye sockets of my character and have used the cut and sew tool to separate the main parts of my body and transform them into nets and UVs.
I have cut and separated the model into different parts. Those include hands, shoes, legs, cape, chest and head. I then used the auto UV tool to unwrap the model into nets.
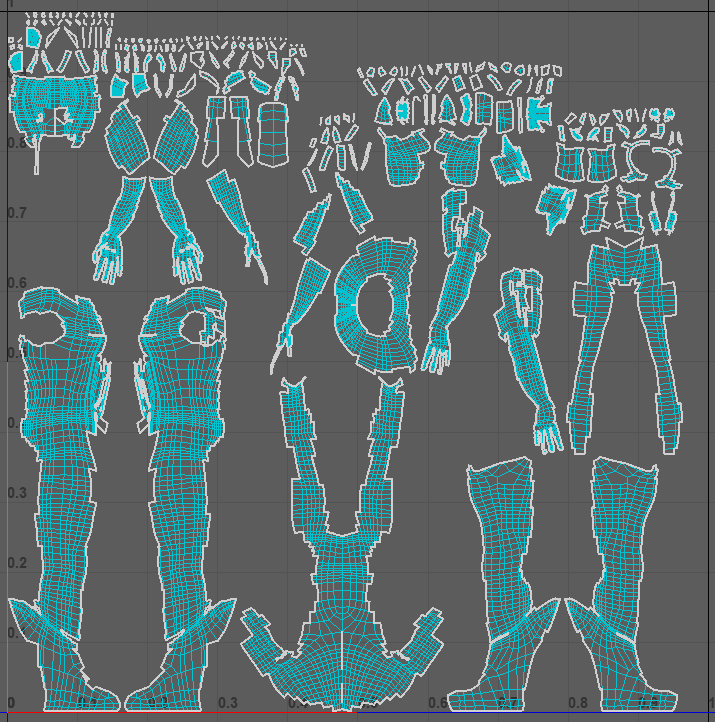

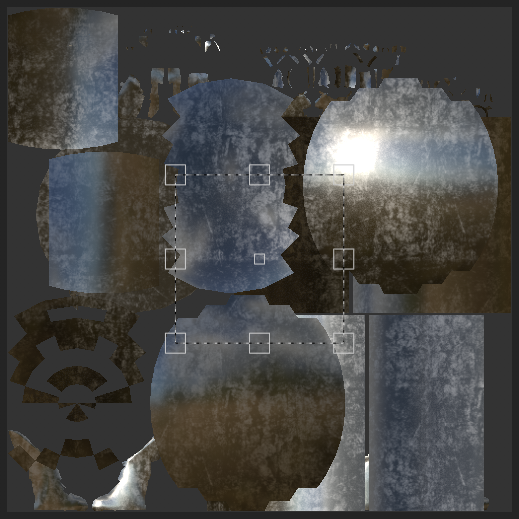
After I have unwrapped everything, I have assigned parts of my character (Polly surfaces and shapes) materials so it would be easier for me to know what material goes where when editing in substance painter.
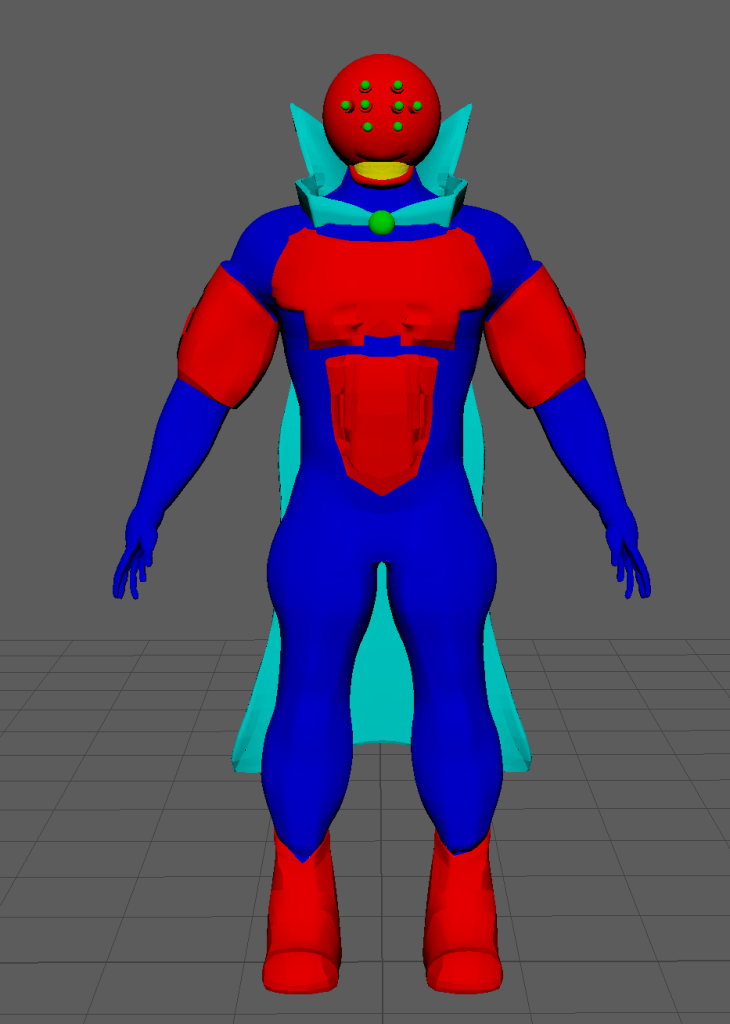
This may look weird at first, but it will allow me to determine which material to use on which part. For instance, red parts will be made of metal, dark blue parts are the tar-like skin, the green parts will be the purple glowing orbs, the yellow would be the mouth and the cyan will have a cape material.
Substance Painter
I’ve experimented with substance painter and it’s many unique materials and managed to successfully textured the model. One of the things I’ve experimented on was a zipper paint style and have turned on the symmetry to paint a zipper on the mouth of the character.
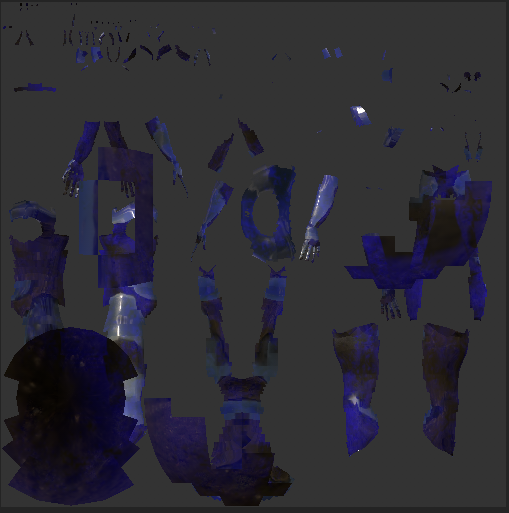
The picture above shows what material I’m going to use for the skin of my character. I want the skin to look like this dark purple, blue, black tar-like slippery, shiny substance. This is best suited for my character because it resembles Venom’s skin from marvel.
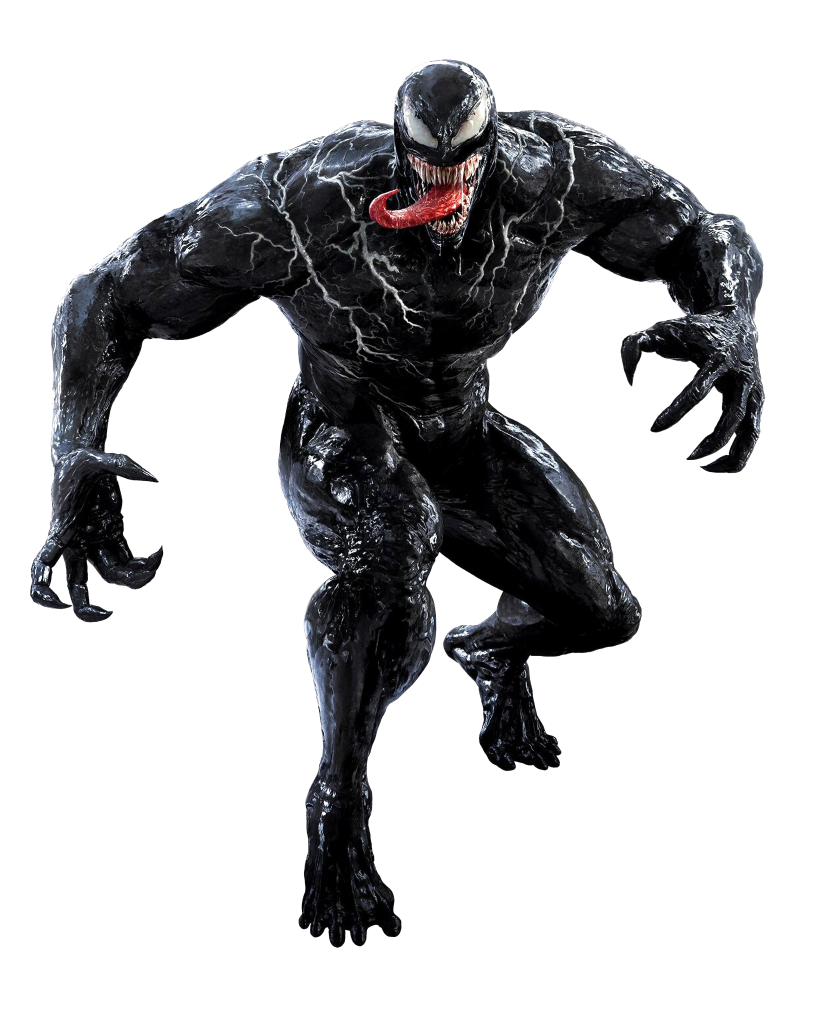
Venom
As you can see Venom’s skin looks viscous and tar like which will be perfect for my character since the machine that clamped my character’s head gave him added muscle growth and covered his entire body like the Symbiote body protection ability.
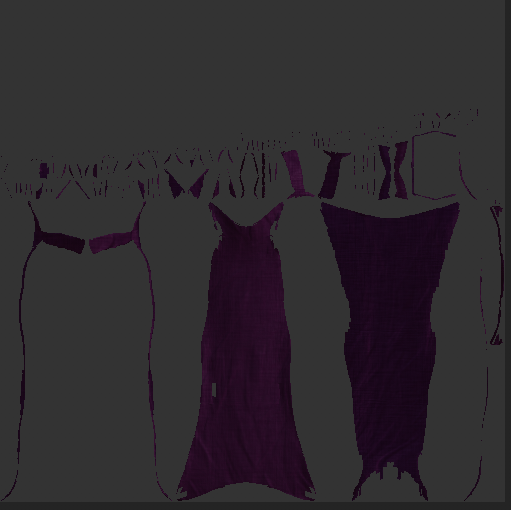
For the cape, I previously wanted it to have a lighter colour like my concept art, but it didn’t match the dark theme of my character at all. So I gave it a dark purple colouration to match the style of my character.

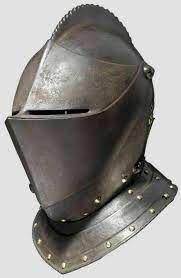
For the mouth, I had a couple of ideas since I didn’t retopologize the teeth properly. My first idea is to make the mouth completely shut with metal plating similar to the bottom part of a knights helmet.
The next idea I had was to make the mouth completely black with the same texture I used for the body but it looked weird and decided it wasn’t going to work.
The third idea however, lead me to applying a skin texture and changing it’s colour to be dark red and used a paint tool and turned on the symmetry and cleverly created a row of teeth using a zipper brush. I have shown this to another student and he told me that this made the character even more terrifying then ever. So I went for a dark red with zipper teeth. It also matched the character’s style too.
For this section, I used a silver metal surface and have applied some rough metal texture to show that the character has been in tough scenarios where his metal armour would age and change colour.
Finally, I have created the purple glow texture for the eyes and orb that connects the cape. I made the colour purple to match the style of the character and added a luminant glow feature and tweaked the glint so it would portray a realistic glow with realistic reflections. I have used the video below to achieve it.
And this is the final result…
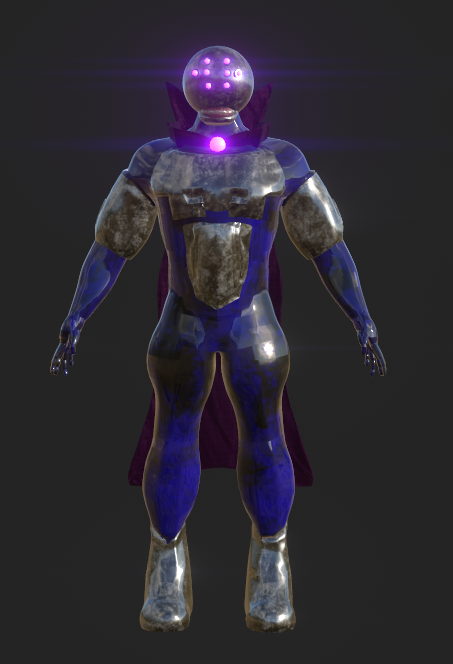
Looking at it from substance, I feel very proud of what I did and appreciate how it all came together well.
After putting it back into Maya (fully textured) I decided to render it out on unreal engine using the camera functions and movement keyframes to create this turntable of my character. Added some lighting within the scene and changed the default day sunlight to night to set this ominous tone. I looked for tutorials online on how to export a sequence in unreal but unfortunately I didn’t find any.
This lead me to use OBS the screen recording software to record the sequence.
Conclusion and Reflection
In conclusion, I am very proud in how it turned out. That I have successfully created a 3D fully rendered and textured model of my character to a very good standard. I have learned a lot during this course and have felt that I have put everything I have into finishing it. This course allowed me to dive into 3D modelling, teaching me what tools to use and how to use it, how to retopologize, how to UV unwrap the model, texture the model, put it back to maya and render it in unreal engine.
Originally, I wanted to create a character that has a doom eyeless monster style face with a permanent grin showing some sort of teeth, a strong man physique, metallic plates and shoes, a sharp cape and an overall evil appearance. Reflecting back, I believe that I achieved what I wanted to make when I made the concept art of my character and have surprisingly stuck to the idea.
There where some sacrifices I needed to make when creating my character. Those include, the textured markings on my character’s concept art needed to be simplified when at the substance painter texturing stage because it can overcomplicate the design or overcomplicate the process for me, the collar cape connection for my character needed to be a simplified shape that wraps around the neck and the set of teeth for my concept art wouldn’t work on my character because it needed gums to have it remotely like a human head. With the changes I made, I think it was for the betterment of the design.
I also learned that asking help from other students and staff can be really helpful to advance to the next step of my course. I was really struggling with the last few bits of my course. Mainly due to few experience and the lack of available staff to help me due to it being a Christmas break.
Fortunately, I did find some help by asking the 3D game design teams section for the University students and found a student who can help me with stuff that I am stuck on. The student then helped me with the completion of my course guided me on UV unwrapping, texturing and importing to unreal.
I got to be extremely honest with my self. If that student wasn’t there to help me with the last bit of this course, I would be in a very different situation (Still in the UV stage because recourses I find online aren’t helpful and the staff not being there to help me is at it’s worst when your on the last bit of the course, pushing me out in the open to independently solve it with zero guidance and no knowledge while my mental health deteriorates by the minuet with all the stress).
This made me realise that asking help from other students can do as much help as the staff can. Also, this encourages me to ask students for guidance when I’m stuck on something. Furthermore this course has taught me new things like how to model a character and understand new software like Zbrush. I had a lot of fun with this course and hope to use what I’ve learned for future projects.
Reference List
Video tutorials I’ve used
Z Instructors (2021) Substance Painter Emissive Tutorial. www.youtube.com. Available online: https://www.youtube.com/watch?v=YyGFwHUkaDM&t=211s [Accessed 30 Dec. 2023].
FlippedNormals (2018) How to Retopologize the Body in Maya. www.youtube.com. Available online: https://www.youtube.com/watch?time_continue=1&v=_TYOgI9kJtU&embeds_referring_euri=https%3A%2F%2Fcanvas.hull.ac.uk%2Fcourses%2F66812%2Fpages%2Flab-zbrush-to-maya-part-1%3Fmodule_item_id%3D986675&source_ve_path=Mjg2NjY&feature=emb_logo [Accessed 20 Nov. 2023].
James, How Do I? (2022) Exporting Textures from Substance 3D Painter to Maya Arnold. www.youtube.com. Available online: https://www.youtube.com/watch?v=-cKtZP3bxRg [Accessed 22 Dec. 2023].
Moodboard Images and other Inspirational Images
Marvel (1984) Venom. Marvel. Available online: https://marvel.fandom.com/wiki/Venom_(Symbiote)_(Earth-616) [Accessed 30 Dec. 2023].
Glowstick Entertainment (2018) Hangry the Pig. Steam. Available online: https://store.steampowered.com/app/332950/Dark_Deception/ [Accessed 5 Oct. 2023].
Kodansha ltd (2013) Attack on Titan Dina Fritz (Titan Form). Hajime Isayama. Available online: https://attackontitan.fandom.com/wiki/Dina_Fritz_(Anime) [Accessed 5 Oct. 2023].
Blizzard Entertainment (2016) Zenyatta. Overwatch Wiki. Available online: https://overwatch.fandom.com/wiki/Zenyatta [Accessed 6 Oct. 2023].
Blizzard Entertainment (2022) Kiriko. Overwatch Wiki. Available online: https://overwatch.fandom.com/wiki/Kiriko [Accessed 6 Oct. 2023].
Capcom (2021) Karl Heisenberg. Vilains Wiki. Available online: https://villains.fandom.com/wiki/Karl_Heisenberg [Accessed 6 Oct. 2023].
Glowstick Entertainment (2018) Gold Watcher. Dark Deception Wiki. Available online: https://dark-deception-game.fandom.com/wiki/Gold_Watchers [Accessed 6 Oct. 2023].
Marvel (1972) Ghost Rider. Marvel database. Available online: https://marvel.fandom.com/wiki/Johnathon_Blaze_(Earth-616) [Accessed 6 Oct. 2023].
Marvel (2023) Miguel O’Hara. Vincent Pauvarel. Available online: https://www.youtube.com/watch?app=desktop&v=GXRbwS7Gr3s [Accessed 6 Oct. 2023].
Mattel Playground Productions (2013a) Morphos. Wiki Fandom. Available online: https://villains.fandom.com/wiki/Morphos [Accessed 6 Oct. 2023].
Mattel Playground Productions (2013b) Ultralinks. Wiki Fandom. Available online: https://villains.fandom.com/wiki/Ultralinks [Accessed 6 Oct. 2023].
Mattel Playground Productions (2022) Mortum. a1whitney. Available online: https://www.deviantart.com/a1whitney/art/Max-steel-mortum-926049308 [Accessed 5 Oct. 2023].
Mob Entertainment (2022) Boxy Boo. Steam. Available online: https://poppy-playtime.fandom.com/wiki/Boxy_Boo [Accessed 6 Oct. 2023].
Mytona Fntastic (2021) Keymaster. Propnight Wiki. Available online: https://propnight.fandom.com/wiki/Killer [Accessed 6 Nov. 2023].
Nintendo (2006) Dry Bowser. Nintendo Wiki Fandom. Available online: https://mario.fandom.com/wiki/Dry_Bowser [Accessed 6 Oct. 2023].
Panic Button Games (2019) Revenant. Apex Legends Wiki. Available online: https://apexlegends.fandom.com/wiki/Revenant [Accessed 6 Oct. 2023].
PopCross Studios (2023) Dresden Oakland. PopCross Studios Wiki . Available online: https://popcross-studios.fandom.com/wiki/Dresden [Accessed 6 Oct. 2023].
Steel Wool Games (2021) Burntrap. Five Nights at Freddy’s Wiki. Available online: https://freddy-fazbears-pizza.fandom.com/wiki/Burntrap [Accessed 6 Oct. 2023].
Warner Bros (2017) Scarecrow. Injustice Gods Among Us Wiki. Available online: https://injustice.fandom.com/wiki/Scarecrow [Accessed 6 Oct. 2023].
Zag Studios (2016) Hawkmoth. Miraculous Ladybug Wiki. Available online: https://miraculousladybug.fandom.com/wiki/Gabriel_Agreste [Accessed 6 Oct. 2023].